Removing a drive cage
To remove a drive cage, complete the following steps.
1. Read the safety information that begins on page vii and “Installation guidelines”
on page 65.
2. Turn off the server and peripheral devices, and disconnect the power cord and
all external cables.
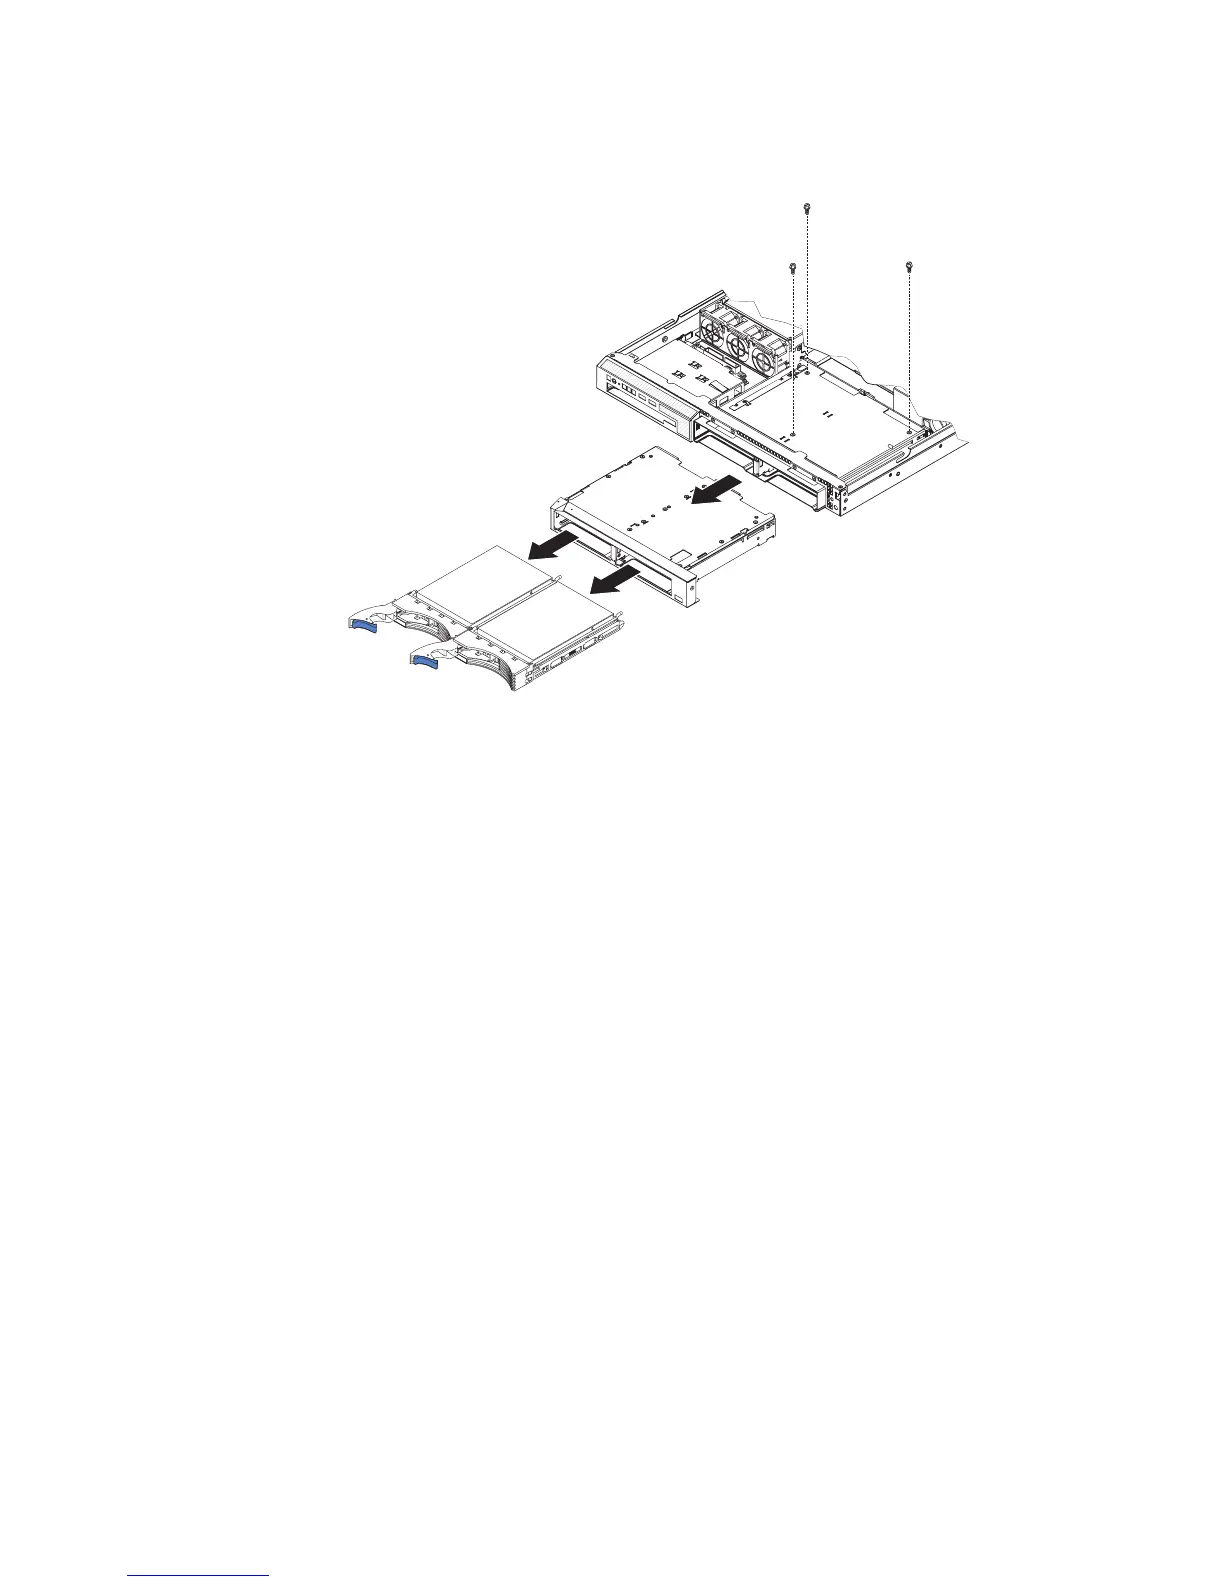
3. Remove the hard disk drives from the cage.
4. Remove the cover (see “Removing the cover” on page 68).
Attention: To ensure proper cooling and airflow, do not operate the server for
more than 2 minutes with the cover removed.
5. Remove the hard disk drive backplane or back plate:
v 2.5-inch drive models: Remove the hard disk drive backplane from the
cage. See “Removing the SAS backplane (2.5-inch drives)” on page 92 for
instructions.
v 3.5-inch drive models: You might find it easier to remove the cage if you
remove the hard disk drive backplane or back plate first. See “Removing the
backplane or back plate (3.5-inch drives)” on page 89 for instructions.
6.
Remove the screws that hold the drive cage in place.
7. Slide the drive cage forward and remove it from the server.
8. If you are instructed to return the drive cage, follow all packaging instructions,
and use any packaging materials for shipping that are supplied to you.
Chapter 4. Removing and replacing server components 97
 Loading...


