6. Place the riser-card assembly on a flat, static-protective surface.
7. Carefully grasp the adapter by its top edge or upper corners, and pull the
adapter from the riser-card assembly.
8. If you are instructed to return the adapter, follow all packaging instructions, and
use any packaging materials for shipping that are supplied to you.
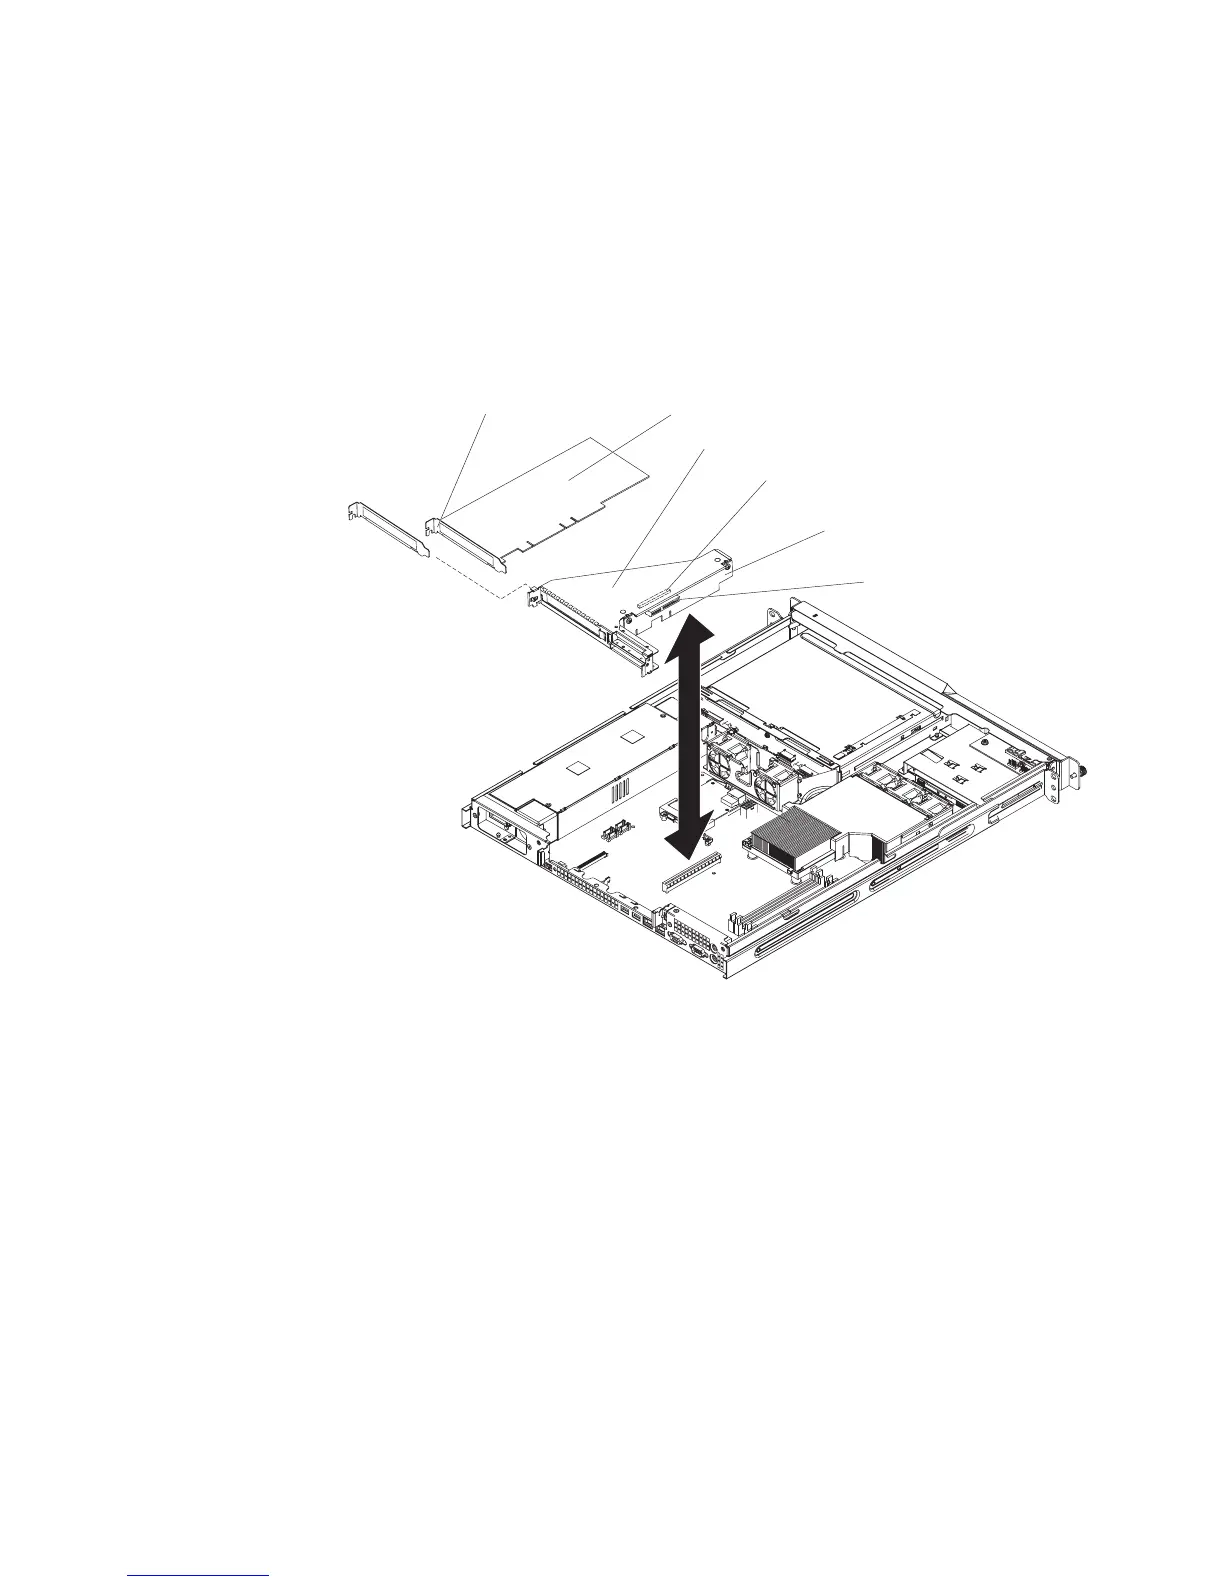
Installing an adapter
Note: Because of mechanical interference, when the Remote Supervisor Adapter II
SlimLine is installed you cannot install an adapter in expansion slot 1.
Riser-card
assembly
Adapter support
bracket
Adapter
Expansion slot 1
Expansion slot 2
Expansion-slot
bracket
To install a replacement adapter, complete the following steps:
1. See the documentation that comes with the adapter for instructions for setting
jumpers or switches and for cabling.
2. Touch the static-protective package that contains the adapter to any unpainted
metal surface on the server. Then, remove the adapter from the
static-protective package. Avoid touching the components and gold-edge
connectors on the adapter.
3. Place the adapter, component side up, on a flat, static-protective surface and
set any jumpers or switches as described by the adapter manufacturer, if
necessary.
4. To install the adapter in the riser-card assembly, carefully grasp the adapter by
its top edge or upper corners, and align it with the expansion slot; then, press
the adapter firmly into the expansion slot.
5. Follow the cabling instructions, if any, that come with the adapter.
6. Carefully align the riser-card assembly with the guides on the rear of the
server and with the riser-card connectors on the system board; then, press
down on the assembly. Make sure that the riser-card assembly is fully seated
in the riser-card connector on the system board.
Chapter 4. Removing and replacing server components 71
 Loading...


