7. Install the cover (see “Installing the cover” on page 69).
8. Slide the server into the rack.
9. Connect the cables and power cords.
10. Turn on all attached devices and the server.
Removing a Remote Supervisor Adapter II SlimLine
To remove a Remote Supervisor Adapter II SlimLine from the server, complete the
following steps:
1. Read the safety information that begins on page vii and “Installation guidelines”
on page 65.
2. Turn off the server and peripheral devices and disconnect all power cords and
external cables; then, remove the cover.
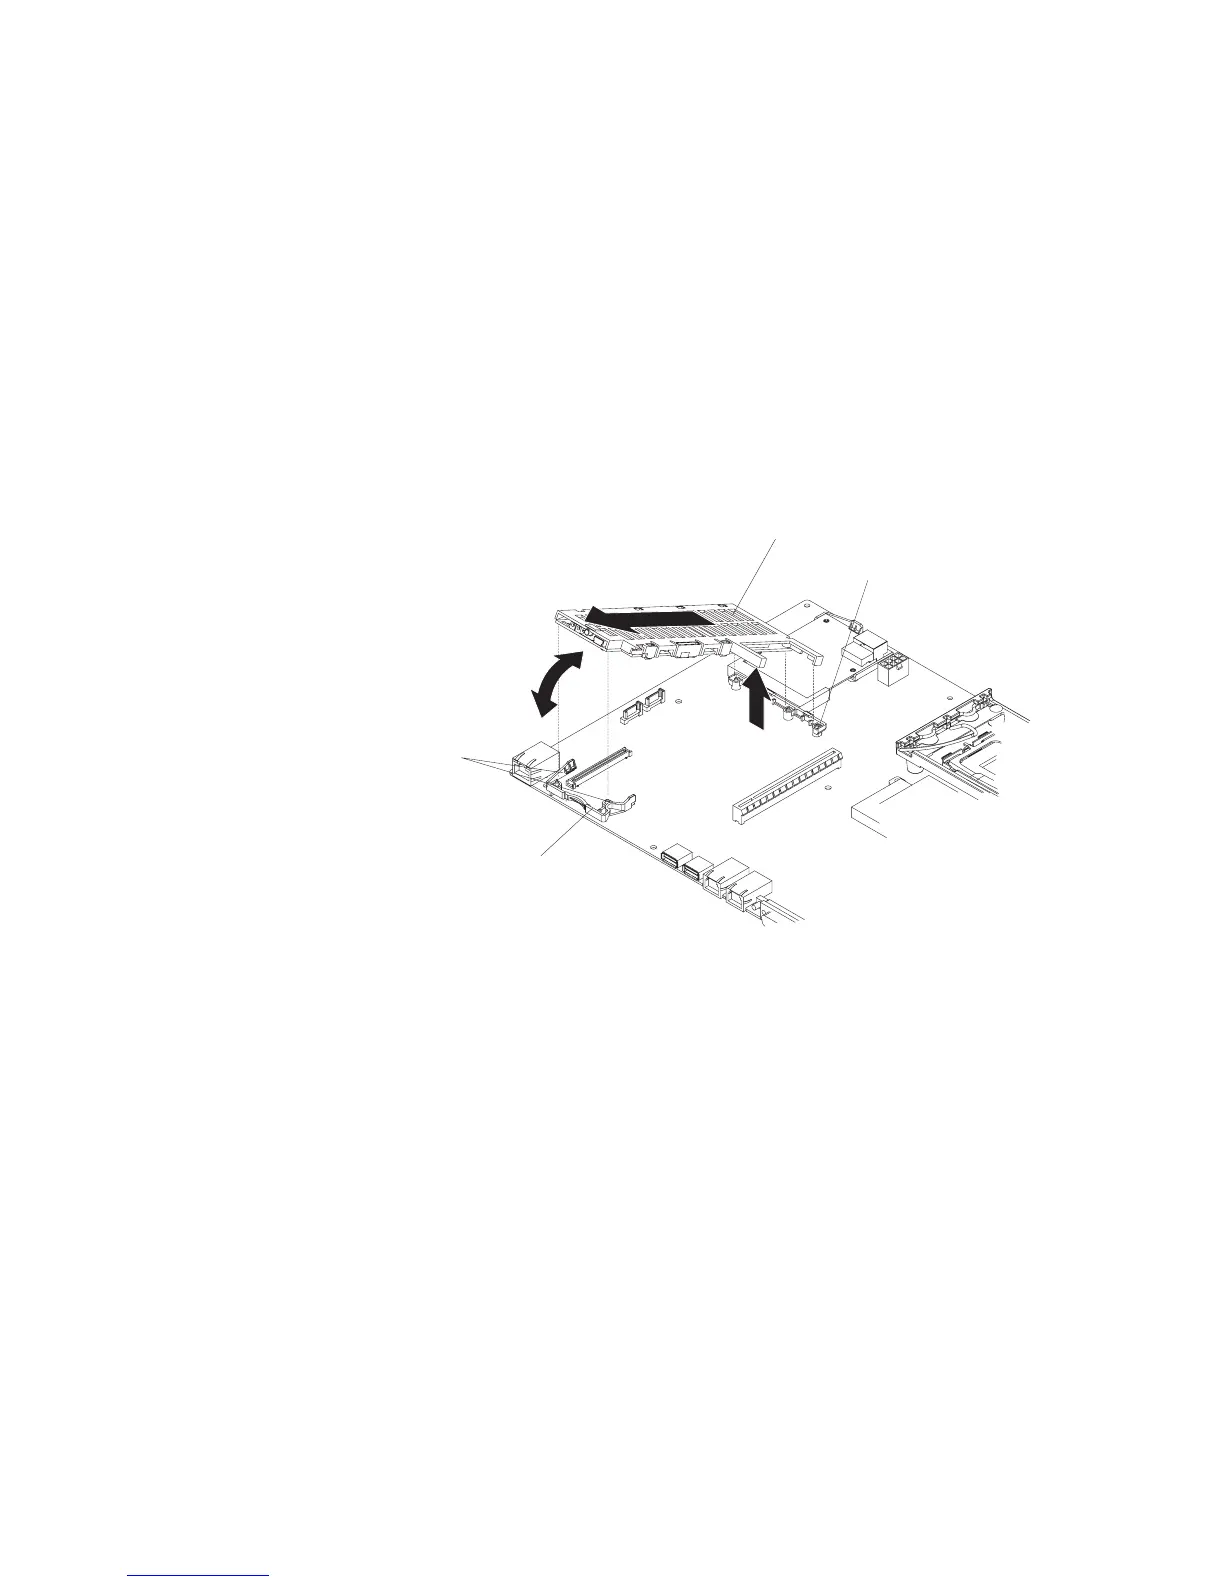
3. Grasp the riser-card assembly at the rear edge and lift to remove it from the
server. Set the riser-card assembly aside on a flat, static-protective surface.
Remote Supervisor Adapter II SlimLine
Mounting bracket
Mounting bracket
Mounting bracket
retention latch
Rear of system
4. Spread the mounting bracket retention latches as you lift the Remote Supervisor
Adapter II SlimLine, to disconnect it from the system board; then, lift it out of the
server.
Installing a Remote Supervisor Adapter II SlimLine
See the illustration in “System-board optional device connectors” on page 10 for the
location of the dedicated connector for the Remote Supervisor Adapter II SlimLine.
After the Remote Supervisor Adapter II SlimLine is installed, the
systems-management port on the rear of the server is active.
Notes:
1. When you start the server for the first time after you install a Remote Supervisor
Adapter II SlimLine, the startup process will take several minutes longer than a
typical startup.
2. Earlier versions of the Remote Supervisor Adapter II SlimLine might not work in
this server. See http://www.ibm.com/servers/eserver/serverproven/compat/us/ for
the supported Remote Supervisor Adapter II SlimLine.
72 IBM System x3250 Types 4364 and 4365: Problem Determination and Service Guide

 Loading...


