3
Terminal mode operation
Form2001
16
■ Setting the Terminal mode
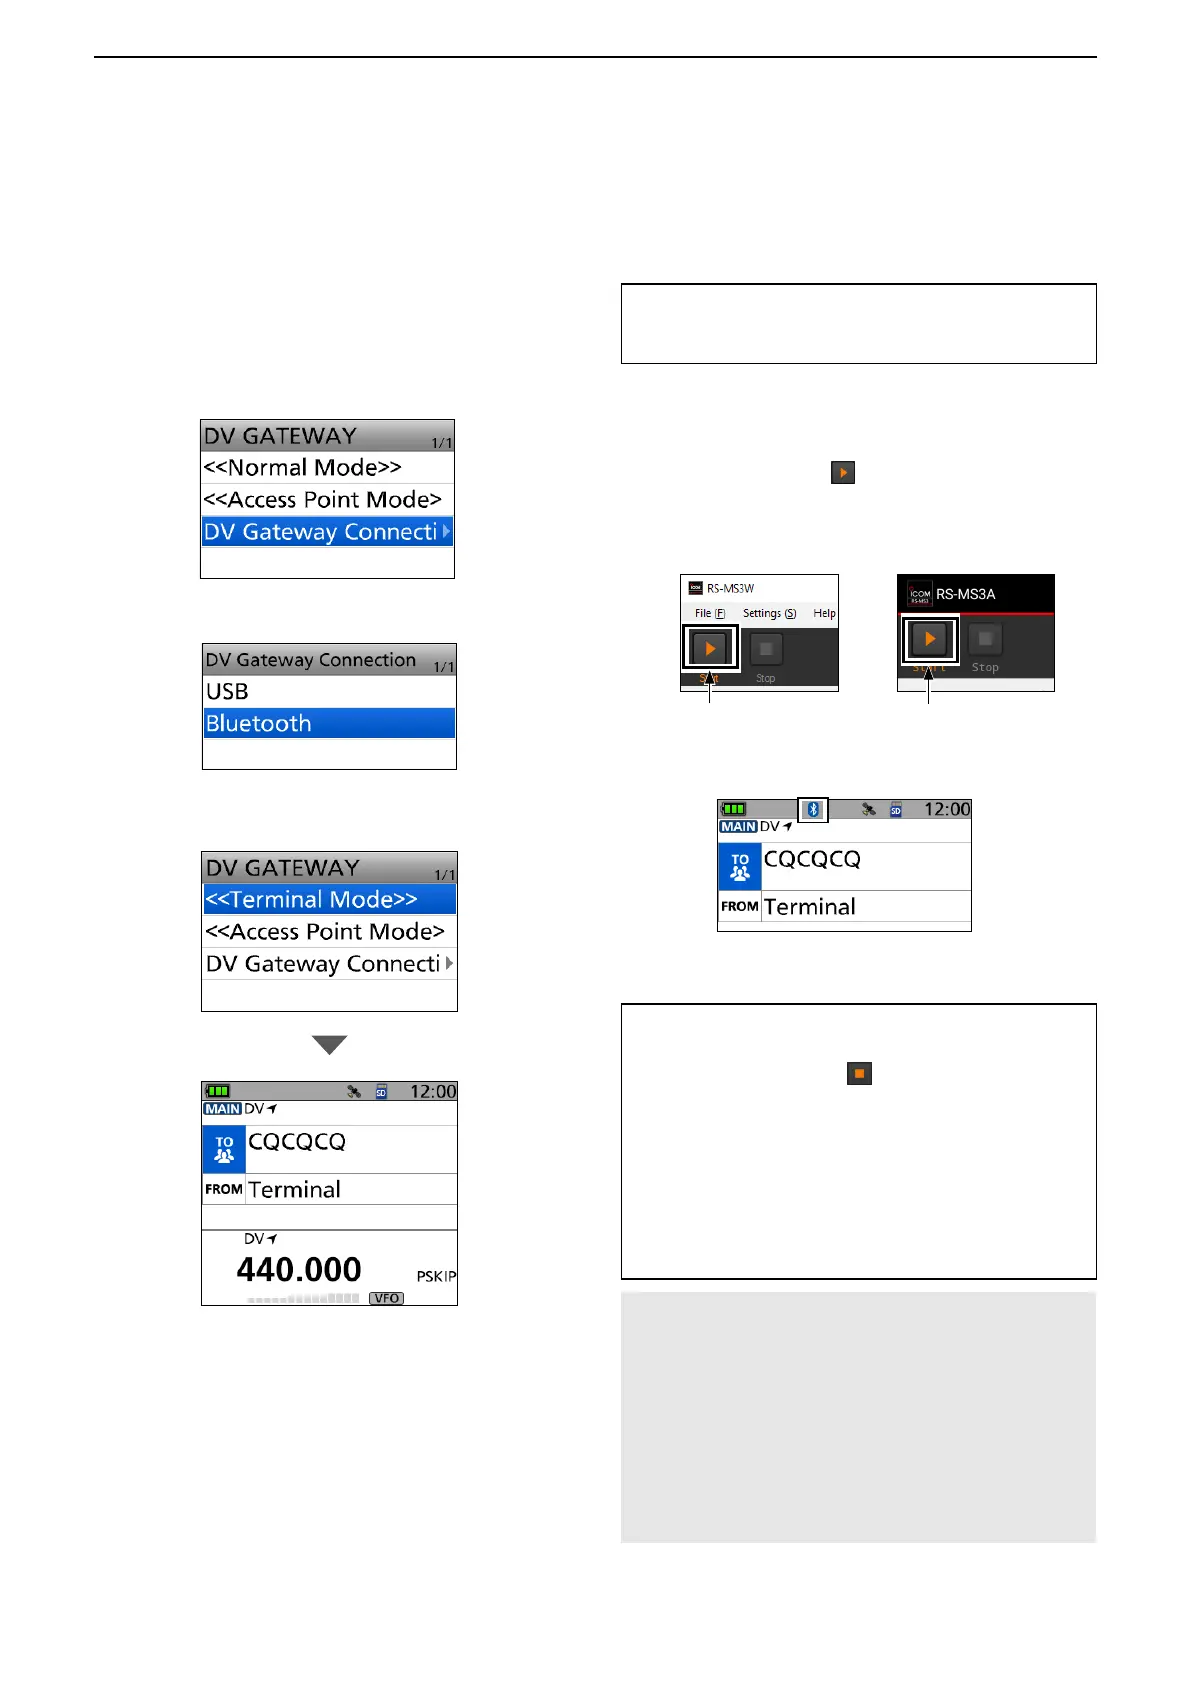
DWhen using the ID-52A/E PLUS
[Transceiver operation]
1. Push [MENU].
2. Select “DV Gateway.”
3. Select “DV Gateway Connection.”
[Windows or Android operation]
L When using the RS-MS3A application, select “Bluetooth
Connection Device” or “USB” in the RS-MS3A “Connection.”
z Click (touch) <Start> in the RS-MS3W or
RS-MS3A.
L If an error message is displayed, see page 30 to
read the tips to solve the problem.
4. Select “USB” or “Bluetooth.”
5. Select “<<Terminal Mode>>.”
TIP: Canceling the Terminal mode
[Windows or Android operation]
1. Click (touch) <Stop>
in the RS-MS3W or
RS-MS3A.
[Transceiver operation]
2. Push [VFO/MHz].
L You can also cancel by selecting “<<Normal
Mode>>” in the Quick Menu or “DV Gateway” on
the MENU screen. To display the Quick Menu, push
[QUICK].
NOTE: In the Terminal mode
• The Power Save function and the Time Out Timer
function are not activated.
• The Following items are automatically set.
Receive mode: DV mode
DR function: ON (MAIN band)*
FROM: MY Call Sign
* These settings do not return to the previous settings
even if you cancel the Terminal mode.
• The Terminal mode is not automatically canceled even
if you turn OFF the transceiver, then ON it again.
When using the UDP Hole Punch function
Set “UDP Hole Punch” to “ON” in the RS-MS3W or
RS-MS3A. (p. 8)
TouchClick
L ID-52A PLUS/ID-52E PLUS can change the MAIN
band or SUB band in the terminal mode.
• For Bluetooth connection, the Bluetooth icon is
displayed on the Standby screen of the transceiver.