Model 252
Label Printer/Applicator
Operators/Technical Manual
32
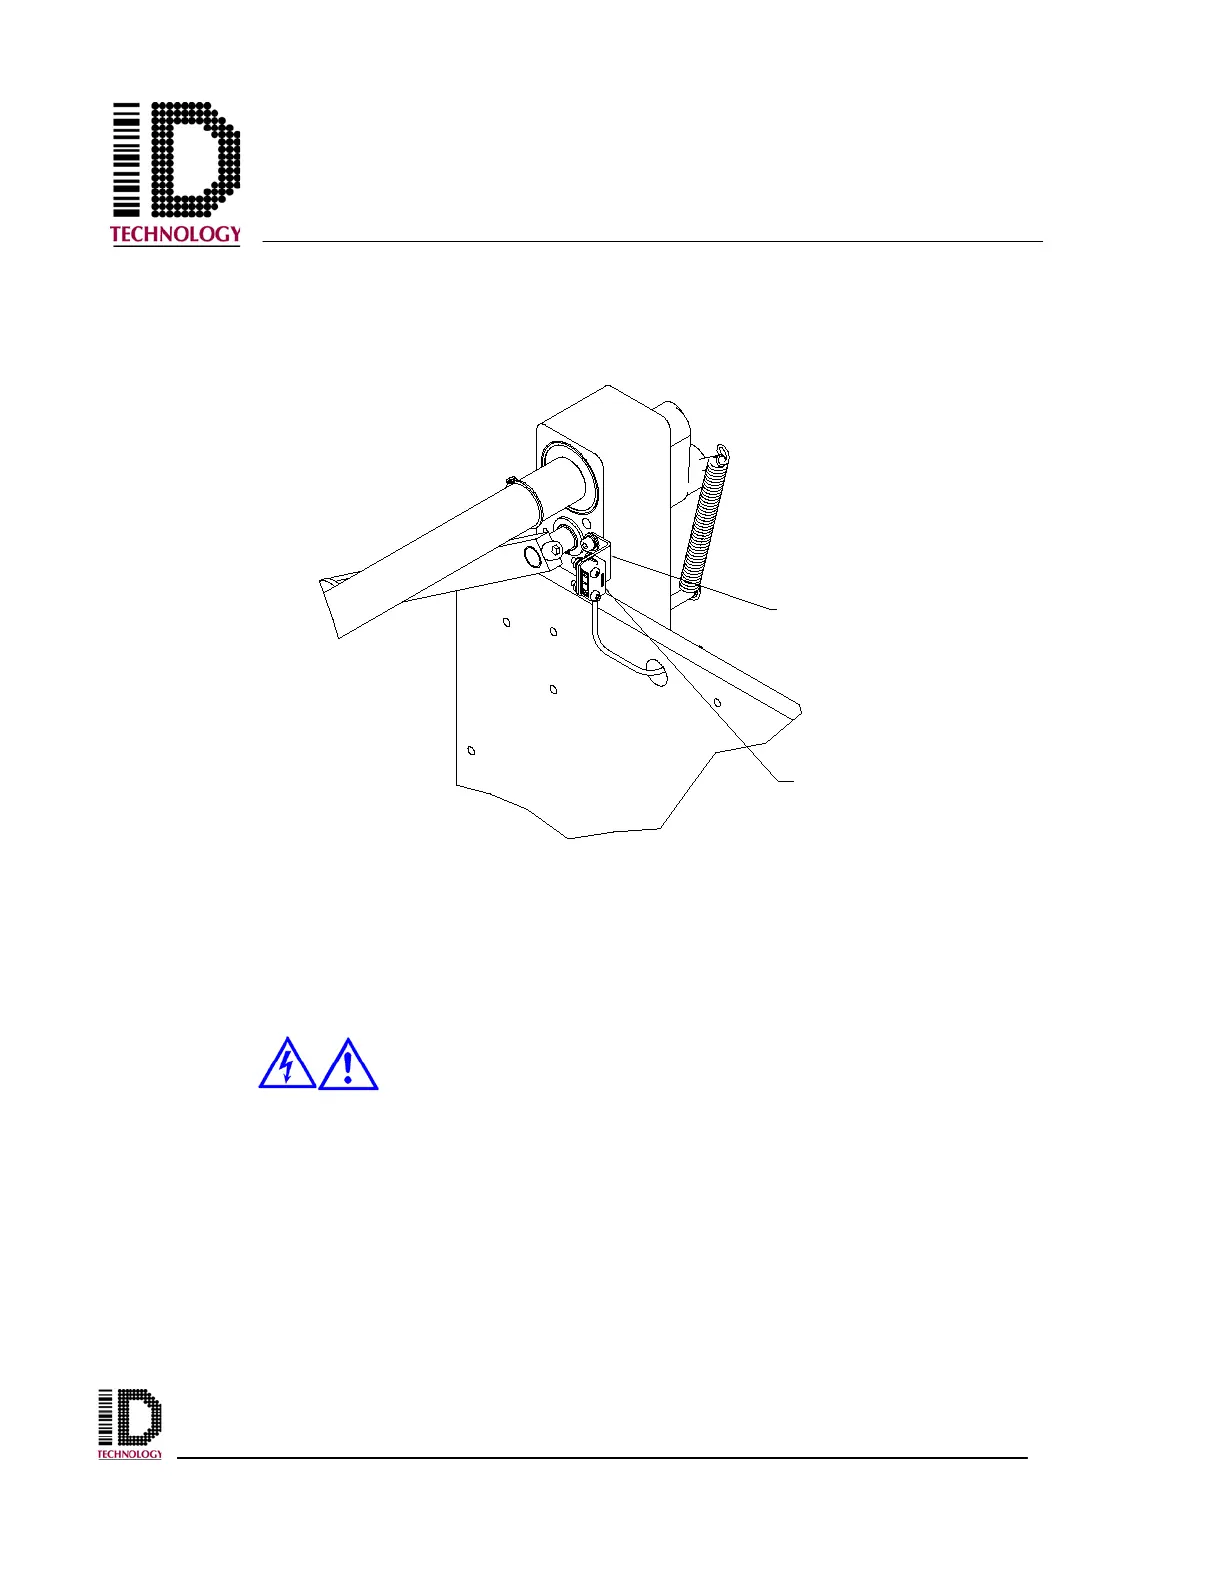
3.18 Low Label Detector Installation
The low label sensor has been factory installed if ordered with the applicator. No
adjustments are available.
If the low label sensor has been purchased as a separate item, it must be installed prior to
use. Start by removing the inner flange and outer retainer as well as the support hub.
Next, remove the back cover from the applicator using a 3mm hex wrench.
Before attempting to service machinery, the machine must be turned
off and the power and air locked out.
Using a 3mm hex wrench, install the low label sensor on the side of the unwind mounting
block as shown above. Route the sensor cable though the access hole in the baseplate
and the access hole in the electronics module. Plug the 4 pin connector into the J17 / LL
connector on the PCB. Secure any excess wire (coil inside electronics module), reinstall
the back cover, the unwind module flanges, and return power to the unit.
SENSOR MOUNTING
BRACKET
LOW LABEL
SENSOR