99903514:TELESCOPIC CRANE: 3A-3
SECTION 3A: CYLINDER REPAIR
20120521
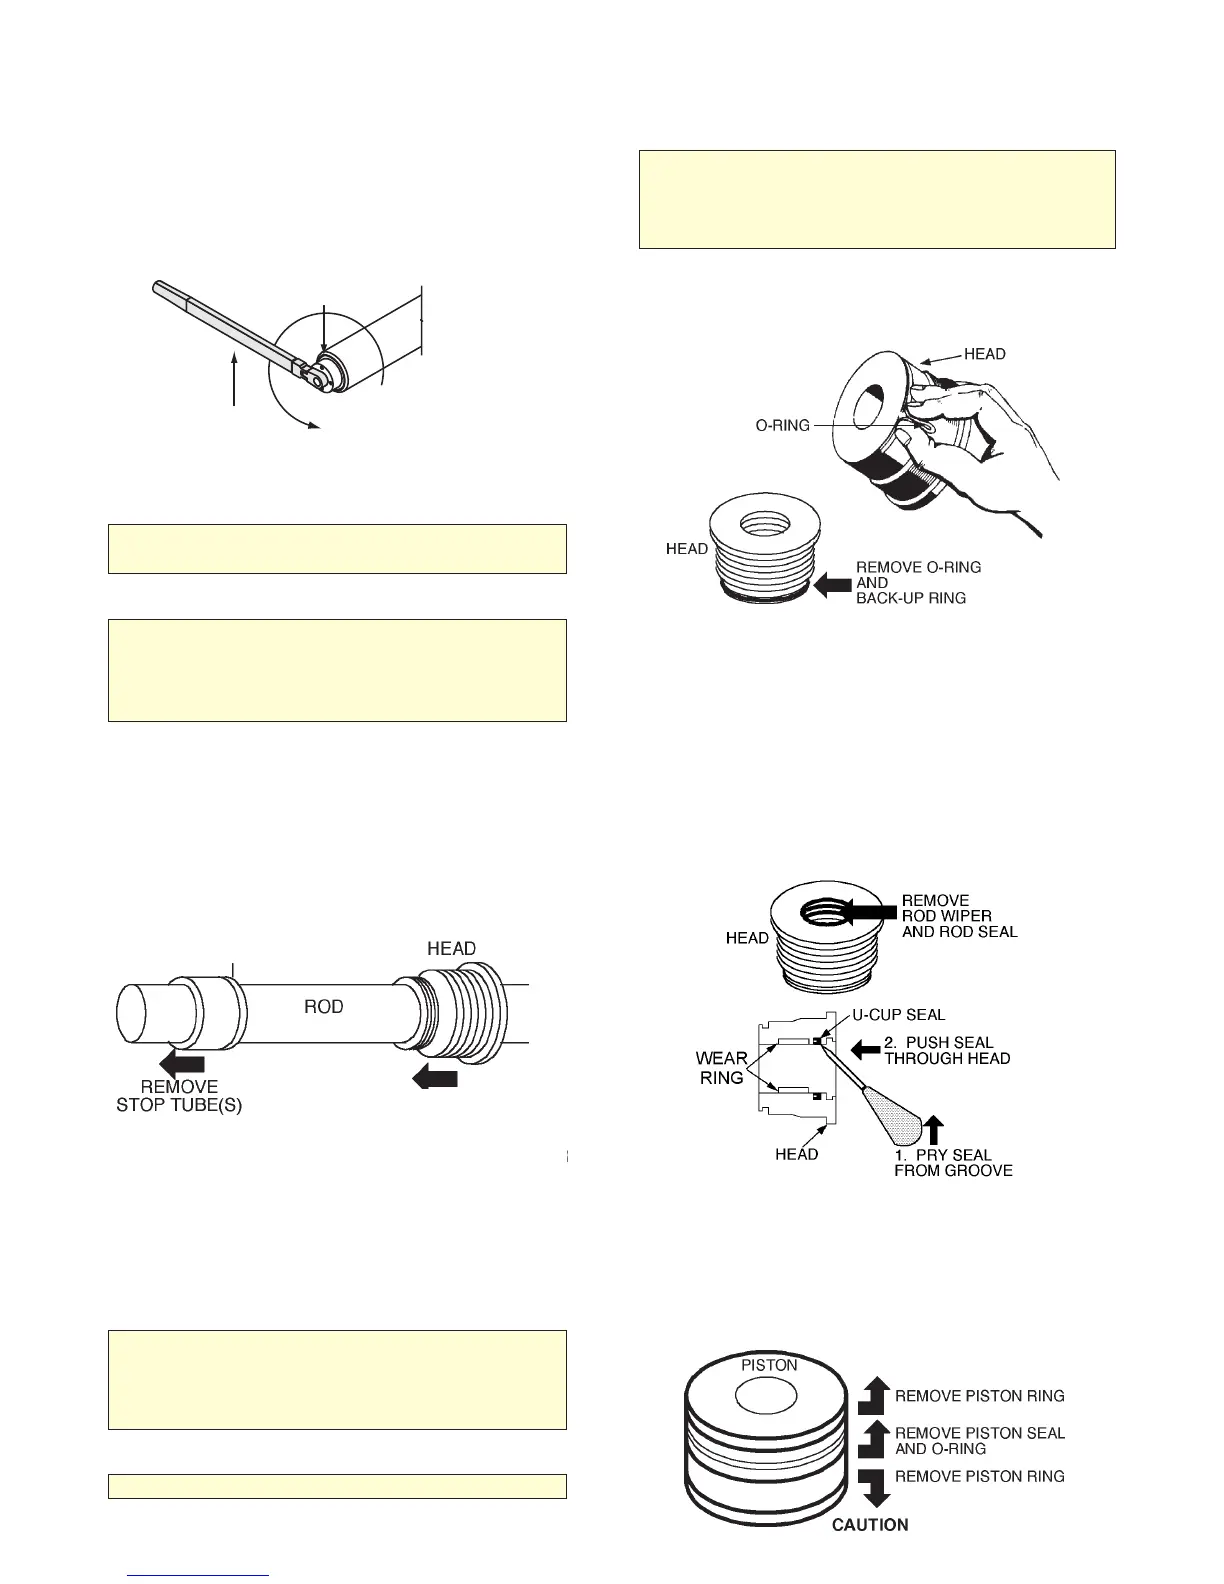
4. Secure the rod pin boss with a pin clamped in
the vise. Unscrew the piston using the spanner
wrench. Carefully inspect the piston and rod threads
for any damage or wear. Replace the part if
damaged threads are present.
CAUTION
DO NOT CLAMP THE ROD IN THE VISE. DAMAGE
TO THE ROD WILL RESULT.
CAUTION:
DO NOT USE A PIPE WRENCH TO TIGHTEN OR
LOOSEN THE HEADS. IT WILL DEFORM THE
METAL, DAMAGE THE MATING SURFACES, AND
PREVENT PROPER TORQUE MEASUREMENT.
5. Remove the stop tube(s) from the rod. Slide the
head down the rod until it makes solid contact
against the stop tube ring/wafer lock. Drive the stop
tube ring/wafer lock from the rod using a plastic
hammer against the top of the head. Use only
enough force to move the stop tube ring/wafer lock
while distributing the blows around the head rather
than in only one place.
6. Remove the head from the rod.
7. Inspect the cylinder interior and the rod for
dents, nicks, scratches, cracks, or other defects
which require repair or replacement.
WARNING
REPLACE CRACKED OR DENTED RODS OR
CYLINDER CASES!! FAILURE TO DO SO MAY
RESULT SERIOUS INJURY, DEATH, OR
EQUIPMENT DAMAGE.
CAUTION
ANY PROTRUSION WILL DAMAGE NEW SEALS.
NOTE
FURTHER WORK SHOULD BE PERFORMED IN A
WARM ENVIRONMENT OF 70°F OR MORE. THE
SEALS WILL BE MORE FLEXIBLE AND EASIER TO
MANIPULATE.
8. Work a slack section into the head seal static
o-ring and remove it from its groove. Lift the static
back-up ring from the groove using a plastic awl.
9. Position the head on the work surface with the
rod wiper at the top.
10. Slide the tip of the plastic awl under the rod wiper
and remove the rod wiper from the head.
11. Puncture the rod seal using a plastic awl. Pry it
out of the groove and push through the head. Remove
the rod wear ring(s) using the awl to pry it from the
groove and push it through the head.
12. Spread the piston rings/ wear rings and slip them
over the lands and off the end of the piston nearest the
wear ring.
13. Carefully lift the dynamic piston seal out of its
groove using a thin blade. Take care not to nick the
edges of the groove. Twist and break the seal.
PISTON
PISTON SPANNER/
TORQUE WRENCH
ROTATE
THIS
DIRECTION
TO DISASSEMBLE
STOP TUBE
SLIDE HEAD
AGAINST STOP TUBE AND
DRIVE OFF USING
PLASTIC HAMMER