Operation of the Protec P3000 33
Notice If you have not purchased the PRO-Check reference leak, warning 71 (“No
communication with test leak”) will be issued on first start-up. Please go to
Settings / Interfaces PRO-Check and set the PRO-Check to “disabled” to
prevent future warnings (see section 4.5.6).
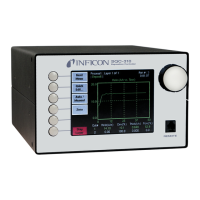
3.2 Controls on the main display unit
All set-up and control functions are integrated into the main display unit via the menu
structure. The functions of the 8 control keys are displayed on the LC display. During
measurements the main interface is the probe handle display giving all necessary
information for proper leak testing.
After start-up the Protec P3000 will automatically go into measurement mode.
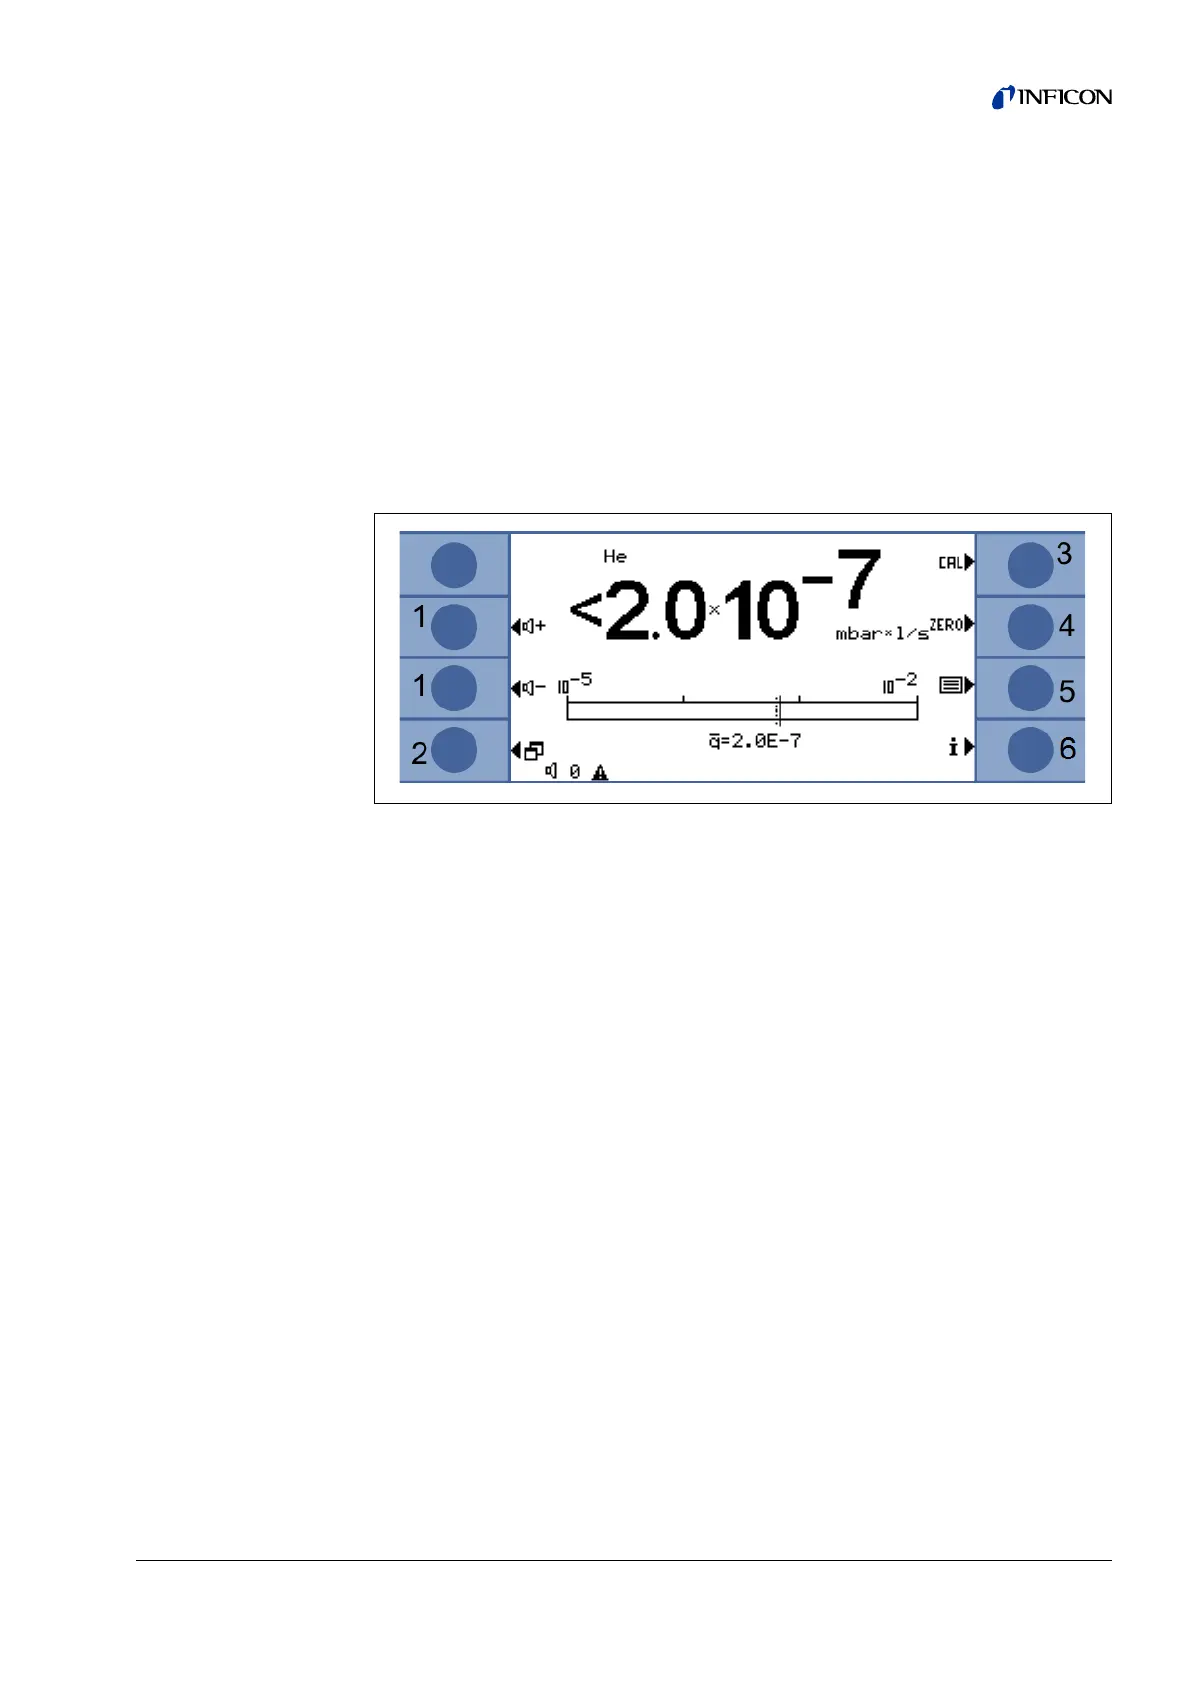
Bar graph display
The currently detected leak rate will be display in a bar graph in logarithmic scale.
The currently selected trigger level is indicated by a black line, the currently selected
search level is indicated by a dotted line. If the search level is exceeded the shape
of a bell is displayed at the top of the display, if the trigger is exceeded the bell starts
to blink (to ring).
Fig. 18 Measurement screen
Pos. Description Pos. Description
1 Audio volume buttons 4 ZERO button
2 Menu button 5 List of gas parameters buttons
3 Calibration button Info button