Chapter: Installation
4-4 M10-16248-EN
Determine the Voltage Setting
1. Locate the power input connector on your machine. Refer to “System Description
and Terminology” on page 1-2 for assistance, if necessary.
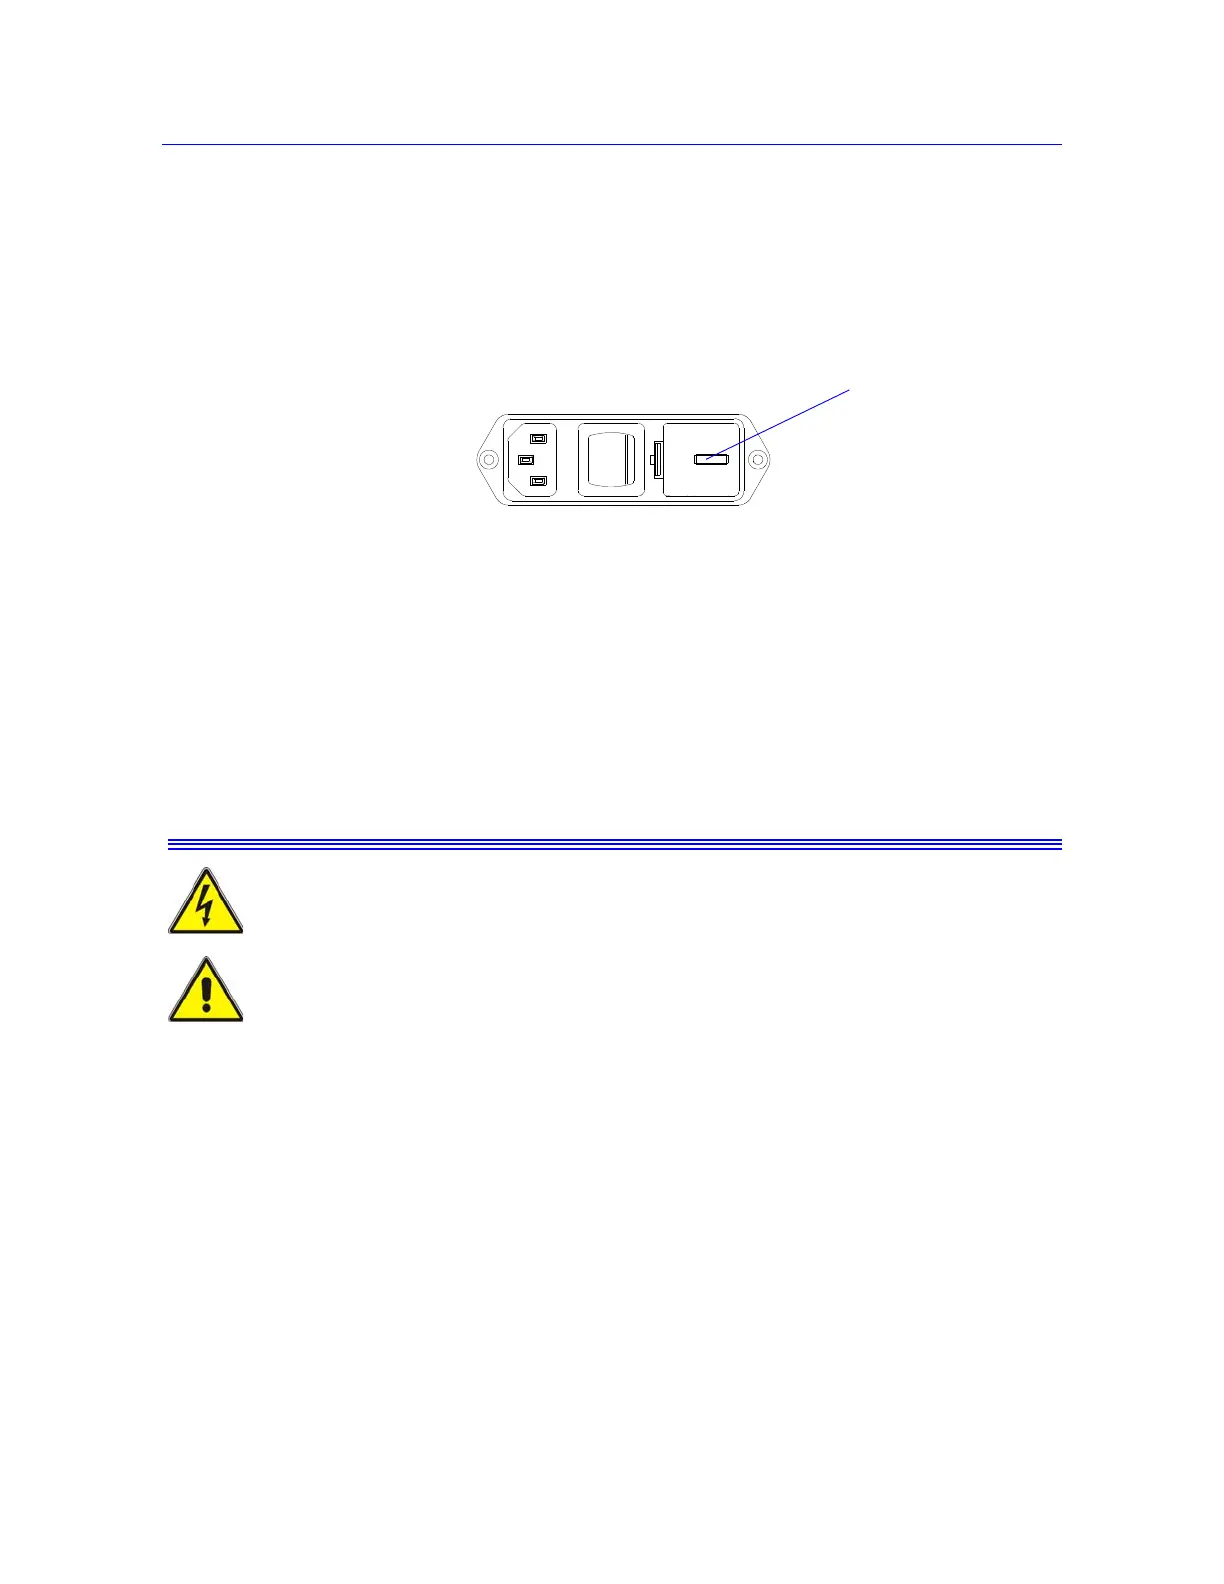
2. Inspect the power input connector. The current voltage setting is visible through a small
window in the fuse holder, as shown in Figure 4-2.
Change the Voltage Setting
Equipment:
• Small flat-head screwdriver or probe.
• Long nose pliers.
To change the input power line voltage:
1. Ensure that the power switch is in the Off (
O) position and disconnect the power cable
from the power source. Verify that the
POWER indicator light on the control panel is
not illuminating.
2. Insert a small flat-head screwdriver into the slot indicated in Figure 4-2 on page 4-4
and pry out the fuse holder.
3. Remove the fuse holder from the power input connector.
4. Remove the voltage selector unit (see Figure 4-4 on page 4-5) from the power input
connector using long nose pliers or a screwdriver.
Figure 4-2. Power Input Connector with Voltage Setting
Voltage setting
indicator
Electrical Hazard - Shut off the main power switch and disconnect the power
cable to the frame before changing the power setting. There are dangerous
voltage levels inside the fuse holder.
Hazard - Do not remove covers to any component of your system, unless it is
specified in a procedure.
There are dangerous voltages and rotating machinery inside the machine that may cause
bodily injury or damage to equipment.