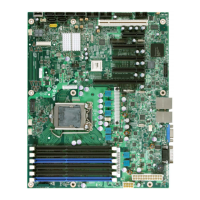
SE7500CW2 Server Board Technical Product Specification Error Reporting and Handling
73
Revision 1.40
Tpoint Description
POST tasks require interrupts off, preserve them with a PUSHF and CLI at the beginning and a POPF at
the end. If you change the PIC, preserve the existing bits.
4Ch Shadow video BIOS ROM if specified by Setup, and CMOS is valid and the previous boot was OK.
4Eh Display copyright notice.
4Fh Initialize Multi-Boot. Allocate memory for old and new MultiBoot history tables.
50h Display CPU type and speed
51h Checksum CMOS and initialize each EISA slot with data from the initialization data block.
52h Verify keyboard test.
54h Initialize keystroke clicker if enabled in Setup.
55h Enabled USB device.
58h Test for any unexpected interrupts. First do an STI for hot interrupts. Secondly, test the NMI for an
unexpected interrupt. Thirdly, enable the parity checkers and read from memory, checking for an
unexpected interrupt.
59h Register POST Display Services, fonts, and languages with the POST Dispatch Manager.
5Ah Display prompt "Press F2 to enter SETUP"
5Bh Disable CPU cache.
5Ch Test RAM between 512K and 640K.
60h Determine and test the amount of extended memory available. Determine if memory exists by writing to
a few strategic locations and see if the data can be read back. If so, perform an address-line test and a
RAM test on the memory. Save the total extended memory size in the CMOS at cmosExtended.
62h Perform an address line test on A0 to the amount of memory available. This test is dependent on the
processor, since the test will vary depending on the width of memory (16 or 32 bits). This test will also
use A20 as the skew address to prevent corruption of the system memory.
64h Jump to UserPatch1. See "The POST Component."
66h Set cache registers to their CMOS values if CMOS is valid, unless auto configuration is enabled, in
which case load cache registers from the Setup default table.
67h Quick initialization of all Application Processors in a multi-processor system.
68h Enable external cache and CPU cache if present. Configure non-cacheable regions if necessary.
NOTE: Hook routine must preserve DX, which carries the cache size to the Display CacheSize J routine.
6Ah Display external cache size on the screen if it is non-zero.
NOTE: Hook routine must preserve DX, which carries the cache size from the cache Configure J routine.
6Bh If CMOS is bad, load Custom Defaults from flash into CMOS. If successful, reboot.
6Ch Display shadow message
6Eh Display the starting offset of the non-disposable segment of the BIOS
70h Check flags in CMOS and in the BIOS data area for errors detected during POST. Display error
messages on the screen.
72h Check status bits to see if configuration problems were detected. If so, display error messages on the
screen.
76h Check status bits for keyboard-related failures. Display error messages on the screen.
7Ch Initialize the hardware interrupt vectors from 08 to 0F and from 70h to 77H. Also set the interrupt vectors
from 60h to 66H to zero.
7Eh The Coprocessor initialization test. Use the floating-point instructions to determine if a coprocessor
exists instead of the ET bit in CR0.
80h Disable onboard COM and LPT ports before testing for presence of external I/O devices..
81h Run late device initialization routines.
82h Test and identify RS232 ports
83h Configure Fisk Disk Controller
84h Test and identify Parallel port.
85h Display any ESCD read errors and configure all PnP ISA devices.
86h Initialize onboard I/O and BDA according to CMOS and presence of external devices.
87h Initialize motherboard configurable devices.
88h Initialize interrupt controller.
89h Enable non-maskable interrupts.
8Ah Initialize Extended BIOS Data Area and initialize the mouse.
8Bh Setup interrupts vector and present bit in Equipment byte.
8Ch Initialize both of the floppy disks and display an error message if failure was detected. Check both
drives to establish the appropriate diskette types in the BIOS data area.