TM3160F,TM3200F&TM3240F
44
Attaching Implements
CAUTION: Always use POSITION CONTROL
to attach / detach implements to provide pre-
cise control of the hitch.
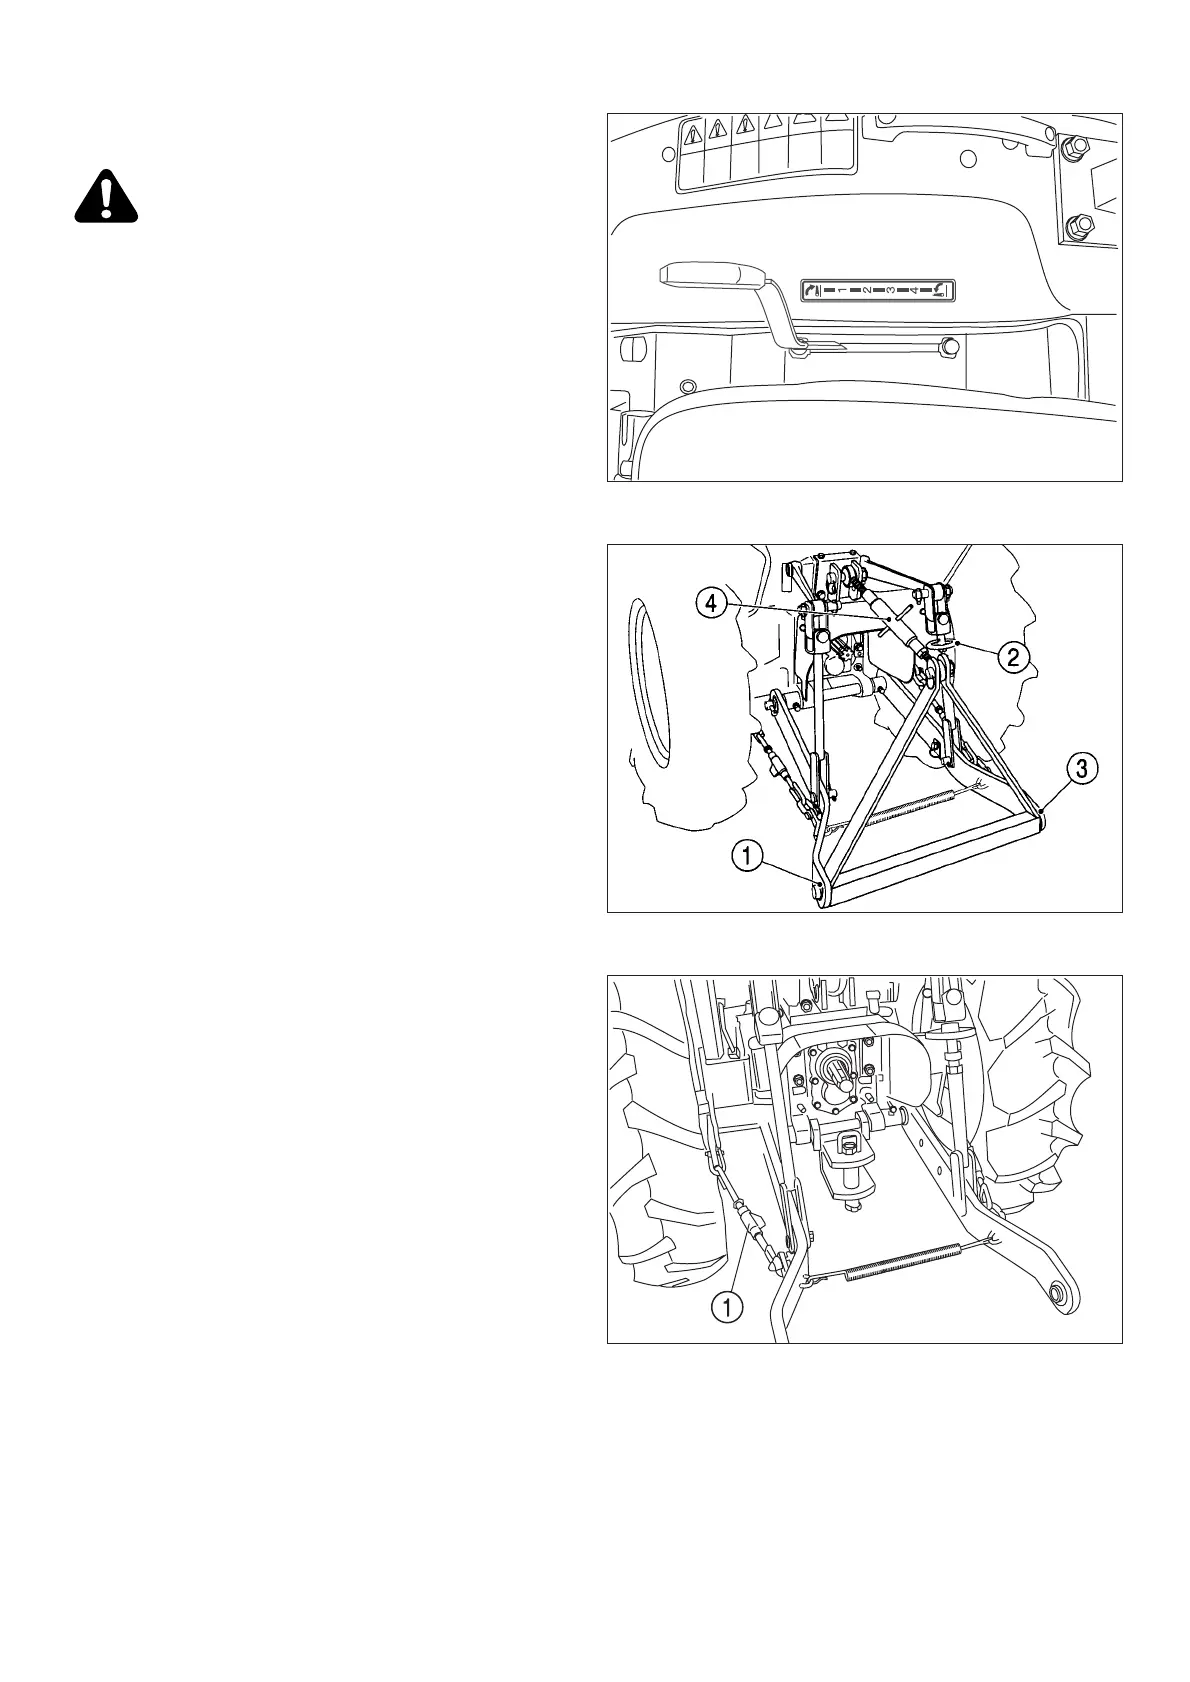
FIG. 55: Reverse the tractor to the implement, cen-
tring the tractor with the implement hitch frame.
Raise or lower the hitch using the position control
lever (1) and align the left lower link end with the corre-
sponding implement attaching pin. Lock the brakes, shut
off the engine and remove the main switch key.
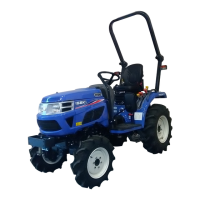
FIG. 56: Slide the ball end of the left lower link (1)
over the implement pin and secure with a linchpin. Adjust
height of the right lower link using the turn buckle (2).
Attach and secure the right lower link (3) to the implement
with a linchpin. Attach the top link (4) to the top of the
implement hitch frame using the pin supplied with the
tractor. Rotate the centre barrel section of the top link, to
lengthen or shorten it, and level the implement from front
to rear. After the implement is attached, it can be read-
justed for level operation using the lift rod and top link
turn buckles. Secure all adjustments.
IMPORTANT: With some "mounted" implements, it will
be necessary to remove the drawbar at
rear of the tractor to permit the implement
to be raised and lowered without obstruc-
tion.
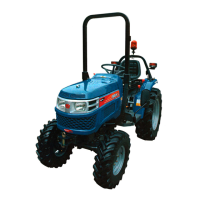
FIG. 57: Certain implements require minimal side-
play. The stabilizer chain (1) at each lower link should be
evenly adjusted to reduce side-play to the desirable level.
Do not, however, elimiate all side-play as chain or lower
link damage may result.
NOTE: The amount of side-play (stabilizer chain loose-
ness) is dependent upon the implement to be
mounted and type of operation. Normally 50 mm
(2") of total side movement is desired, 25 mm
(1") to each side of the tractor centre line.
FIG. 55
FIG. 56
FIG. 57



 To Next Page