Caution: Avoid high differential pressure across the meter. Abnormal differential
pressures can damage internal meter components.
7. Alternate cracking open the upstream and downstream valves for a few seconds and then
slowly-over a period of 10 seconds (¼ PSIG systems)-turn the valve to the ¼ open position
and then to the full open position.
8. After the meter is pressurized, apply a soap solution or other good leak detecting liquid to the
connections to check for leaks.
9. Test the meter to verify the meter is registering the gas flow.
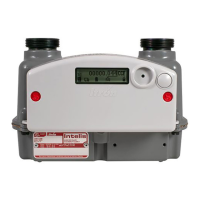
1. Press the button to activate the LCD.
2. Observe the LCD display and look for usage to increase.
Note: If the LCD does not display any expected consumption, investigate the install-
ation. If necessary, change out the meter.
10. Perform a shadow or lock-in test following company or utility procedures.
11. After the Intelis Gas Meter installation testing is complete, purge all air from the gas line
including the piping section.
Warning! Never allow gas to discharge into a confined space or area where
there are ignition sources unless precautions are in place to eliminate potential
hazardous conditions.
It is possible to get air detection alarms during Intelis Gas Meter installation due to installation
setups, gas pressure, flow rates, pipe length, and general installation practices. Air detection
alarms during installation should be ignored.
Removing or Installing the Pipe Plug
This section provides the steps to remove or re-install the pipe plug.
Removing
Using a 3/16" hand-driven Allen wrench, remove the pipe plug.
Installing
1. Clean any debris from the pipe plug and inspect it for any damage or deformation. Replace
the pipe plug if any defects or wear are found.
11 December 2019 TDC-1782-005 18
Intelis Gas Meter Installation Guide 3 Installation