HYDROSTATIC POWER TRAIN
4181384 First Edition 5-33
5
11. Install the mounting flange assembly (19) on the
bearing housing assembly (18) using six socket-head
screws (17). Tighten screws using an alternating
pattern to 27 lb-ft (37 N·m).
Figure 5-52
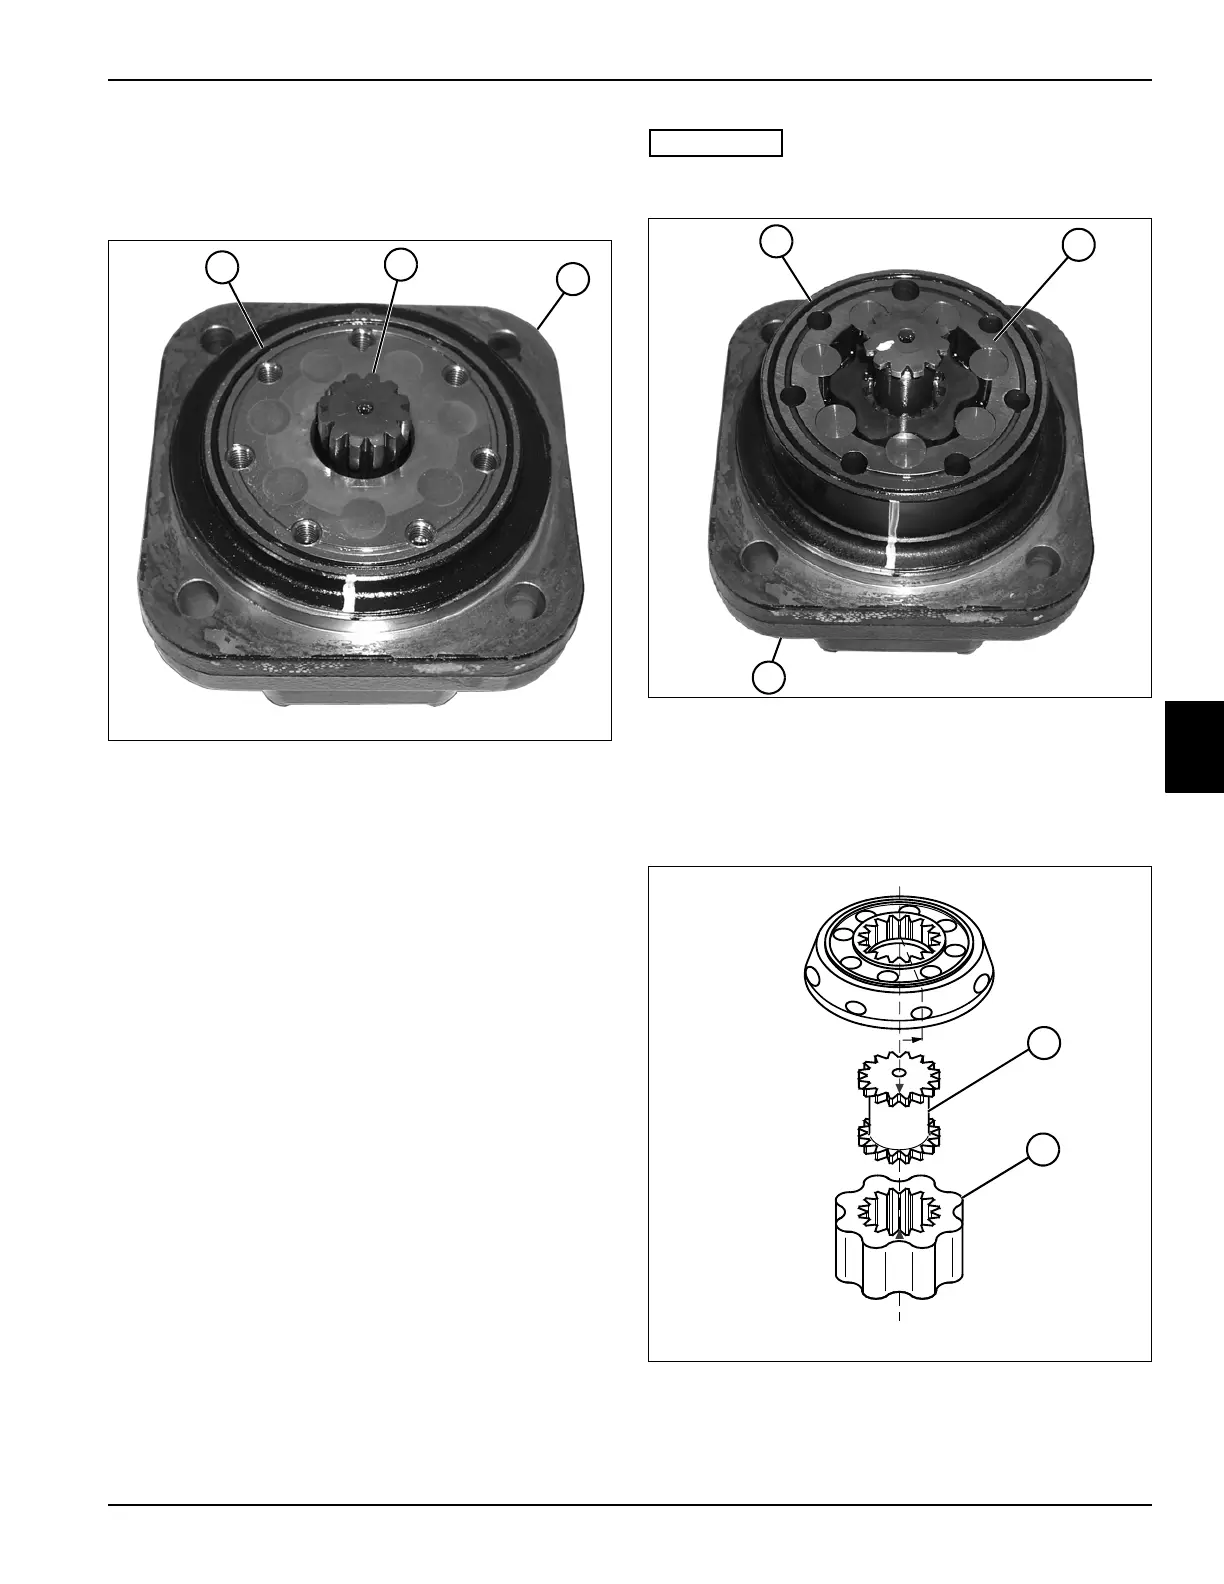
12. Install the drive shaft (21) in the mounting flange
assembly (22).
13. Apply a thin film of petroleum jelly to O-ring (20), and
install an O-ring in the mounting flange assembly
(22).
IMPORTANT
The motor must be timed correctly.
Figure 5-53
14. Install the gear wheel set (24) on the mounting
flange/bearing housing assembly (25).
15. Apply a thin film of petroleum jelly to O-ring (23).
Install O-ring on the gear wheel set (24).
Figure 5-54: Correct Motor Timing
16. Mark the gear wheel set rotor (27) at the point where
the tip of a spline tooth is opposite to the bottom of a
tooth in the external rotor teeth.
TN1314
20
21
22
TN1313
23
~
24
25
TN1366
~
27
26