32 of 76
5. With the output end of the FRL disconnected (remove the quick disconnect fitting),
reconnect the air line to the FRL unit. Air will flow freely through the FRL.
6. Perform Drip Check / Adjustment: Drips to be set to 2-3 per minute.
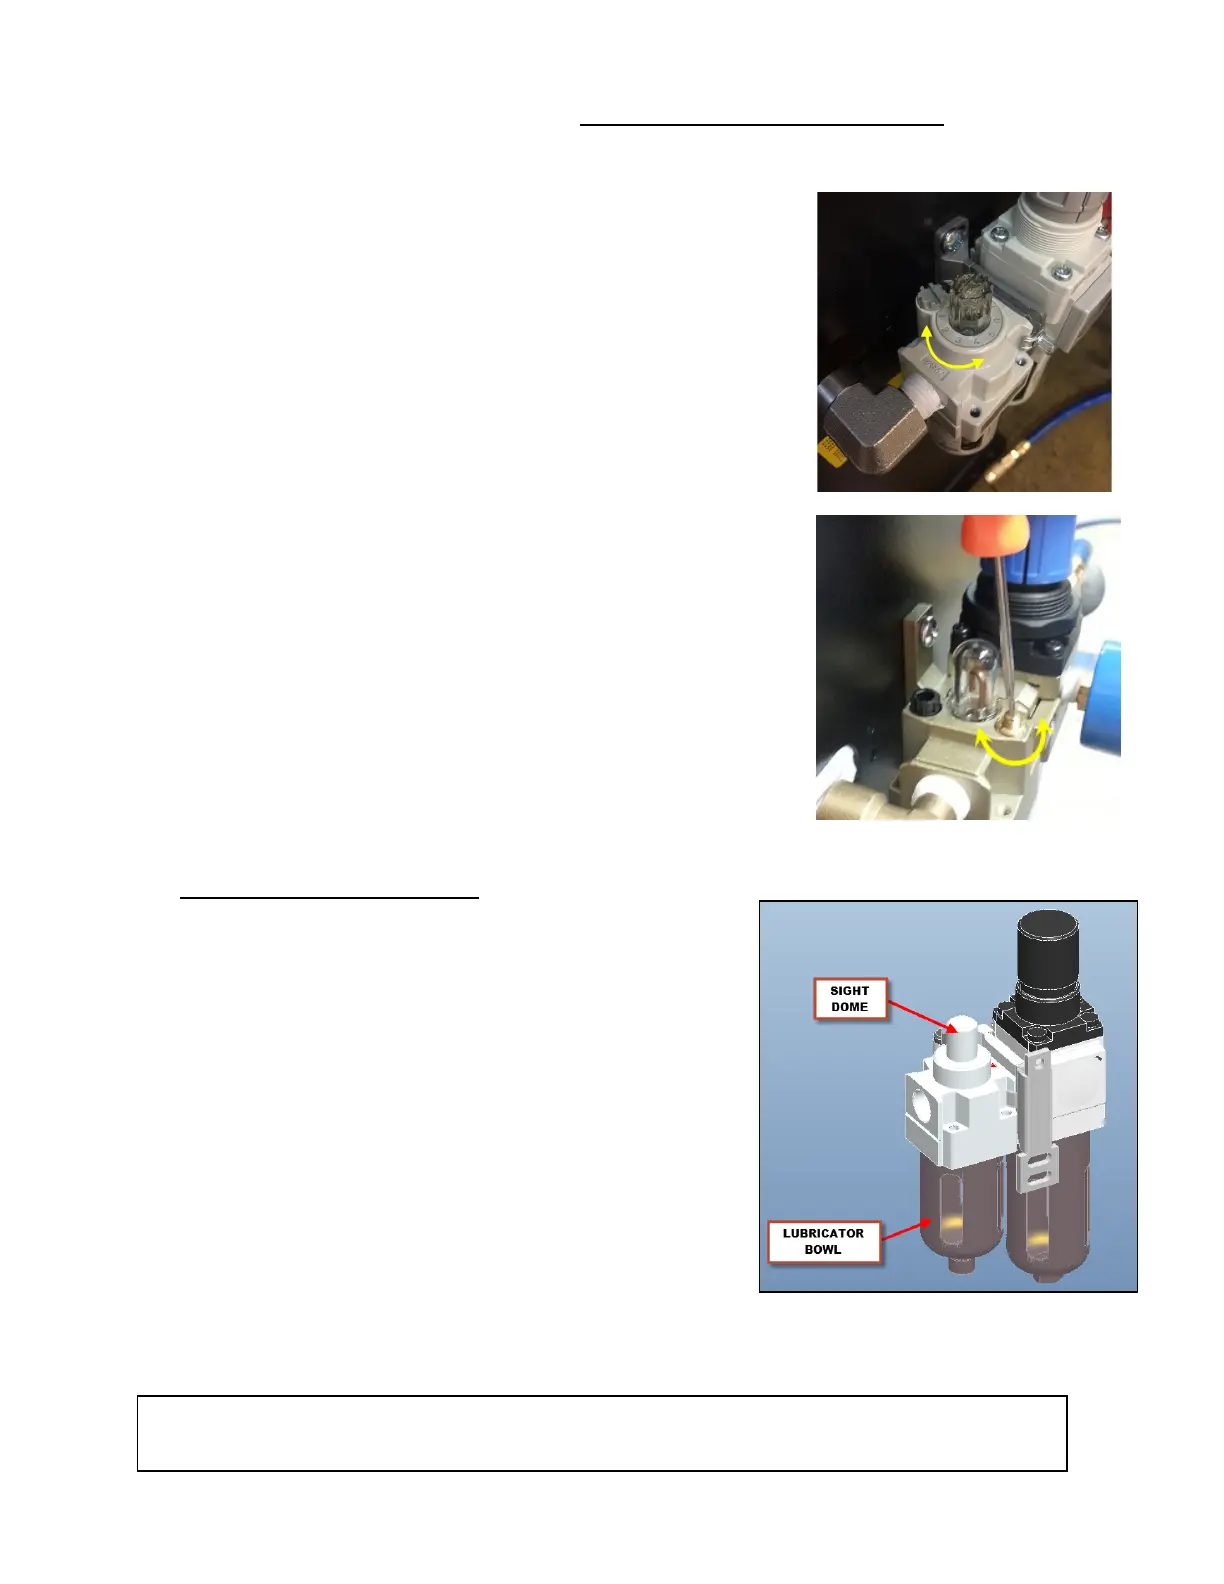
SMC Brand - DIAL VERSION
i. Turn the dial on the top end of the oil reservoir to
the 2 position.
ii. Count the number of drips for 1 minute.
iii. Adjust between settings up or down to reach the
desired drip rate.
JELPC Brand - SCREW VERSION
i. Using a flat head screwdriver, turn the screw
clockwise until it is closed.
ii. Open the screw by turning counterclockwise a 1/4
turn.
iii. Adjust by turning screw slowly in either direction to
reach the desired drip rate.
7. PRESSURE ADJUSTMENT:
Pull up on the regulator knob and adjust the
pressure to 100 psi. Pressure should be set between
90 - 120 psi.
8. Reconnect all airlines and check system for air
leaks.
9. Check the operation of the air cylinder locks by
pressing the pushbutton on the Air Valve and Filter
Assembly on the front left post. This should cause
the mechanical safety locks to disengage from the
safety racks.
10. The pneumatics are now completely installed. Press
the "UP" button on the power pack and continue until
the lift is fully supported by the cables.
NOTE: MAKE CERTAIN THAT THE MECHANICAL SAFETY LOCKS AND
CABLE ROLLERS ARE WORKING PROPERLY.
Figure 25: FRL