35 of 76
7.13 ANCHOR INSTALLATION
Check all layout dimensions in the General Specifications in Figure 2 before
continuing with anchor installation.
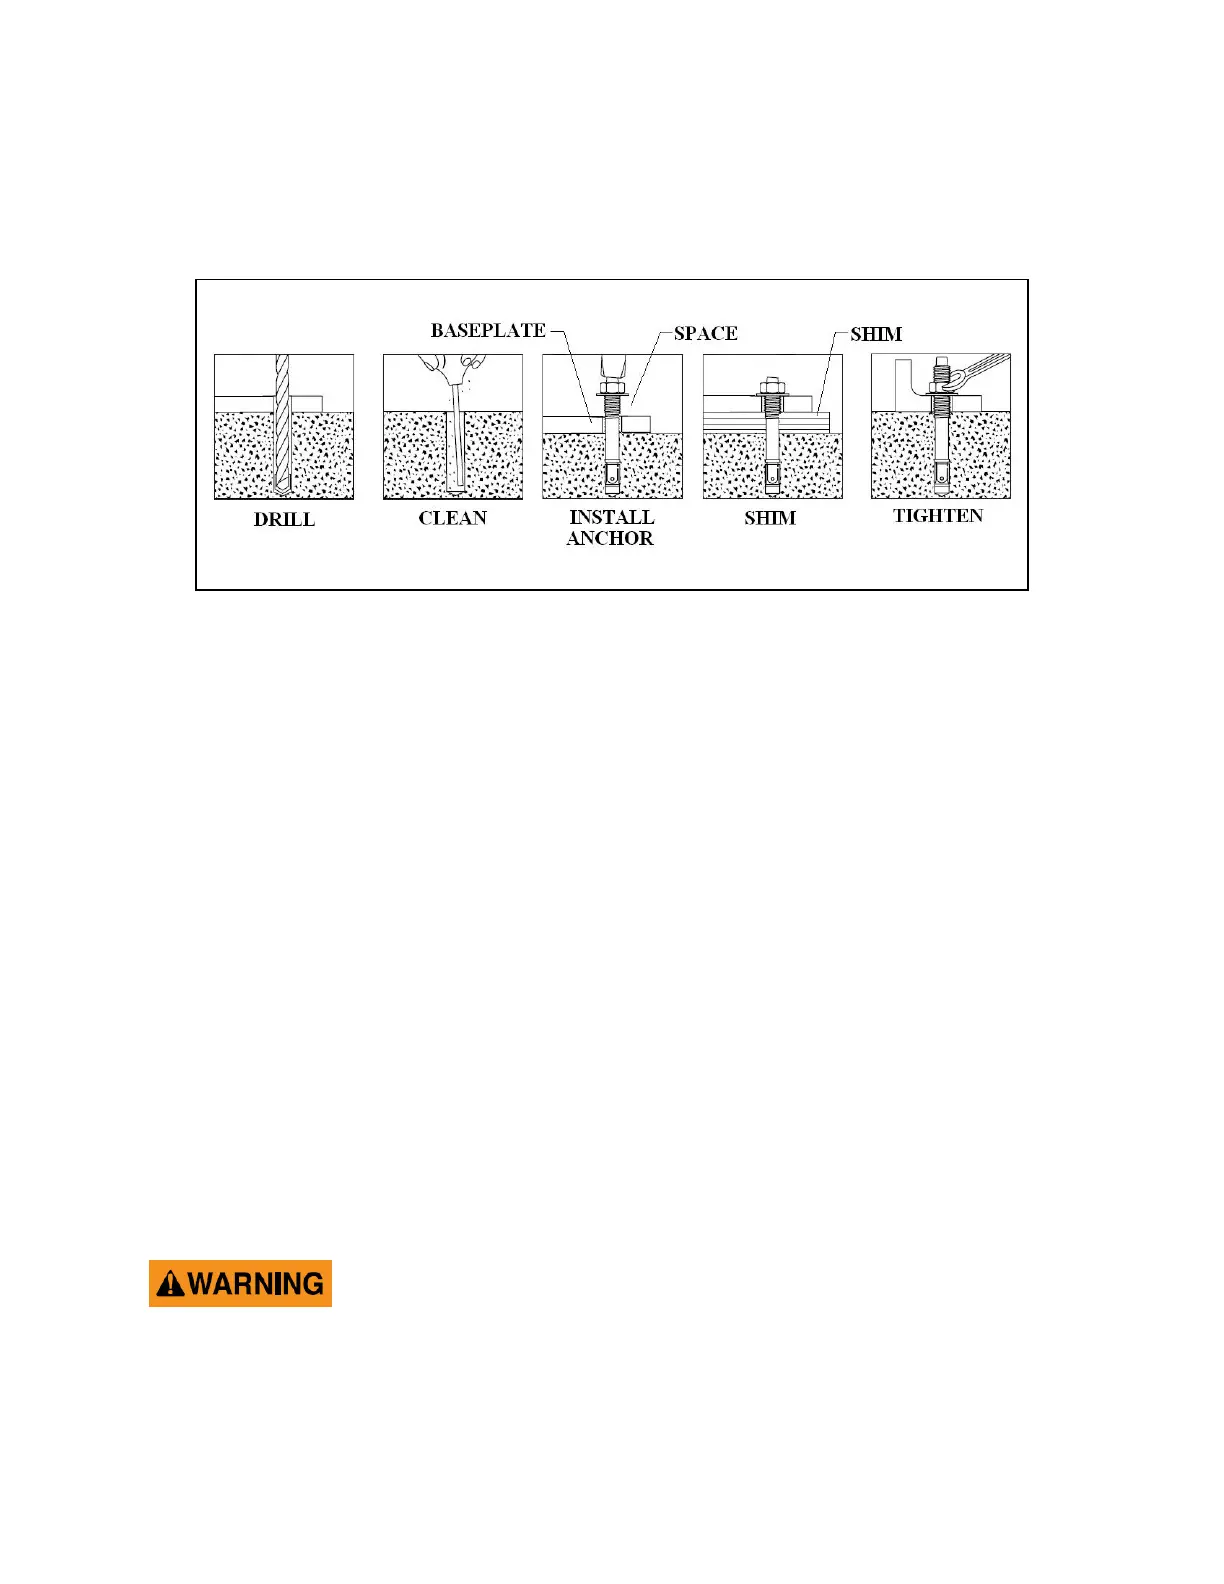
1. Refer to Figure 28 while reading through these instructions.
Figure 28. Anchor installation
2. Ensure that the lift is fully supported by the cables and is at a level just above
ground. Work stands should be removed at this point.
3. Prior to installing anchors, assemble the nut and washer onto anchors. A
minimum of six threads must be visible below the surface of the nut.
4. Using a 3/4” concrete drill bit and rotary hammer drill, drill through the concrete
floor in the anchor holes positioned on the base of each post. (In case longer
anchors are required, supplied anchors can be hammered through concrete).
5. Using a hammer, drive each anchor into floor leaving space for shimming.
6. Use a 4’ level, to level the posts. See Figure 30.
7. Shim as required and hammer anchors till they make contact with Baseplate. Do
not tighten anchors.
8. Check the distance from the top of the anchor to the floor. If this dimension
exceeds 2¼” due to floor slope, DO NOT use the supplied anchors. Longer
anchor must be used. See Figure 29.
Failure to ensure proper embedment of concrete anchors could
lead to floor damage or possible failure of concrete floor
resulting in injury or death.
9. Tighten all anchor bolts to a torque of 110 ft. lbs. Recheck and adjust the level of
post(s) and cable(s) if necessary.