34 of 76
7.12 LEVELING ON SAFETY LADDERS
1. Repeat the preceding steps until the lift is completely level when supported by the
cables.
2. Raise the lift so that the deck is supported by the cables and is not resting on the
safety ladders.
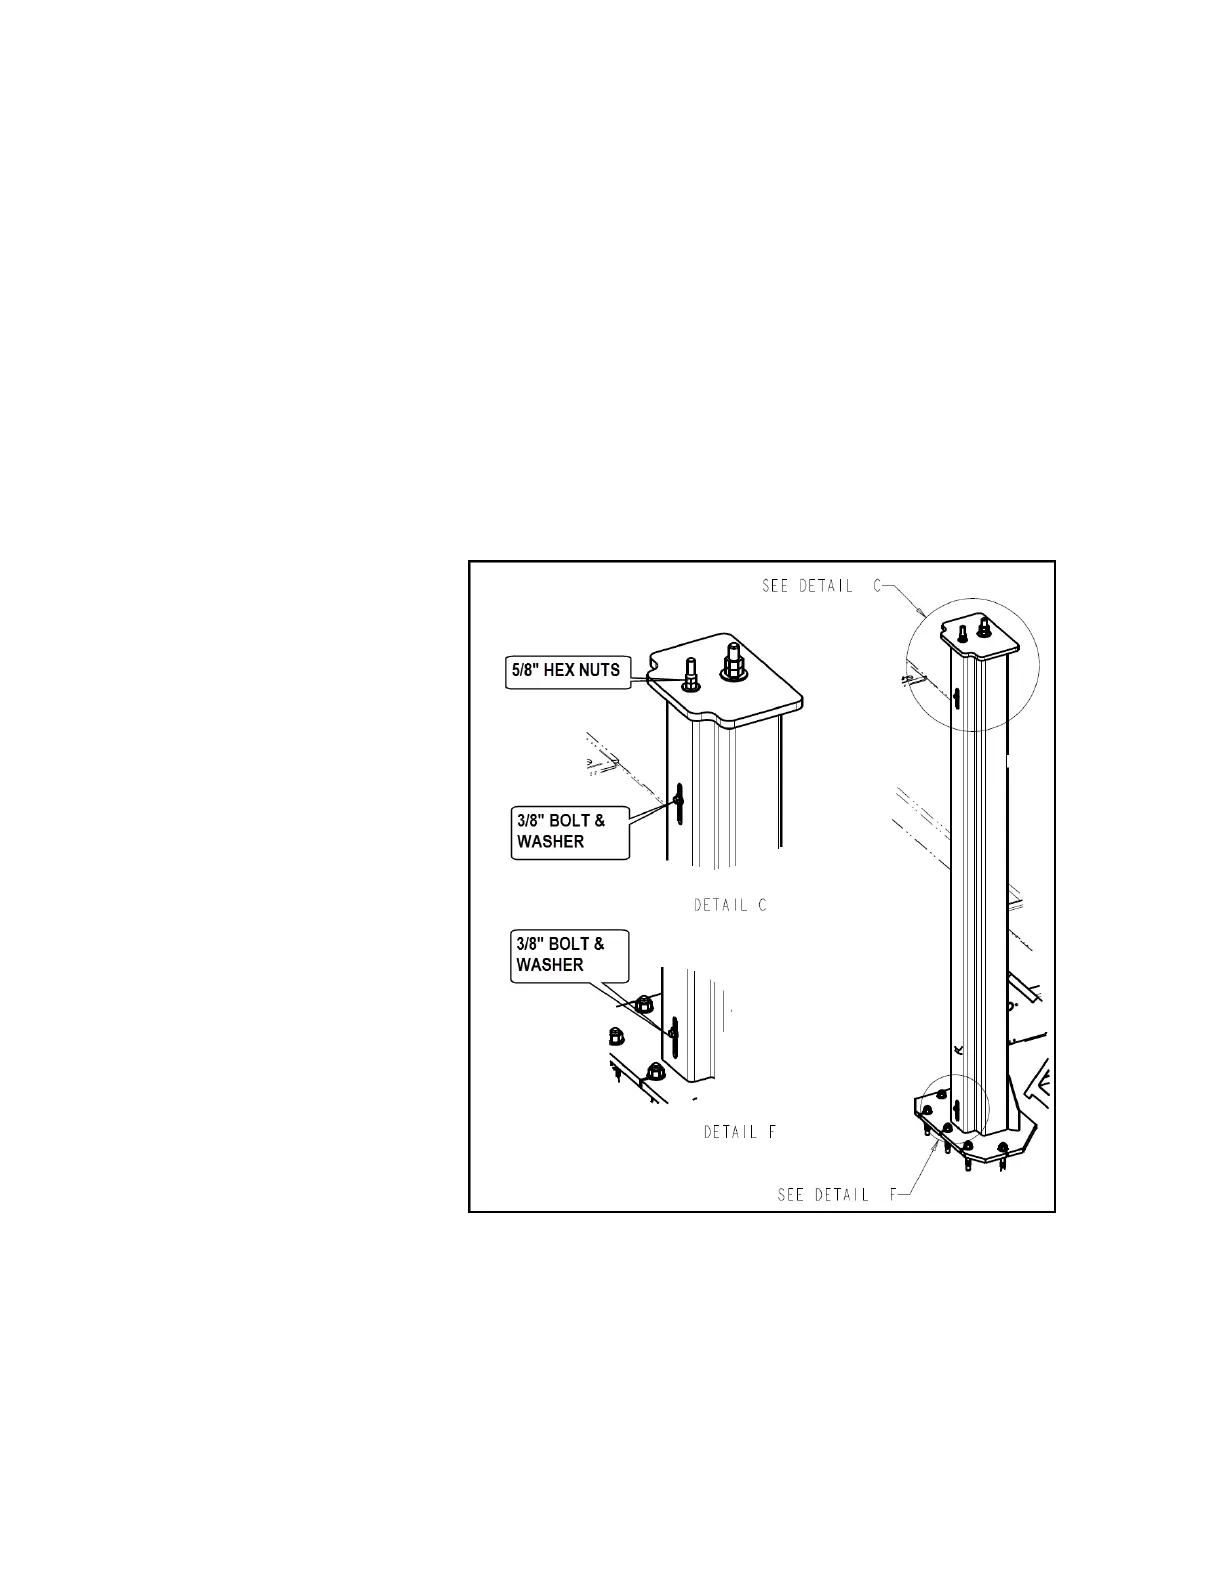
3. Loosen the 3/8"-16 UNC × 1" LG. hex bolts at the bottom and top of each safety
ladder (on the back side of the tower) and pull the safety ladders up until they come
into full contact with each safety shoe on the crossmember assemblies. See Figure
27.
4. When flush with the safety shoe, tighten the two (2) 5/8"-11 UNC hex nuts at the top
of each safety ladder and the 3/8"-16 UNC × 1"LG hex bolts at the bottom and top of
each safety ladder (on the back side of the tower).
Figure 27. Ladder Leveling
5. Lower the lift onto the
mechanical safety locks
and verify level as shown
in Figure 26. Make
adjustments to safety
ladder as necessary.
6. Raise the lift and check
that the ladders engage
evenly.
7. Raise the lift to its full
height and check for full
operating height of 72".
This measurement is
taken from the top of the
decks to the bottom of
the tower baseplate.
NOTE: If shims have been
used under the tower, this
dimension could be larger. If the floor is not even, this dimension may vary.
8. Cycle the lift several times to check proper operation of the cables, safety lock, air
locks, etc.
STOP IMMEDIATELY IF THE LIFT IS NOT OPERATING PROPERLY.
9. Make any necessary adjustments and check again for proper operation.