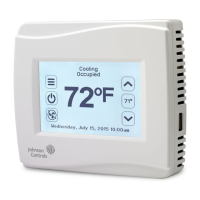
LCD Message Display
iSTAR Ultra Installation and Configuration Guide 8–3
Displaying Status Messages
Under normal conditions, set the LCD to display status messages, including:
iSTAR boot information
Date and time
Firmware version
Controller status information.
Messages typically display for approximately four seconds, separated by an interval of about
one second. In some instances, however, a message can display until it is cancelled or
terminated.
Setting LCD Status Message Display
You can display LCD general status messages for a controller by setting the SW3 rotary switch
to positions 0 (zero) or F. Setting the SW3 switch to 0 or F also controls the ICU Block feature,
preventing or allowing users from modifying the ICU configuration, as shown in Table 8-2.
When ICU Block is On (set SW3 to F) – the LCD displays general status messages;
however, fields in the ICU dialog box are unavailable and cannot be edited.
With ICU Block Off (set SW3 to 0) – the LCD displays general status messages, and users
can read, write, and update the ICU configuration.
8 Hardware Test (Onboard Ethernet 1 and 2, USB ports).
NOTES:
Ethernet tests require a good IP (Static or DHCP, and a good network link) and at least
one ICU running on the same subnet.
USB port tests require the thumb drive to be formatted to a FAT32 file format.
9 Not used.
A Erase DB files from flash. (Press SW2 GCM Hard reset, wait for LCD instructions, set rotary
switch back to 0 or F, press reset again.) This is similar to position D, but leaves the basic
Comm setup of IP, etc.
B MFG - ATE (Automated Test Equipment) (Software House only).
C Disable watchdog (Software House only).
D Restore Factory Default. Erase data base files and communication parameters from flash.
(Press SW7 Hard GCM reset, wait for LCD instructions, set rotary switch back to 0 or F, press
reset again.)
E Boot to backup image (Activate on Software House instruction only).
F ICU Block On (Read only) - Display General Messages.
Table 8-1: iSTAR Ultra Rotary Switch Functions, continued
Position Description
 Loading...