58
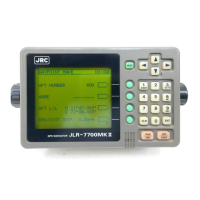
JLR-7700 MK2 GPS Navigator
Port
(010)
Fishery
(011)
Fishery
(012)
Waypoint
Route plan
Leg
Waypoint
Waypoint
Port
(013)
4.5.3 ROUTE SEQUENCE Screen
How to use the route plan
A route plan consists of multiple legs obtained by connecting multiple waypoints.
For example, let’s assume a case when navigating from a port ◯◯ (010) to a fishery △△ (011), to another
fishery □□ (012), and then to another port ×× (013).
The route plan consists of a series of leg obtained by connecting the multiple waypoints starting from the
port ◯◯ (010) to the fisheries (011 and 012) and then to the port ×× (013).
The equipment has a function to automatically switch the current leg to the next leg after the vessel has
entered the preset arrival alarm range if the vessel is being navigated based on the preset route plan. See the
item 4.5.3.3 “Setting the Arrival Alarm Range” and 4.5.3.4 “Switching between the Automatic and Manual Leg
Change”.
4.5.3.1 Setting the Route Plan
Press the key provided on the right hand side of the ROUTE SEQ to enter the starting waypoint
number 010 to set the route plan 010 to 013, for example.
Press the 0 , 1 , and 0 keys.
Next, enter the last waypoint number 013.
Press the 0 , 1 , 3 and ENT keys.
Memo
・ The route plan needs to be registered in the order of memory number under any circumstances;
however, the numbers for the starting and last waypoint do not need to be registered in the chronological
order. For example, the route plan can be set to navigate the vessel from the port ◯◯ (010) to the port
×× (013) and then back to the port ◯◯ (010) from the port ×× (013).
・ Enter XXX-XXX for the route plan if a given preset route plan needs to be canceled. The route plan can
also be erased by pressing the GOTO key on the NAVIGATE screen, COURSE DEVIATION IND.
screen, or PLOT screen to enter “XXX”.
XXX denotes the state ready for input and can be selected by pressing the CLR key.
4.5.3.2 Canceling the Route Plan
Any one of the following four methods can cancel the preset route plan. Note that “XXX” needs to be entered
as the waypoint to cancel the route plan, which is common to all the four methods. XXX denotes the state ready
for input and can be selected by pressing the CLR key. (See the item 4.3.1.4 “Canceling the Route”.) The
display of “_ _ _” (three hyphens) will appear in the column after the route plan has been canceled. Note that the
information related to the waypoint (bearing, distance, time, and deviations) is not displayed in other columns
since canceling the route plan means that no destination needs to be set.
(1) Enter “XXX - XXX” to the route plan on the ROUTE SEQUENCE screen.
(2) Press the GOTO key on the NAVIGATE screen to enter “XXX” as the waypoint.
(3) Press the GOTO key on the COURSE DEVIATION IND. screen to enter “XXX” as the waypoint.
(4) Press the GOTO key on the PLOT screen to enter “XXX” as the waypoint.

 Loading...