– 3 –
List 3
List 2
Model
Scale of DOWN position detecting plate
LU-2200N series A
DU-141H-7, DSC series, DSU series, LZH-1290-7 D
Model
Handwheel
Upper-position
marker dot
Lower-position
maker dot
Reverse-rotation
needle-up position
marker dot
DU-141H-7, DSC series, DSU series Red White -
LZH-1290-7 Between red and red White -
LU-2200N series Between F and E K B
3)Checkrstthatthesewing-machineconnectorshavebeenremoved.Then,placethesewingmachine
controller in the setting where the sewing machine stops with its needle down. Loosen setscrew
of
synchronizer
. To adjust so that the sewing machine stops with its needle down, turn the joint to align
engraved marker dot
on the handwheel which represents the lower position (i.e., the sewing machine
stops with its needle down) with engraved marker dot
on the machine arm.
The location of the engraved marker dots on the handwheel which represents the stop position of the
sewing machine differs with model. Refer to List 3 for the location of the marker dots of your sewing ma-
chine.
4) After adjusting DOWN stop, set the sewing machine controller to the needle UP position setting and con-
rmtheUPstopposition.WhenUPstoppositionisimproper,performneadjustmentwithUPposition
detecting plate
.
5) After adjusting the stop position, attach the cover of synchronizer
. Return the sewing machine control-
ler to the needle DOWN position setting.
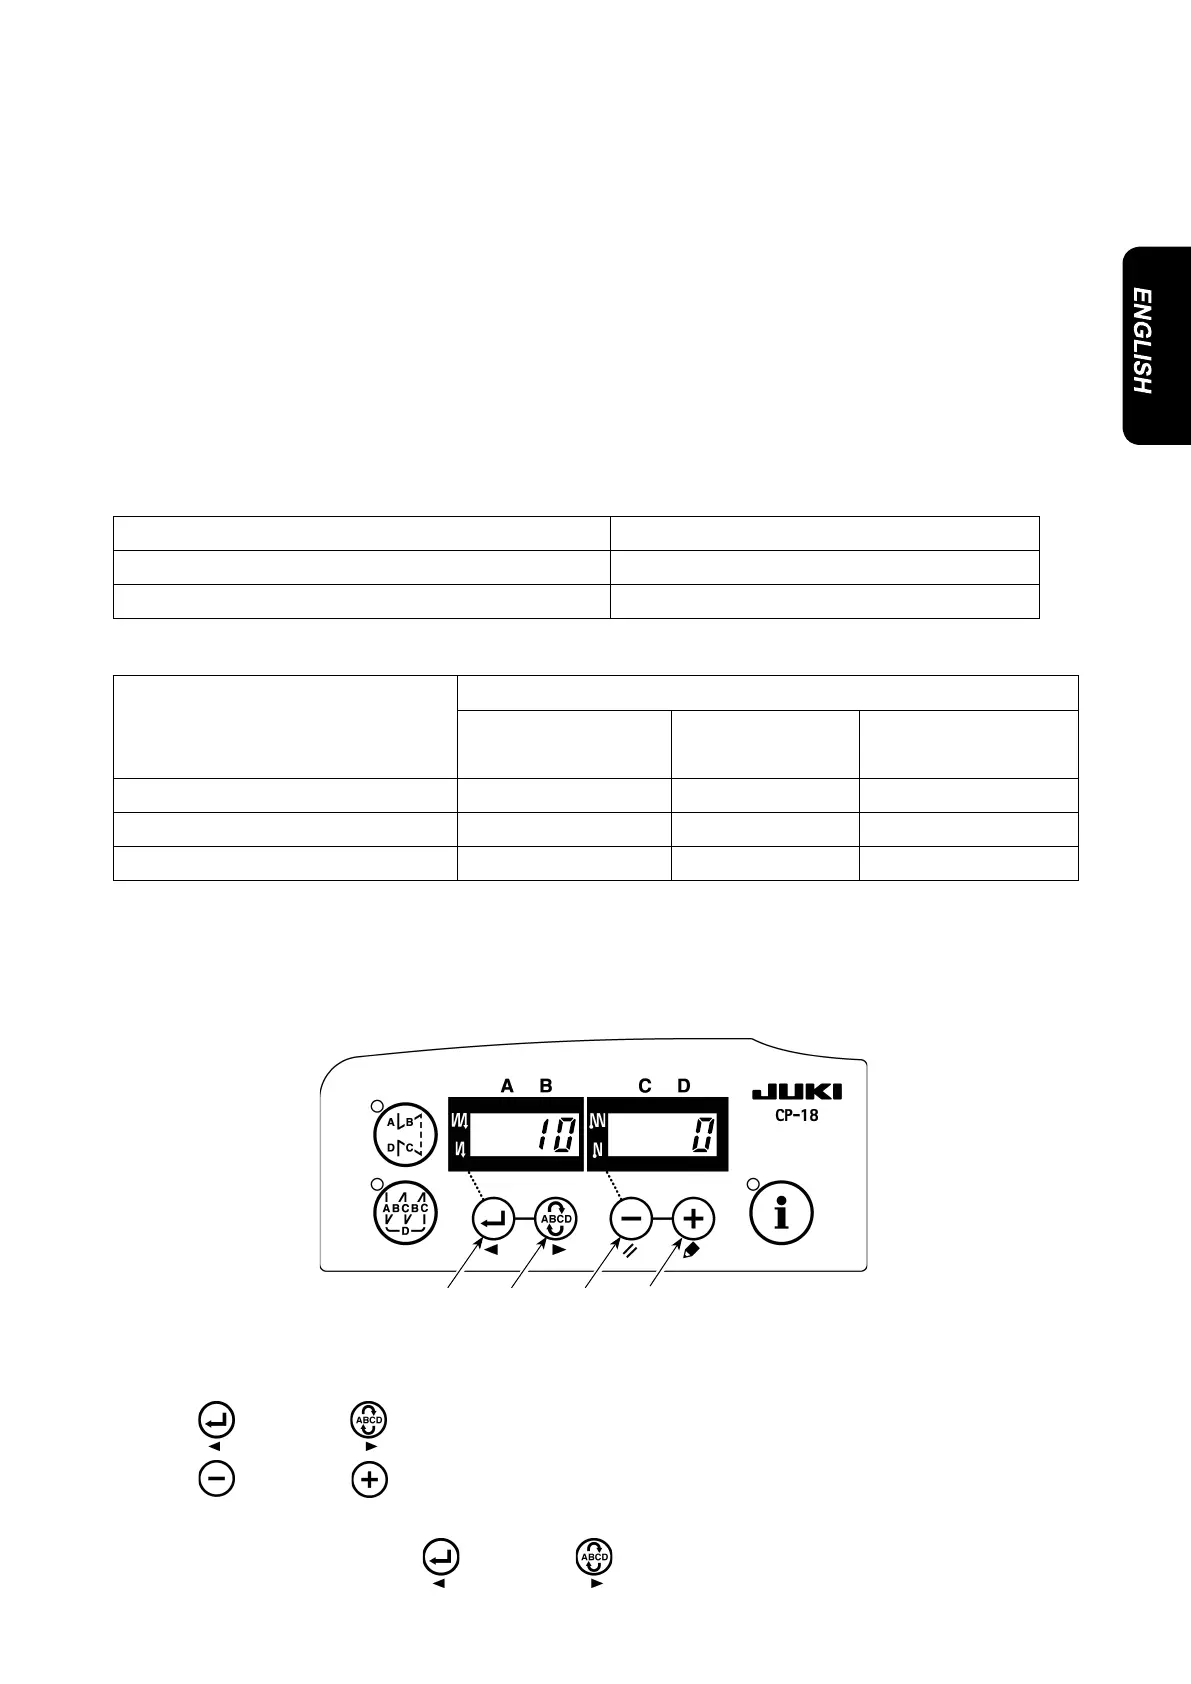
How to set the needle bar position when the machine is stopped
Make the setting by function No.10 (needle bar position setting when the machine is stopped).
1) Refer to "1. Setting of the mounted head, 1) How to enter into the function setting mode” and enter into
the function setting mode.
2) Press
switch
or switch
to call out function setting No.10.
3) Press
switch
or switch
and select "0” or "1”.
"0”….down position stop, "1”…..up position stop
4) After the setting is made, press
switch
or switch
, and turn the power OFF.
 Loading...


