– 12 –
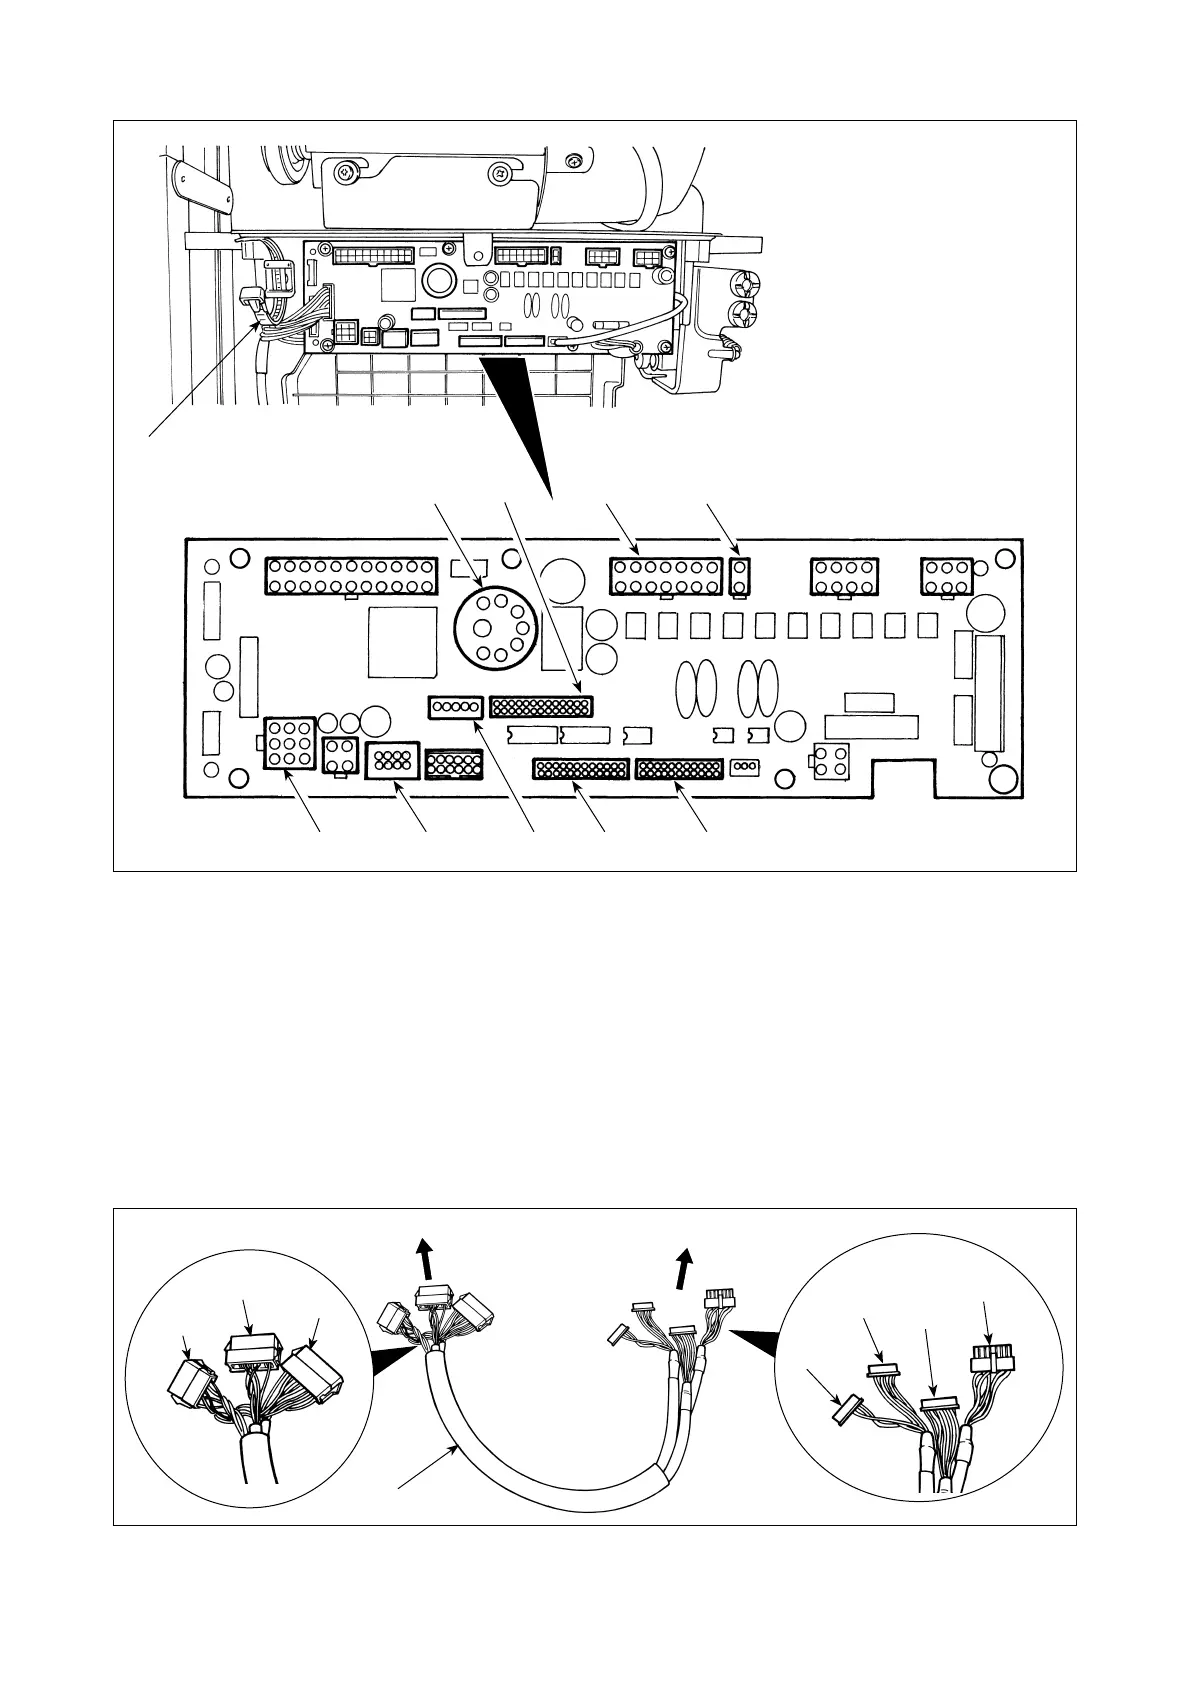
4) Connection of the cords
1) Connect the motor signal connector, needle bar synchronizer, operation panel and junction cord to the
sewing machine controller.
After inserting the connector, put all cords together with cable clip band
located on the side of the box.
CN44
(24P)
CN59
(26P)
CN58
(22P)
CN36
(14P)
Connect to the controller box side
Connect to the machine side
CN100
(12P)
CN101
(16P)
CN102
(18P)
CN30 Motor signal connector
CN33 Externally installed needle bar synchronizer (+5V version) : The needle bar position is detected.
CN36 Machine head solenoid: Provided with solenoids for thread trimming, reverse feed stitching, one-
touch type reverse feed switch.
CN37 Presser foot lifting solenoid (Only for the automatic presser foot lifter type)
CN38 Operation panel: Various kinds of sewing can be programmed. (For details of the operation panel
other than CP-18, refer to the Instruction Manual for the panel to be used.)
CN43 Built-in needle position synchronizer of the machine head (+12V version) : The needle bar position
is detected
CN44 Hand switch: Hand switch other than the touch-back switch.
CN58 Extended input connector (for the sensor input, etc.)
CN59 Extended output connector (for the solenoid valve output)
Relay cord
 Loading...


