List of Figures
Part 1 Access Point Overview and Components
Chapter 1 WLA532 Access Point Overview . . . . . . . . . . . . . . . . . . . . . . . . . . . . . . . . . . . . . . 3
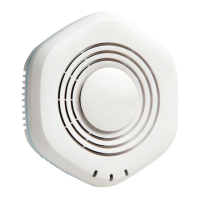
Figure 1: WLA532 Access Point . . . . . . . . . . . . . . . . . . . . . . . . . . . . . . . . . . . . . . . . . 3
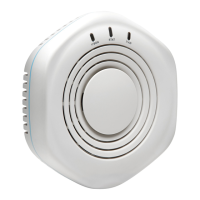
Figure 2: Status LEDs on WLA532 Access Points . . . . . . . . . . . . . . . . . . . . . . . . . . . 6
Part 3 Requirements and Certifications
Chapter 5 Requirements and Specifications . . . . . . . . . . . . . . . . . . . . . . . . . . . . . . . . . . . 25
Figure 3: Internal Antennas of the WLA532 Access Point . . . . . . . . . . . . . . . . . . . 26
Figure 4: Horizontal-Plane Radiation Pattern (Omnidirectional) for a
Ceiling-Mounted Access Point . . . . . . . . . . . . . . . . . . . . . . . . . . . . . . . . . . . . . 27
Figure 5: Vertical-Plane Radiation Pattern (5-Degree Downtilt) for a
Ceiling-Mounted Access Point . . . . . . . . . . . . . . . . . . . . . . . . . . . . . . . . . . . . . 27
Part 4 Installing, Connecting, and Verifying the Access Point
Chapter 7 Installing and Connecting the Access Point . . . . . . . . . . . . . . . . . . . . . . . . . . . 33
Figure 6: Opening the Ceiling Bracket Clips . . . . . . . . . . . . . . . . . . . . . . . . . . . . . . 34
Figure 7: Opening the Ceiling Bracket Snaps . . . . . . . . . . . . . . . . . . . . . . . . . . . . . . 34
Figure 8: Locking the Bracket Clips Over the Rail . . . . . . . . . . . . . . . . . . . . . . . . . . 35
Figure 9: Aligning the Access Point with the Ceiling Bracket . . . . . . . . . . . . . . . . . 35
Figure 10: Releasing the Access Point . . . . . . . . . . . . . . . . . . . . . . . . . . . . . . . . . . . 36
Figure 11: Locking the Access Point onto the Ceiling Tile . . . . . . . . . . . . . . . . . . . . 36
Figure 12: WLA-BRKT-WALL Kit (Wall-Mount Bracket Kit Hardware) . . . . . . . . . . 37
Figure 13: Wall-Mount Bracket Dimensions-–WLA-BRKT-WALL . . . . . . . . . . . . . 38
Figure 14: Use the Provided Template to Install Wall Anchors . . . . . . . . . . . . . . . . 39
Figure 15: Pull the Category 5 Cable Through the Wall Bracket . . . . . . . . . . . . . . . 40
Figure 16: Use M3 or 6-32 Wall Anchors to Secure the Bracket to Anchors . . . . . 40
Figure 17: Faceplate Secured to the Wall-Mount Bracket . . . . . . . . . . . . . . . . . . . . 41
Figure 18: Align the Access Point with the Bracket and Push Down . . . . . . . . . . . . 41
Figure 19: Release the Access Point . . . . . . . . . . . . . . . . . . . . . . . . . . . . . . . . . . . . . 42
Figure 20: Secure the Access Point with the Security Screw and Tool . . . . . . . . . 42
Figure 21: WLA-GNGWLBX-ADP-EU Kit (EU Faceplate Standard Hardware) . . . 43
Figure 22: EU Faceplate Dimensions . . . . . . . . . . . . . . . . . . . . . . . . . . . . . . . . . . . . 43
Figure 23: Dimensions of the Installed WLA532 Access Point on an EU-Standard
Faceplate . . . . . . . . . . . . . . . . . . . . . . . . . . . . . . . . . . . . . . . . . . . . . . . . . . . . . 44
Figure 24: WLA-GNGWLBX-ADP-NA Kit (NA Faceplate Standard Hardware) . . . 45
Figure 25: NA Wall-Mount Bracket Dimensions . . . . . . . . . . . . . . . . . . . . . . . . . . . 45
Figure 26: NA Standard Outlet Box . . . . . . . . . . . . . . . . . . . . . . . . . . . . . . . . . . . . . 46
Figure 27: NA Faceplate Secured to the Outlet Box . . . . . . . . . . . . . . . . . . . . . . . . 47
vCopyright © 2012, Juniper Networks, Inc.