Turning On the Unit
You can turn the power of this unit on/off by opening or closing the LCD
monitor.
1
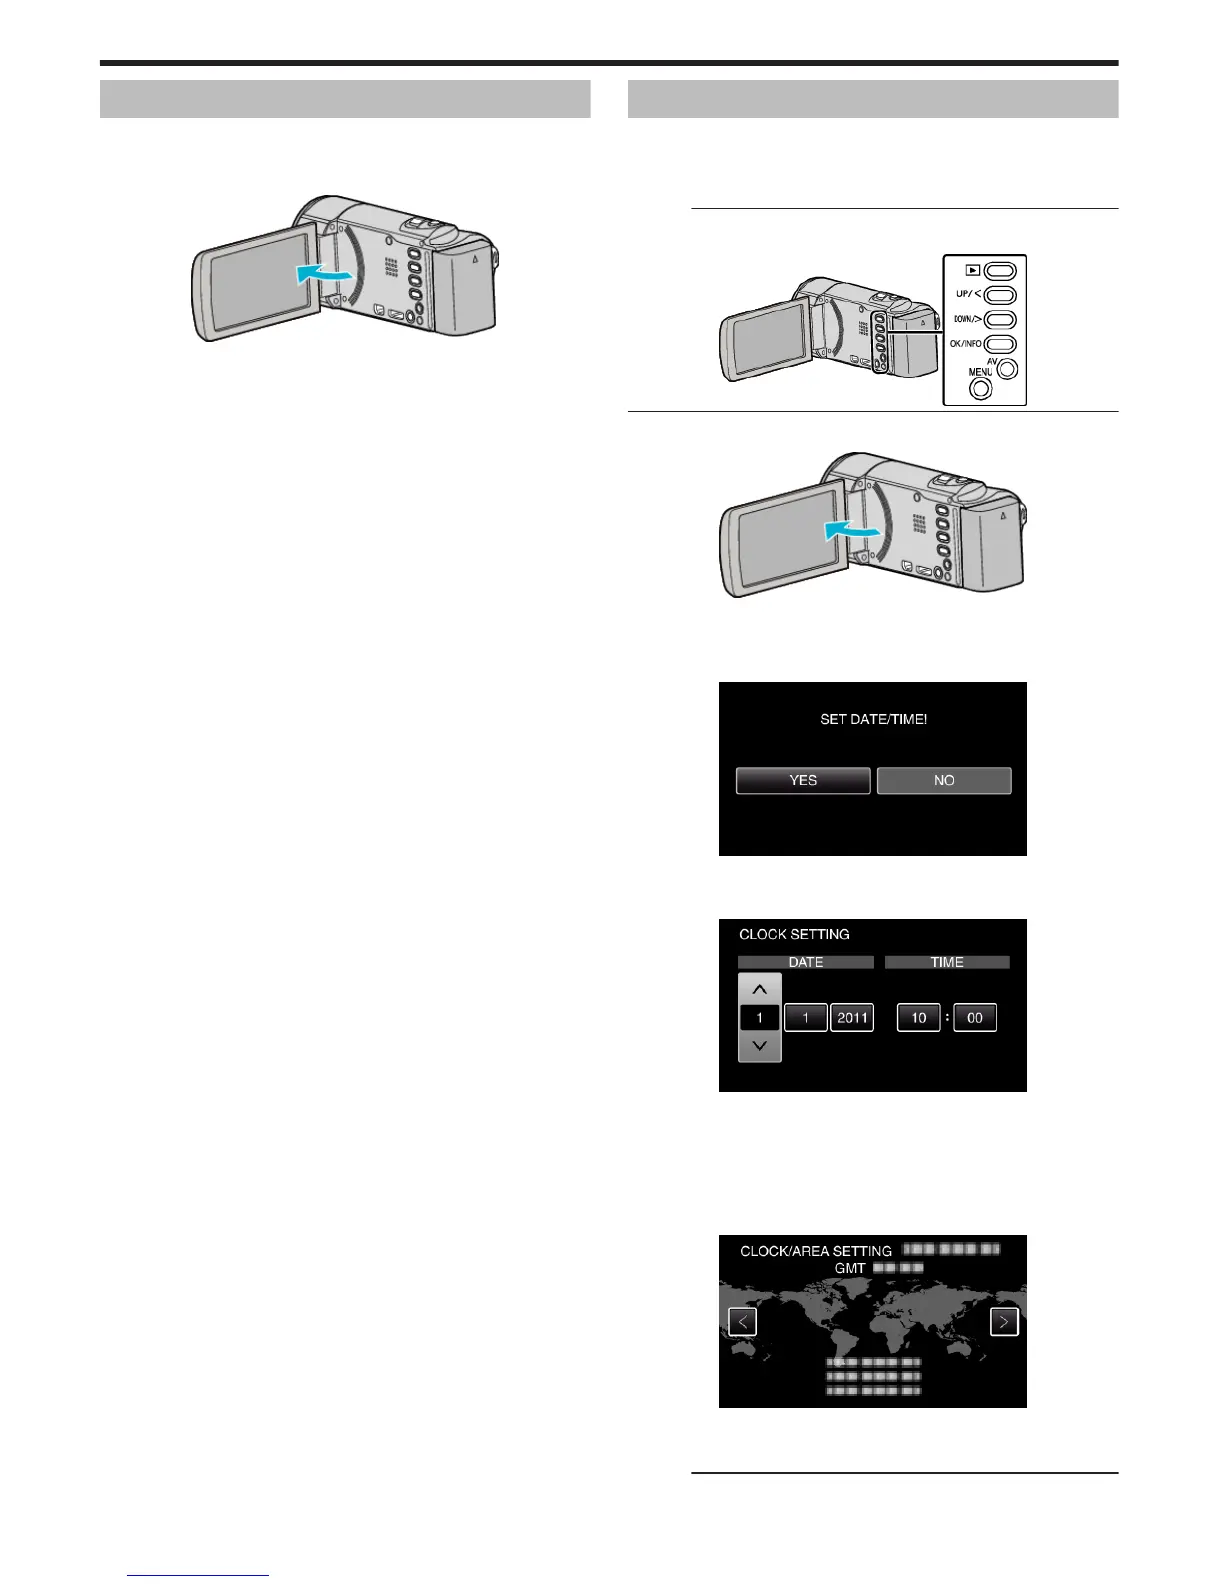
Open the LCD monitor.
.
0
The unit turns on.
0
When the LCD monitor is closed, the unit turns off.
Clock Setting
The “SET DATE/TIME!” screen appears when you turn on this unit for the
first time after purchase, when it has not been used for a long time, or when
the clock is not set yet.
Set the clock before recording.
Memo :
To select/move cursor towards up/left or down/right, press the button UP/<
or DOWN/>.
.
1
Open the LCD monitor.
.
0
The unit turns on.
0
When the LCD monitor is closed, the unit turns off.
2
Select “YES” and press OK when “SET DATE/TIME!” is displayed.
.
0
Press UP/< or DOWN/> to move the cursor.
3
Set the date and time.
.
0
Press UP/< or DOWN/> to adjust the setting value and press OK to
confirm it. The cursor moves to the next item.
0
Repeat this step to input the year, month, day, hour, and minute.
0
To cancel and return to the previous screen, press MENU.
4
Press UP/< or DOWN/> to select the region where you live and press
OK.
.
0
The city name and time difference are displayed.
0
To cancel and return to the previous screen, press MENU.
Memo :
0
The clock can be reset again later.
Getting Started
16

 Loading...