Memo :
0
The background image of the disc menu can be selected
(only for DVD-Video and BDMV).
0
The following sizes are recommended for still images.
BD : 1920 x 1080
DVD : 720 x 480 (SR-HD2700U)
720 x 576 (SR-HD2700E)
0
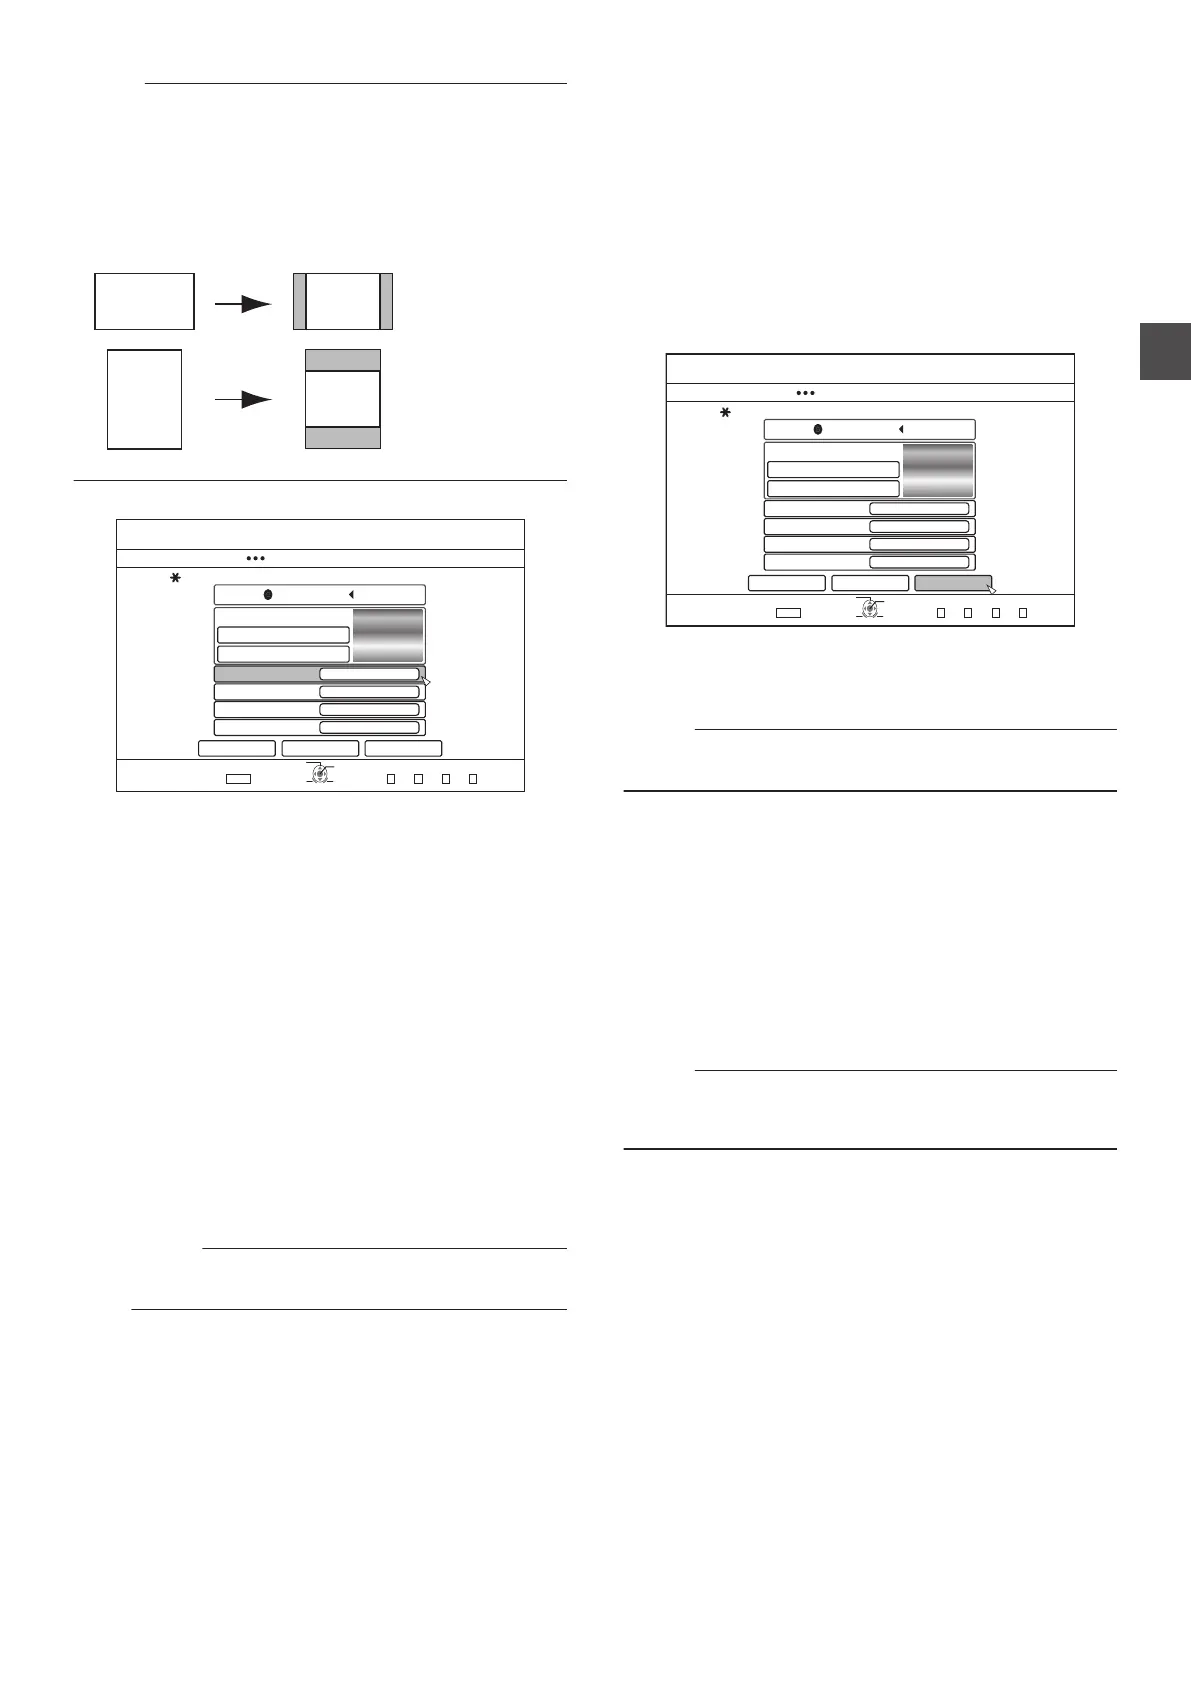
When a still image is used, the two vertical or horizontal edges
are trimmed based on the side that is smaller than the aspect
ratio of the video to be dubbed.
.
Example of Side-cut Still Image
7
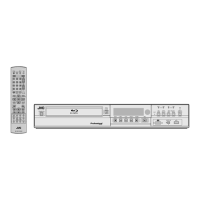
Set the operations for finalize
.
&+5%
126+10
1-
4'6740
*&&
&7$$+0)
56'2
5'.'%66*'&7$$+0)&'6#+.5
%*#0)'&+5%/'07$#%-)4170&
5'.'%6(41/&'(#7.6$#%-)4170&
5'.'%6(41/56+..2+%674'5
(+0#.+<'
10
4'0#/'&+5%
%#0%'. $#%- 56#46
':+6
5'.'%6
&7$$+0)
(+4562.#;
4'2'#6
010'
1((
0
Finalize will be performed after dubbing if
“ON” has been
set for “FINALIZE”.
If a BDMV disc is being dubbed, “OFF” cannot be set for
“FINALIZE”. And once the BDMV disc is dubbed the disc
cannot be rewritten.
0
If
a DVD-Video or BDMV disc is being dubbed, the settings
for “FIRST PLAY”, “REPEAT” and “RENAME DISC” can
be changed.
A
Select
“FIRST PLAY”, and select either “NONE”,
“TOP MENU” or “TITLE 1”
0
“NONE”
A finalized disc will not be automatically played
back when it is inserted into another device.
0
“TOP MENU
”
The disc menu will be displayed automatically
when a finalized disc is inserted into another
device.
0
“TITLE 1
”
The first title on a finalized disc will be played back
automatically when it is inserted into another
device.
Memo :
0
“NONE” cannot be selected for “FIRST PLAY
” for
BDMV.
B
Select “REPEAT
”, and choose either “OFF” or “ON”
0
“OFF
”
The disc will stop and the menu will be displayed
after all the titles are played back.
0
“ON”
Repeat playback from the first title will start
automatically after all the titles are played back.
C
Select “RENAME DISC
”, and press the [OK] button
0
A screen for entering the disc name appears.
Finalization is performed using the entered disc
name.
8
Select
“START”, and press the [OK] button
.
&+5%
126+10
1-
4'6740
*&&
&7$$+0)
56'2
5'.'%66*'&7$$+0)&'6#+.5
%*#0)'&+5%/'07$#%-)4170&
5'.'%6(41/&'(#7.6$#%-)4170&
5'.'%6(41/56+..2+%674'5
(+0#.+<'
10
4'0#/'&+5%
%#0%'. $#%- 56#46
':+6
5'.'%6
&7$$+0)
(+4562.#;
4'2'#6
010'
1((
0
Dubbing starts. A progress bar is displayed during the
dubbing process.
0
After dubbing is complete, a
“DUBBING IS
COMPLETED” message appears on the monitor.
Memo :
0
Choose
“BACK” from the menu and press the [OK] button to
return to the previous screen.
Cancel dubbing
To cancel dubbing before it starts
0
Select
“CANCEL” from the menu, and press the [OK] button
to cancel dubbing.
0
Alternatively, you can press the
[RETURN] button to cancel
dubbing and return to the initial screen.
To discontinue dubbing while it is in progress
0
Press the
[OPTION] button. Select “CANCEL” from the
Cancel Dubbing menu, and press the [OK] button. Data will
be written onto the disc up to the point where import is
cancelled.
Memo :
0
When
dubbing to a BD-R or DVD-R, the disc memory will be
reduced as data will still be written onto the disc up to the point
where dubbing is discontinued.
Dubbing a Title from the HDD to a BD/DVD
47
Dubbing/Importing