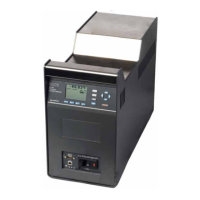
Chapter 5. General Operation
20 Kaye LTR -90 Operating Manual
5.2 Calibrating Sensors (cont.)
The rubber plugs can be used to cover unused holes.
Note: The rubber insulator must be used at all times. If not used Amphenol Advanced Sensors does not guarantee
specs. Also, at cold temperatures, there will be significant ice buildup, that will effect accuracy and uniformity
5.3 Insert Installation and Removal Procedure
WARNING! For safe operation and maintenance of the product, do not remove inserts when the
block temperature indicator is illuminated.
To install the insert:
1. Remove the rubber well insulation cap.
2. Stand the insert upright.
3. Lock the insert tool into the attachment holes.
4. Pick up the insert and slowly and carefully lower the insert into the well.
To remove the insert:
1. Let the Calibrator cool to below 50 °C and make sure the high temperature indicator is not illuminated.
2. Use the insert tool to lift the insert from the well. Put the insert on a metal or ceramic fiber surface or container
made to set hot materials on.
Note: If the insert has not been cleaned periodically (see “Clean the Insert” in Chapter 7), hard-water deposits can
form on the insert and make it difficult to remove. If the insert cannot be removed, try to remove the insert as
follows:
a. Put the Calibrator in a cold environment that is less than 21 °C.
b. Use the procedure in “Set the Temperature SETPOINT Manually” on page 29 to set the temperature to 100°C.
c. When the temperature is between 50°C and 70°C, use the insert tool to lift the insert from the well. Put the
insert on a metal or ceramic fiber surface or container made to set hot materials on.
d. If the insert cannot be removed, turn off the Calibrator and contact Amphenol Advanced Sensors Customer
Service (see Chapter 1).
3. Put the rubber well insulation cap back on the well.