Service 7
Keysight 85024A User’s and Service Guide 65
Replacement Procedure
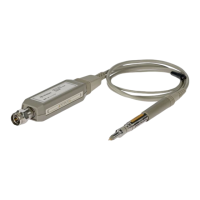
Replacing the probe tip
Tools required:
– 3/32 inch probe-tip nut driver (supplied with the probe)
– 10 mm open-end wrench
Refer to Figure 7-6.
1 Remove the nut with a 10 mm open-end wrench.
2 Remove the nose assembly, leaving the microcircuit attached to the body of
the probe.
3 Unscrew the damaged tip with the nut driver and discard the tip.
4 Screw in the new tip and lightly tighten it with a 3/32 inch nut driver.
(Over-tightening the tip can damage the nose assembly.)
5 Install the nose assembly and nut. Tighten the nut with a 10 mm open-end
wrench.
Use static precautions when performing the following procedures. The
amplifier microcircuit is very static sensitive and exposed during this
procedure.
Failure to remove the nose assembly prior to replacing the probe tip will
result in damage to the conductive elastomer on the new probe tip
assembly.
The tip on the 10:1 divider can be replaced without disassembling the divider.
Use the 3/32 inch probe tip driver.