7Service
66 Keysight 85024A User’s and Service Guide
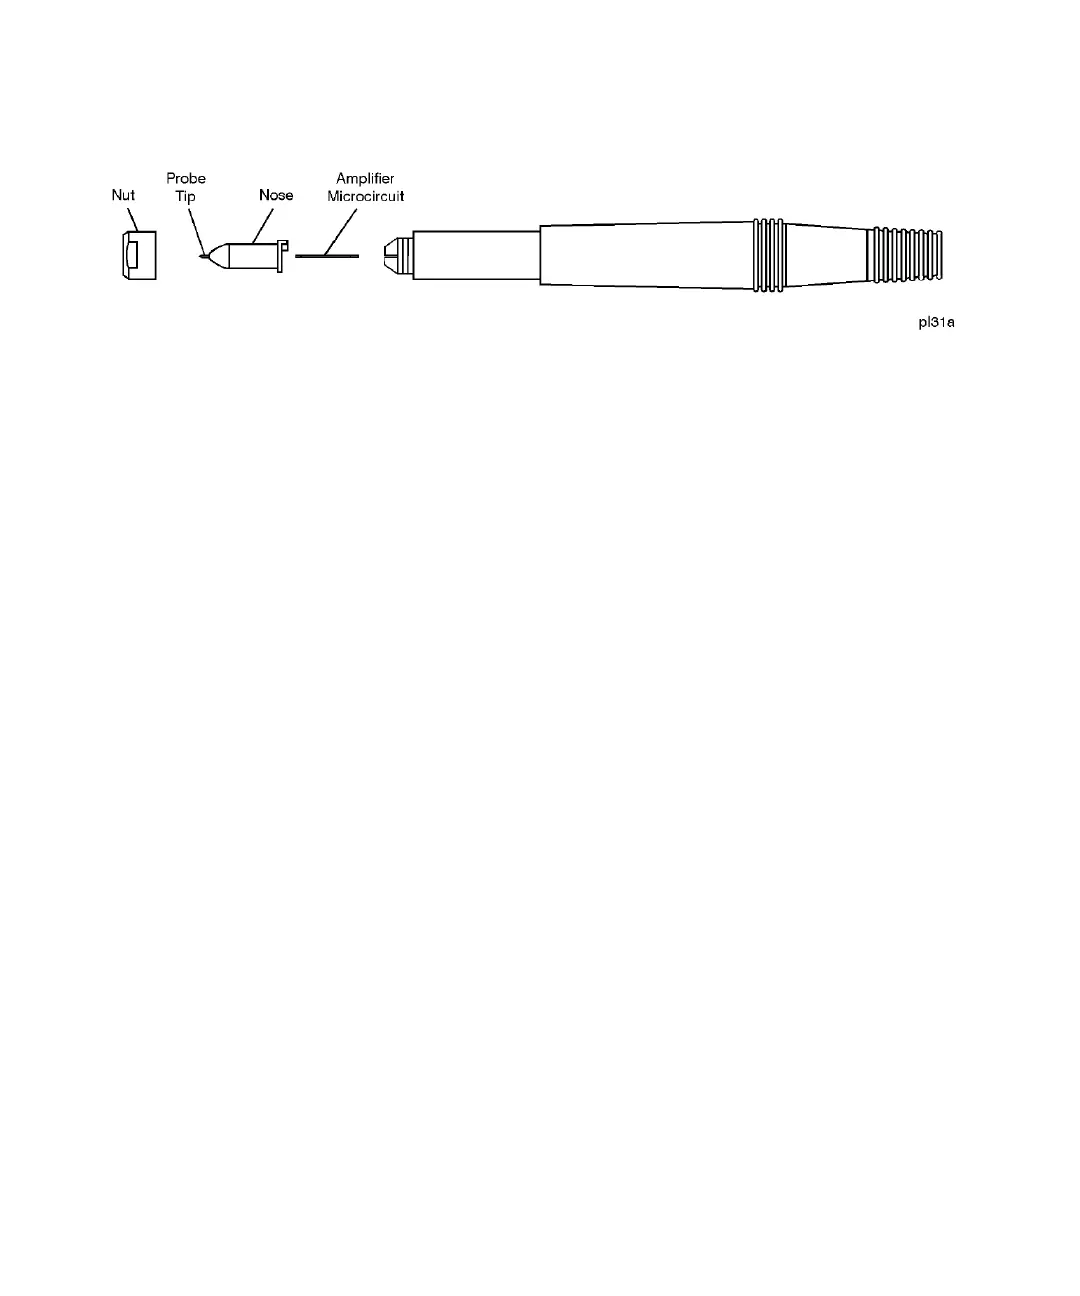
Figure 7-6 Probe end disassembly
Replacing the amplifier microcircuit
Tools required:
– 10 mm open-end wrench
– Small flatblade screwdriver
Refer to Figure 7-6.
1 Remove the nose assembly.
2 Remove the amplifier microcircuit.
Refer to Figure 7-7.
3 Remove and discard the spring clip and elastic conductive strip.
4 Place the new amplifier microcircuit into the probe heatsink. Place the new
elastic conductive strip in place, making sure the gold traces are facing down
and are aligned lengthwise with respect to the probe. Make sure the elastic
strip is flush with the front end of the heatsink. The screwdriver may be used to
move the strip.
5 Place the new spring clip over the elastic strip, flush with the front of the
heatsink. The beveled end of the clip should face away from the amplifier
microcircuit. The center of this U-shaped clip must press into the elastic
conductor. Insert one side of the clip into the small slot in the probe heatsink.
Press the other side of the clip down with the small screwdriver until it snaps
into the slot on the other side of the heatsink.
6 Replace the nose assembly and nut.