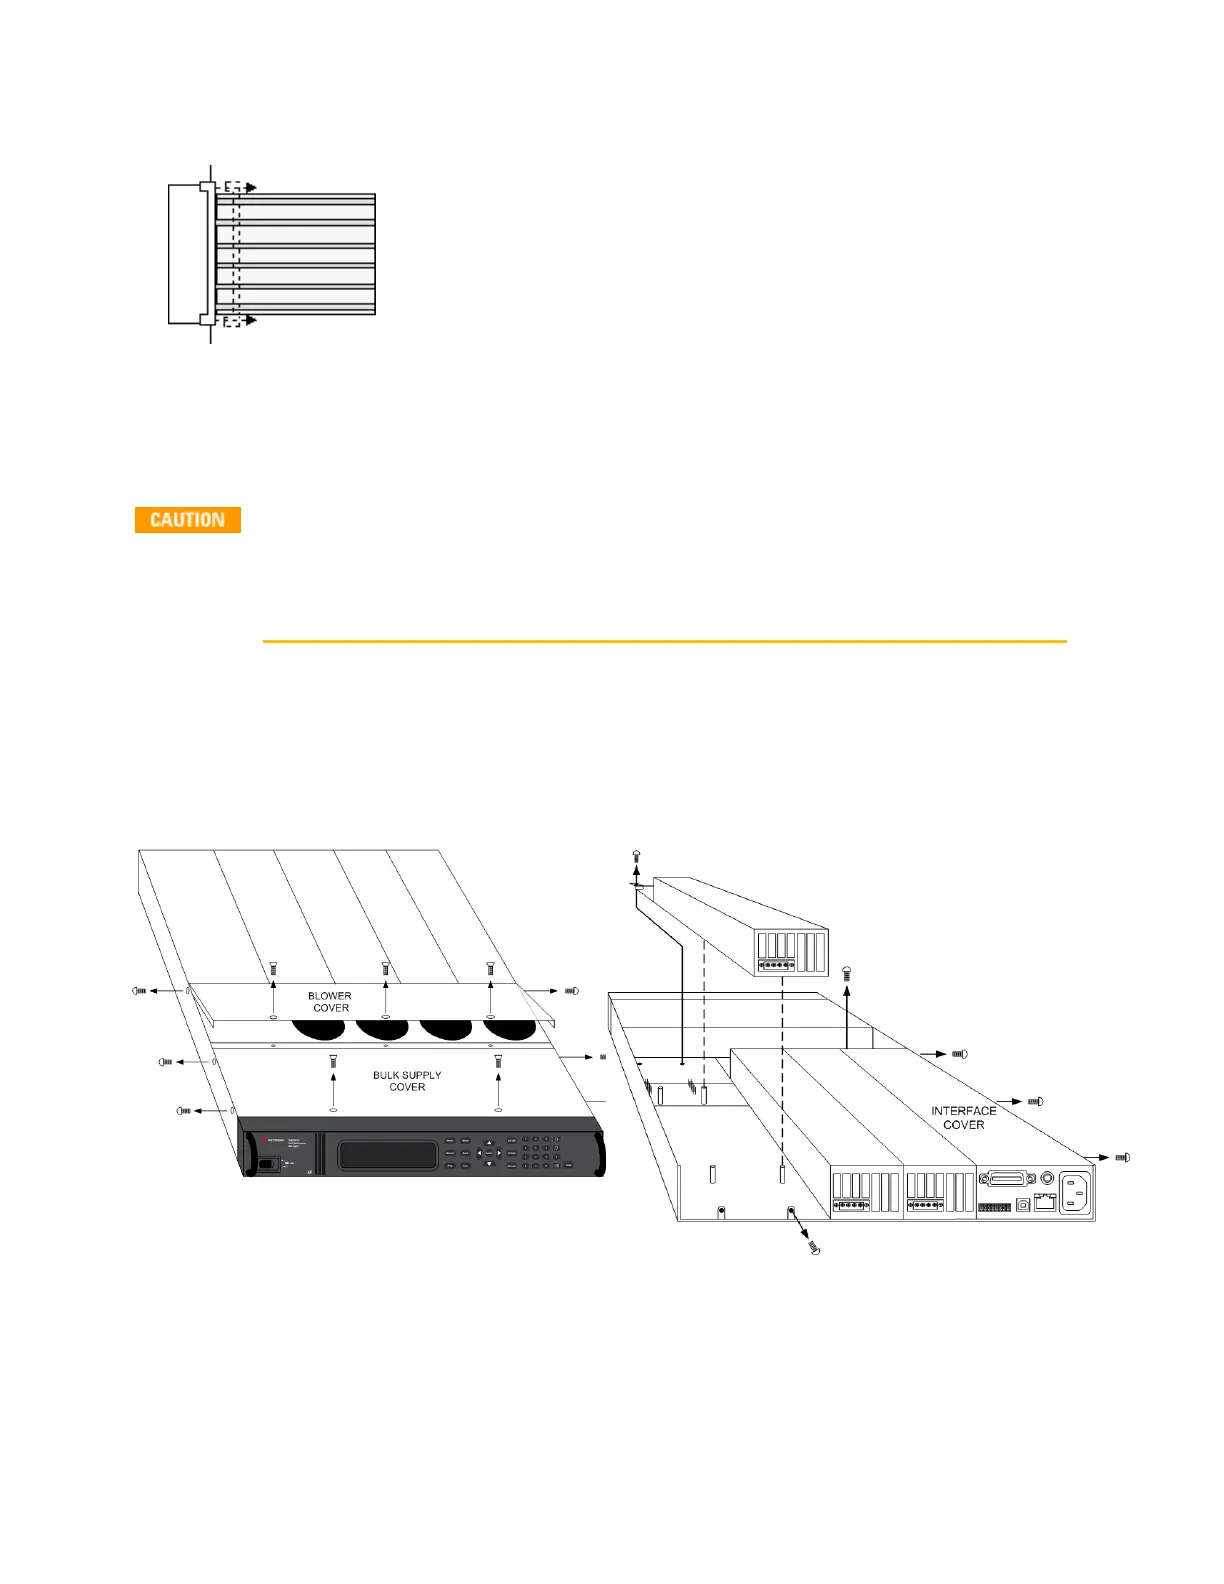
l Release the ribbon cable by pulling up on the locking tab as shown by the arrows in the next figure.
l To replace the cable, fully insert the cable into the connector; then push down on the locking tab
to secure the cable.
Removing/Installing Modules
Modules must be installed next to one another, starting with slot 1. Do not leave any
empty slots between modules, otherwise the power system will not operate. Any
remaining unused slots must have a filler module installed to ensure proper cooling.
Do not install filler modules between power modules
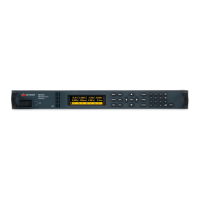
Step 1. Remove the blower cover. Remove three screws from the top of the cover and two screws on
the sides. Tilt the cover up and slide it out.
Step 2. To remove a module, first remove the two fastening screws at either end of the module. Grasp
the module at the ends (near the fan and the output connector), and lift it straight up out of the
mainframe.
Step 3. To install a module, align the module over the alignment pins, and push it down onto the
mainframe connector.
Step 4. Fasten the module to the mainframe. Install the two screws from the power module or filler
module at either end of the module. Because the RFI strips are applying upward pressure, continue
pushing down on the module until the screws are fully tightened.
Step 5. Replace the blower cover when finished.
Keysight N6700C Operating and Service Guide 411
7 Service and Maintenance