FlexStat 37 Operation Guide, Rev. R
Relay (Internal) Does Not Work
CAUTION
Relays are for Class-2 voltages (24 VAC) only.
Do not connect line voltage to the relays!
NOTE: Max. output current is 1Aforindividual
relays@24VAC/VDCoratotalof1.5A
perbankof3relays (relays 1–3, 4–6, and
7–9). Do not aach a device that draws
current that exceeds the corresponding
value. Relays are NO, SPST (Form “A”).
• Check current draw of load. Substitute an output
device that draws less current.
• Check that the output is on.
• See Wiring Issues on page 39.
• Restart the FlexStat.
• If Restore Factory has just been performed, see
the Note and Cautions in Restore Factory on
page 27.
• If the rmware has just been upgraded, rm-
ware for the wrong model type may have been
installed (e.g., BAC-1xx63 rmware accidentally
installed in a model BAC-1xx36). In the About
menu, ASV may simply read “CUSTOM” instead
of something like “BAC_1xx36 R1.1.0.5” as it
normally would have done. If so, repeat the rm-
ware upgrade and ensure that the correct type of
rmware is selected for the connected model.
NOTE: ASV in the About menu will also show
CUSTOM if any built-in Control Basic
program (1–5) is not running or has auto-
run disabled.
Upgrading Firmware Issues
NOTE: SeealsotheHTO-1103(KMD-5699)
FlexStatFirmwareFlashUpgradeKit
InstallationGuide,formoreinformation.
(The KMD-5699 product number was
changed to HTO-1103 in August 2010.)
CAUTION
To prevent damaging the FlexStat or programming
pod, be sure all the pins align properly with the
sockets!
To prevent damage, never plug the programming
pod into a FlexStat that is powered. Always attach
the power cable last.
To prevent the possibility of damage caused by
a ground loop between the FlexStat transformer
and the computer power supply, using an optically
isolated USB hub or using a laptop operating on
batteries only is recommended.
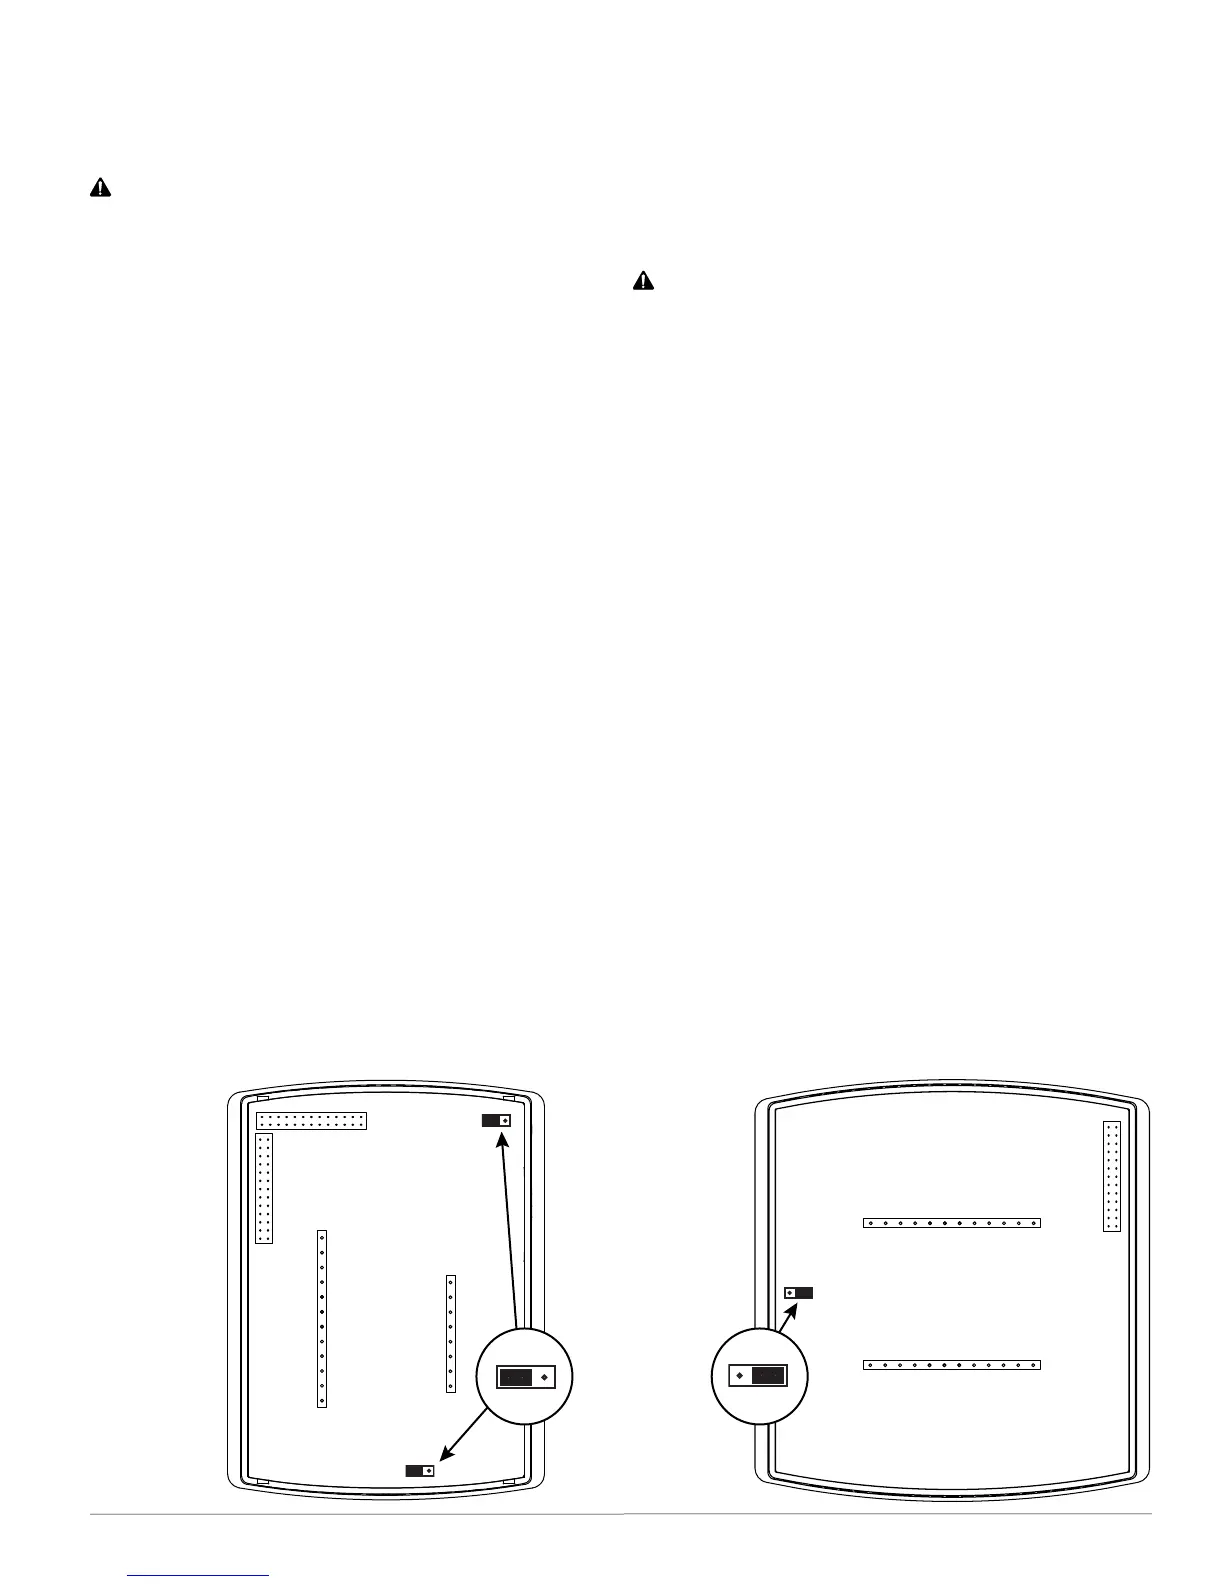
Firmware Upgrade Failures
• If a message appears that the operation has
failed, ensuretheWD(watchdog)jumper is
TEMPORARILYremovedduringtheupgrade
process! Reinstallthejumperonthetwopins
closesttothecenteroftheboardafterthe
upgradeprocessiscomplete! (See illustration
below.) After the update, a FlexStat with a miss-
ing jumper may seem to be operating correctly,
but it may lock up at a later time.
NOTE: To replace a lost WD jumper, use a standard
2.54 mm computer jumper sourced locally.
A KMC HPO-0063 jumper can also be
used if the nger tab is cut o to clear the
backplate.
Flash
Port
Backplate
Wiring
Connectors
Backplate Wiring
Connectors
Flash
Port
WD Jumper
Location
Varies by
Model and Is
Shown in
Normal
Operating
Position
(Toward
Center of
Board)—
REMOVE for
Firmware
Update
WD
Jumper
(BAC-12xxxx)
WD Jumper
(BAC-10000 Series)
WD Jumper
(BAC-13xxxx/14xxxx)