4-70 A-61635 December 2010
5. Enter the maximum size allowed for an e-mail attachment (in MB) in the
Max size of attachments field.
6. Check Interactive if you want a confirmation before the e-mail is sent.
NOTE: If you are using Outlook Express as your e-mail client, you must check
this option, otherwise the e-mail will not be sent.
7. Enter one or more e-mail addresses in the To field, cc field and bcc as
applicable. The e-mail address(es) must be enclosed in double quotes
(e.g., “John Smith@aol.com”).
8. If desired, click Setup to add predefined values to your e-mail recipient
names.
9. If you are including an attachment, you can enter a name of the attachment
and/or select predefined values by clicking Setup. The attachment name
must be enclosed in double quotes (e.g., “Patient file”).
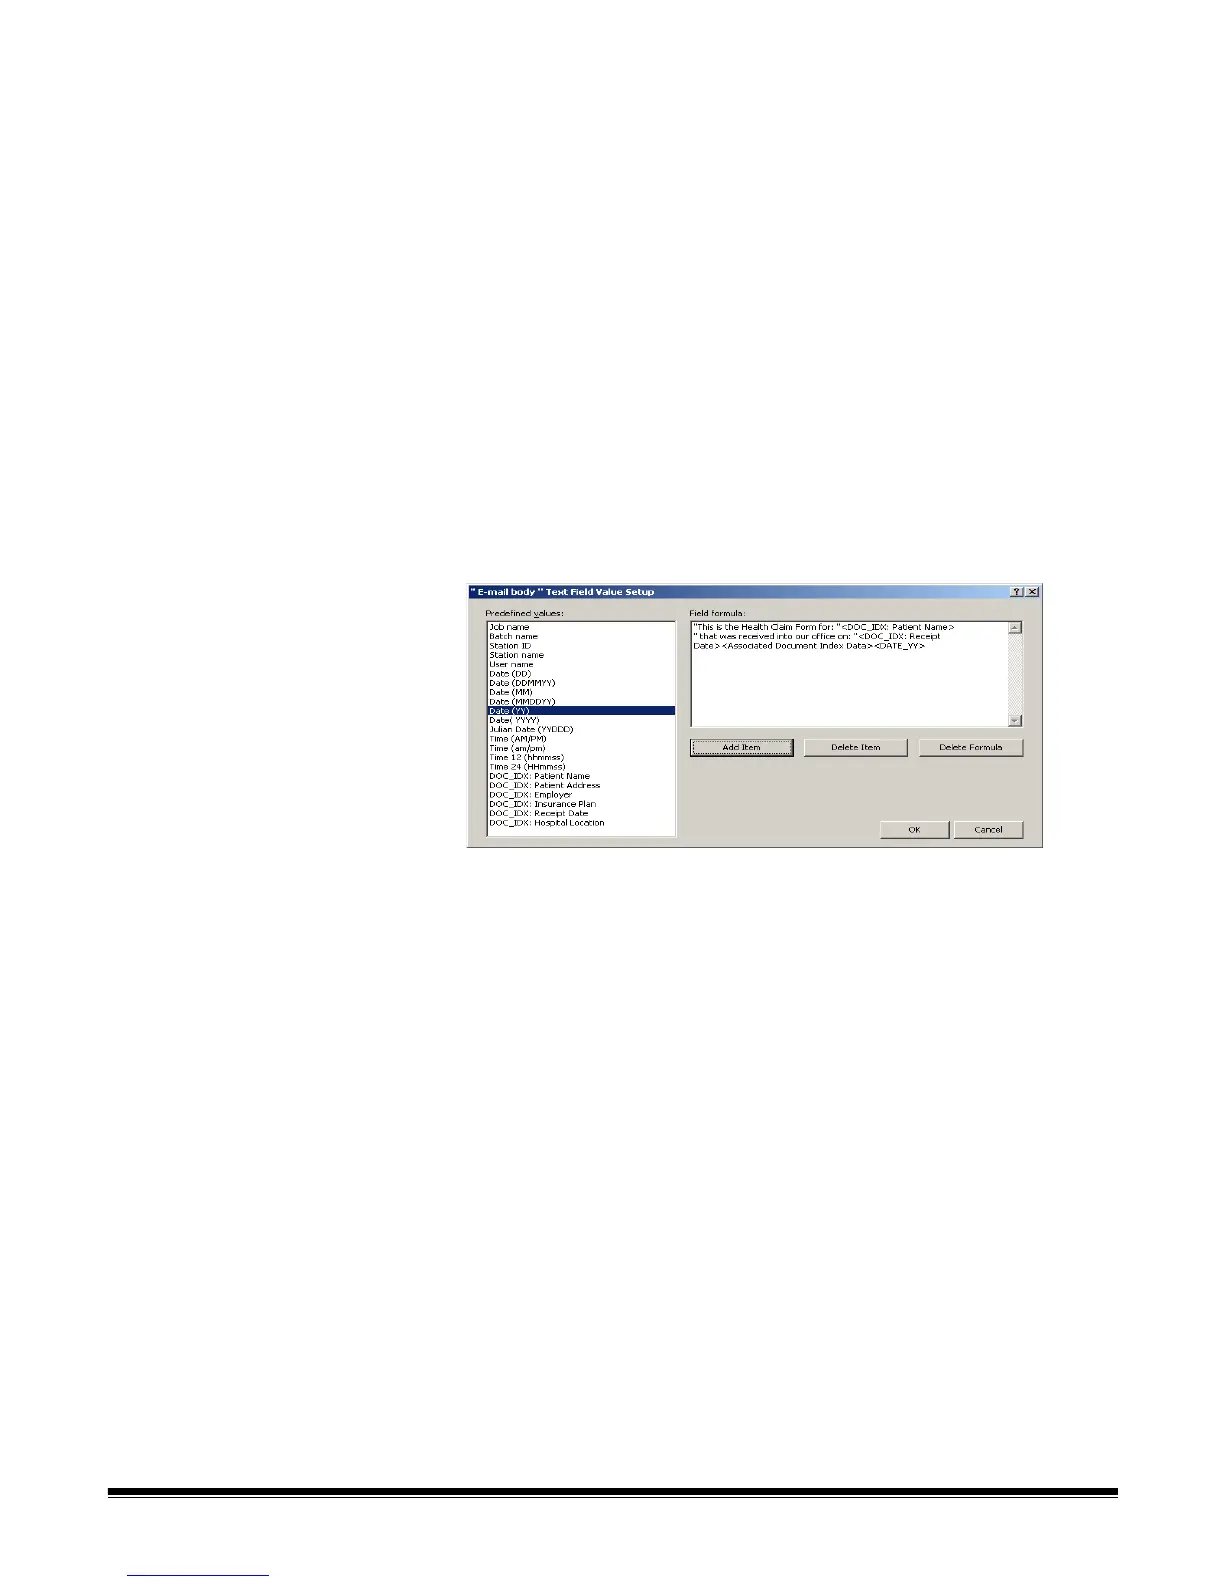
10. Check Include associated document index data if you want data to
automatically be displayed in the E-mail body field. To change this data,
click Setup and the E-mail Body Text Field Value Setup dialog box will be
displayed.
• Enter any text you want to appear in the e-mail. The information you
enter must be enclosed in double quotes (“ “). You can also select any
values from the Predefined values list and click Add Item.
• Click OK when finished.
11. Check Save images to disk if you want to save the output image files to
your hard drive in addition to sending the email output.
12. Click OK when finished.
NOTE: If you check Image under the E-mail option on the left side of the
Output tab, you can check destination options (TIFF, PDF, JPEG, etc.)
depending on your type of output.