English
14
Initial setup
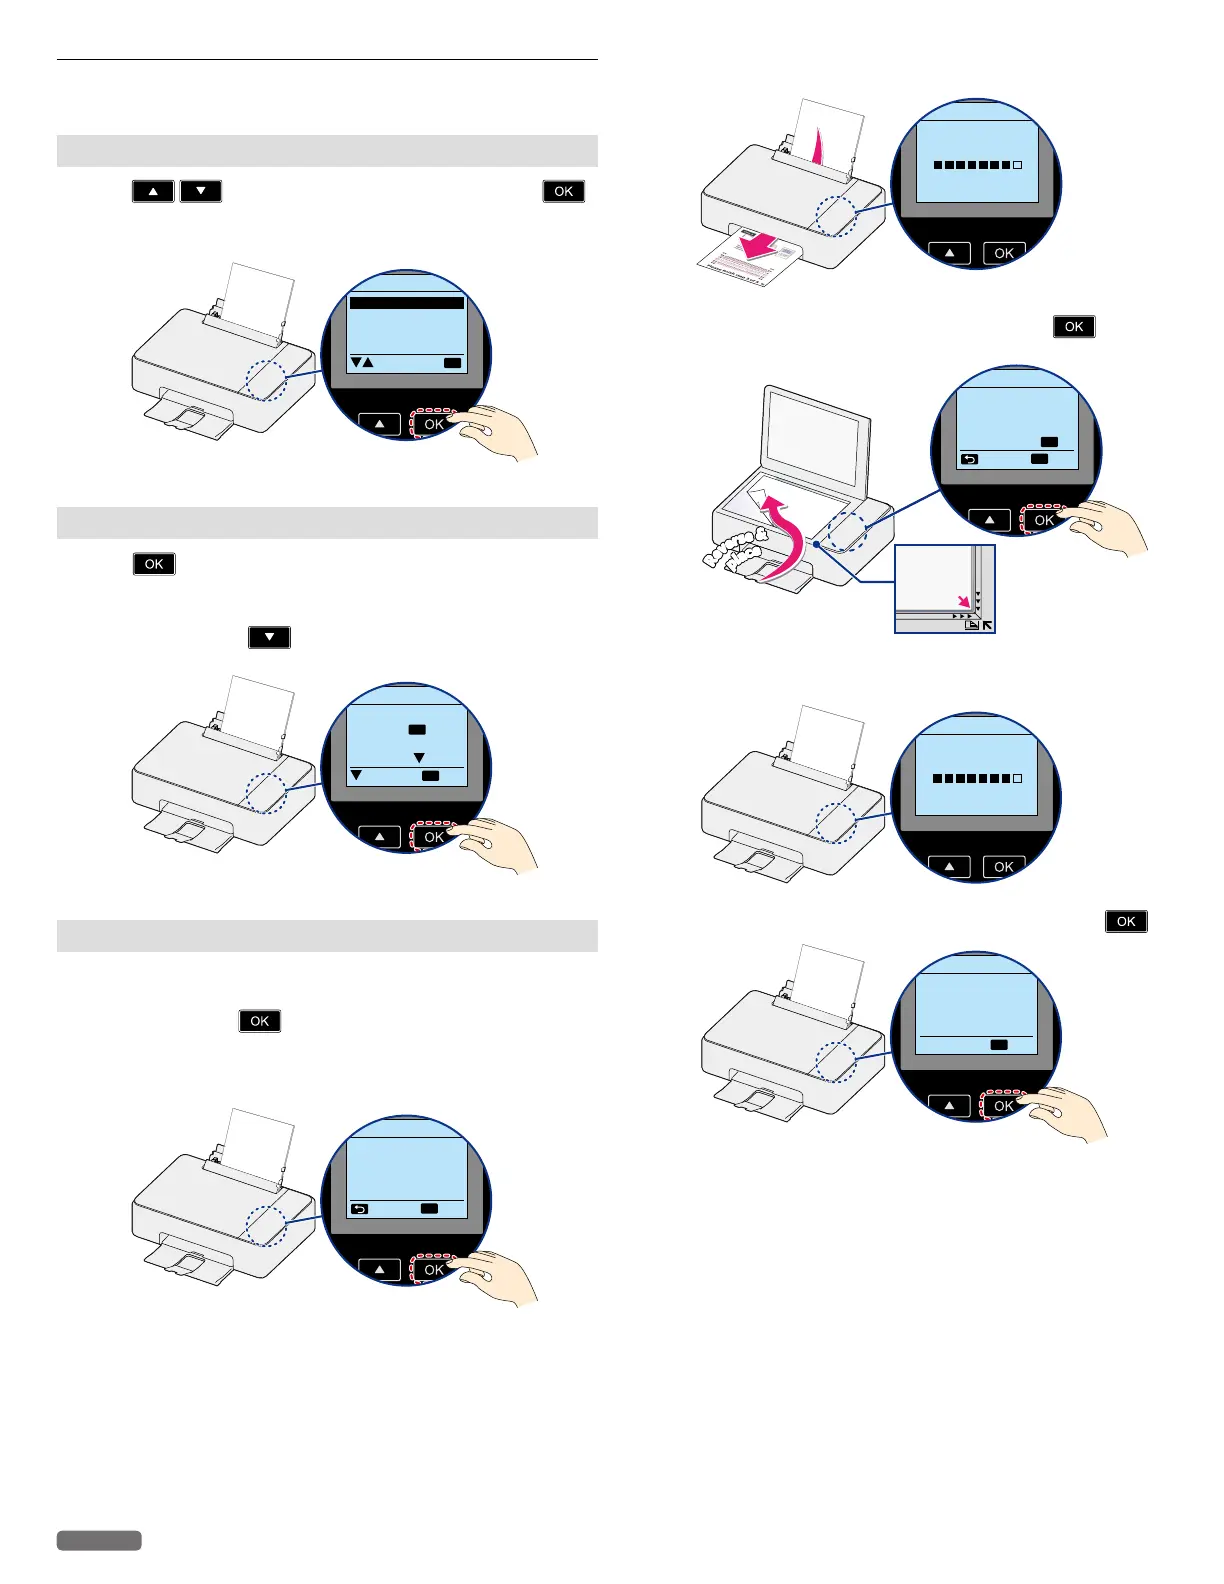
Select language
1 Press to select the desired language, then press .
• After initial setup, if you would like to change to another
language, refer to “Language” on page 48.
English
Español
Français
Language
OK
Select setup method
1 Press if you continue the Initial setup by using Menu display
on this unit.
• You can also setup by downloading APP with your smartphone/
tablet or PC. Press
to read the explanation how to setup
with other devices.
LCD setup,
Press .
Using PC/Mobile APP,
Detail [ ].
PC/APP Next
Initial setup
OK
OK
Cartridge setup
1 [Cartridge Setup] screen will be displayed on the Menu display.
Make sure plain Letter or A4 size paper is loaded in the paper
support, then press
.
• Make sure to use only blank paper (sold separately).
Never use colored or patterned paper when performing
[Cartridge Setup].
Step 1 of 5 :
For best results,
please proceed with
cartridges setup.
Cartridge Setup
OK
NextSkip
2 The unit will start printing the alignment pattern.
Step 2 of 5 :
Test Print
Cartridge Setup
3 Open the scanner lid and place the alignment pattern paper facing
down and reversed on the scanner glass, then press
after
closing the scanner lid.
R
e
v
e
r
s
e
&
R
e
v
e
r
s
e
&
p
l
a
c
e
p
l
a
c
e
Step 3 of 5 :
Place test print on
the lower right corner
of scanner. Press .
Cartridge Setup
OK
OK
ScanBack
4 The unit will start scanning the alignment pattern to set an
appropriate alignment on this unit.
Step 4 of 5 :
Test Scan
Cartridge Setup
5 When alignment is completed, [Cartridge Setup complete.]
message will be displayed on the Menu display, then press
.
Step 5 of 5 :
Cartridge Setup
complete.
Cartridge Setup
OK
Next
Continued on next page.