English
15
Wi-Fi Setup
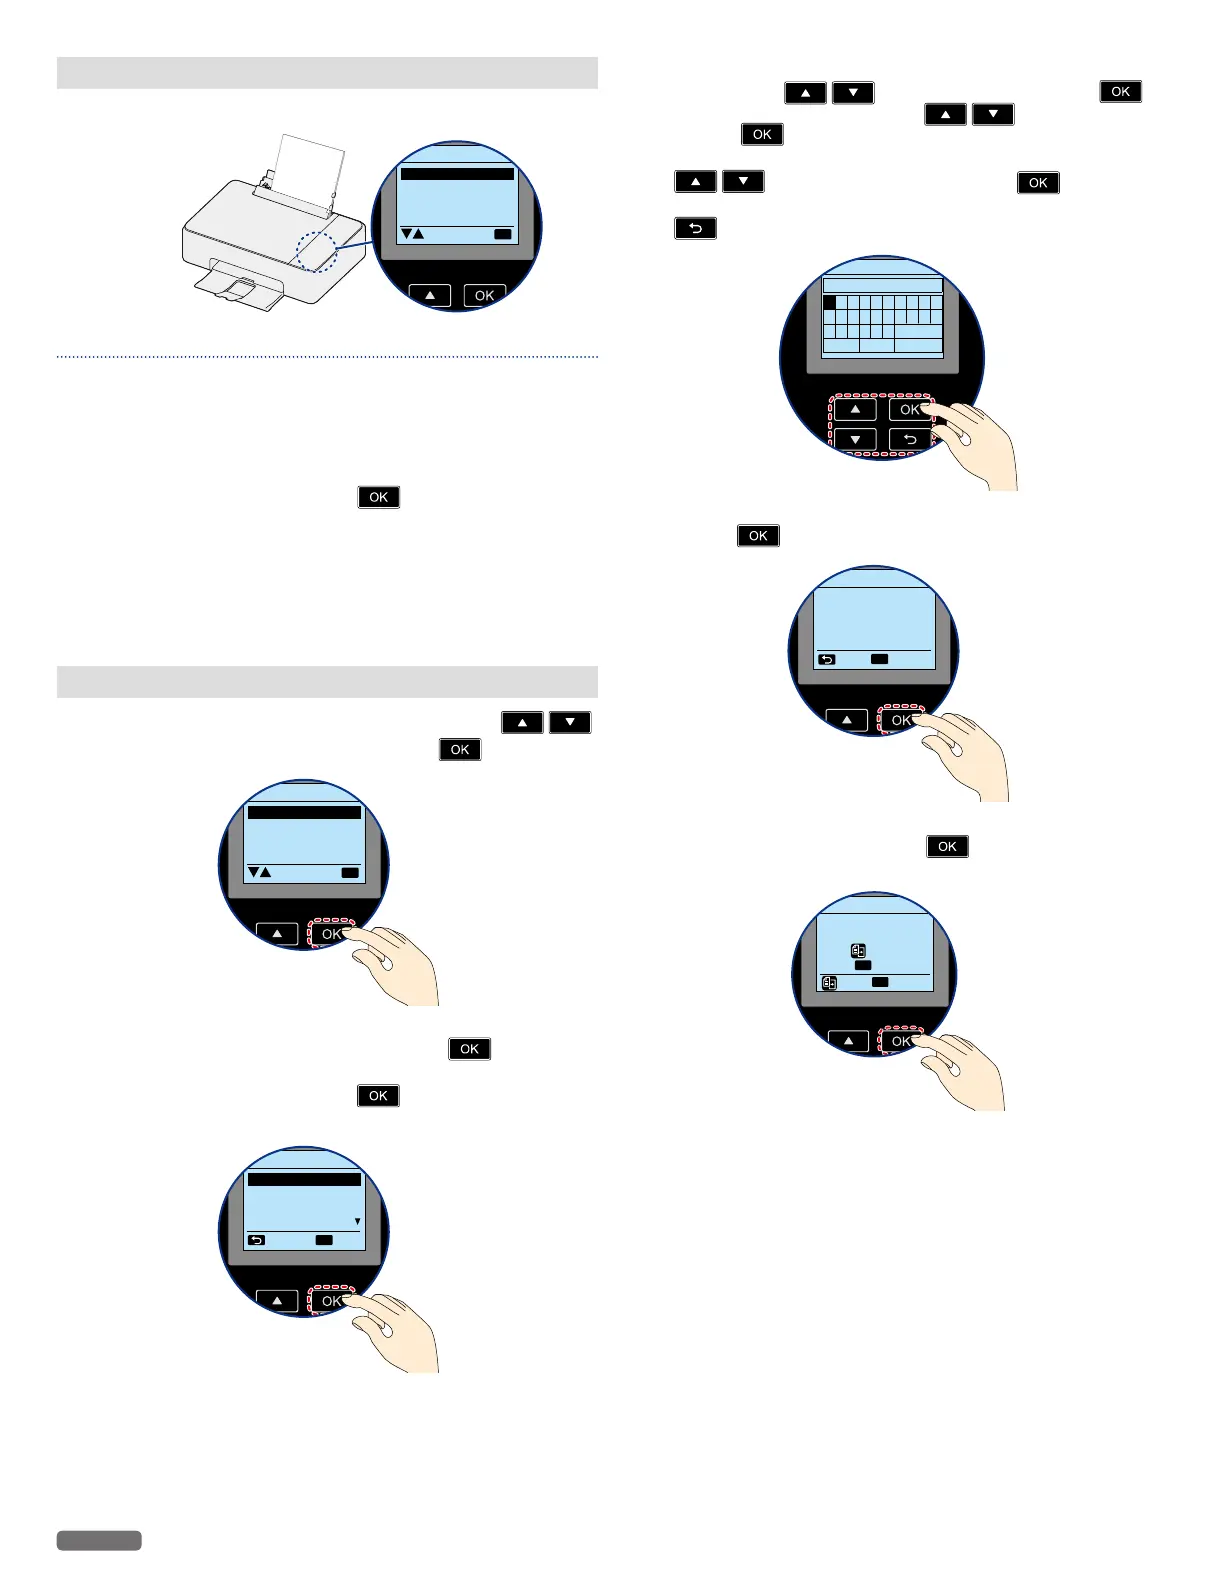
Select Wi-Fi Setup type and follow the Menu display instructions.
Network and Password
Wi-Fi Protected Setup
Skip
Wi-Fi Setup
OK
Note(s)❏
• By factory default, the DHCP function is set to On, and it
automatically assigns a local IP address to your printer.
• If you would like to set the IP address manually, refer to below.
– You can setup from the Menu Control Panel, then select the
[IP Address]. IP Address...Navigate to [Home > Setup > Wi-Fi
Setup > IP Address] and press
.
»»
Refer to “Wi-Fi Setup - IP Address” on page 47.
• When performing Network connection, make sure the unit is
not placed too far away from the Access Point/Router and the
Access Point/Router is powered On and its settings are correct.
If you need additional help on Network problems, visit our
website at www.kodakverite.com/support
Network and Password
1 If you would like to connect to a Router manually, press
to select [Network and Password], then press
.
Network and Password
Wi-Fi Protected Setup
Skip
Wi-Fi Setup
OK
2 SSID names of Routers are listed on the Menu display. Select the
SSID that you would like to connect, then press
.
• If the SSID that you would like to connect to is not displayed in
the list, select [other] then press
. Enter the SSID name,
then select the security type of the Router.
Router1
Router2
Router3
Router4
Network and Password
Back
OK
Select
3 [Enter Password] will appear on the Menu display, then enter
Password. Press
to select a letter, then press .
After entering the Password, press
to select [Done],
then press
.
• If you would like to use capital letters, numbers or symbols, press
to select [a/A/1/+], then press .
• When you enter a wrong letter, then you can erase it by pressing
.
Network and Password
Enter Password
a b c d e f g h i j
k l m n o p q r s t
u v w x y z a/A/1/+
< > Done
4 Confirm the SSID name and Password displayed on the Menu display,
then press
. The unit will start connecting to the Router.
SSID: Router1
Password:
Xaxswordxssdaa123456
Network and Password
OK
ContinueBack
5 [Connected to ...] message will appear on the Menu display when
the Connection is successful. Press
, then the Connection
setting is completed.
Connected to
Router1
Press to print report.
Press to continue.
Network and Password
OK
OK
Continue
Print
»»
Refer to “Wi-Fi Setup - Network and Password” on page 46.
Continued on next page.


 To Next Page