Chapter 5 CVS-841/851
Basic Operation
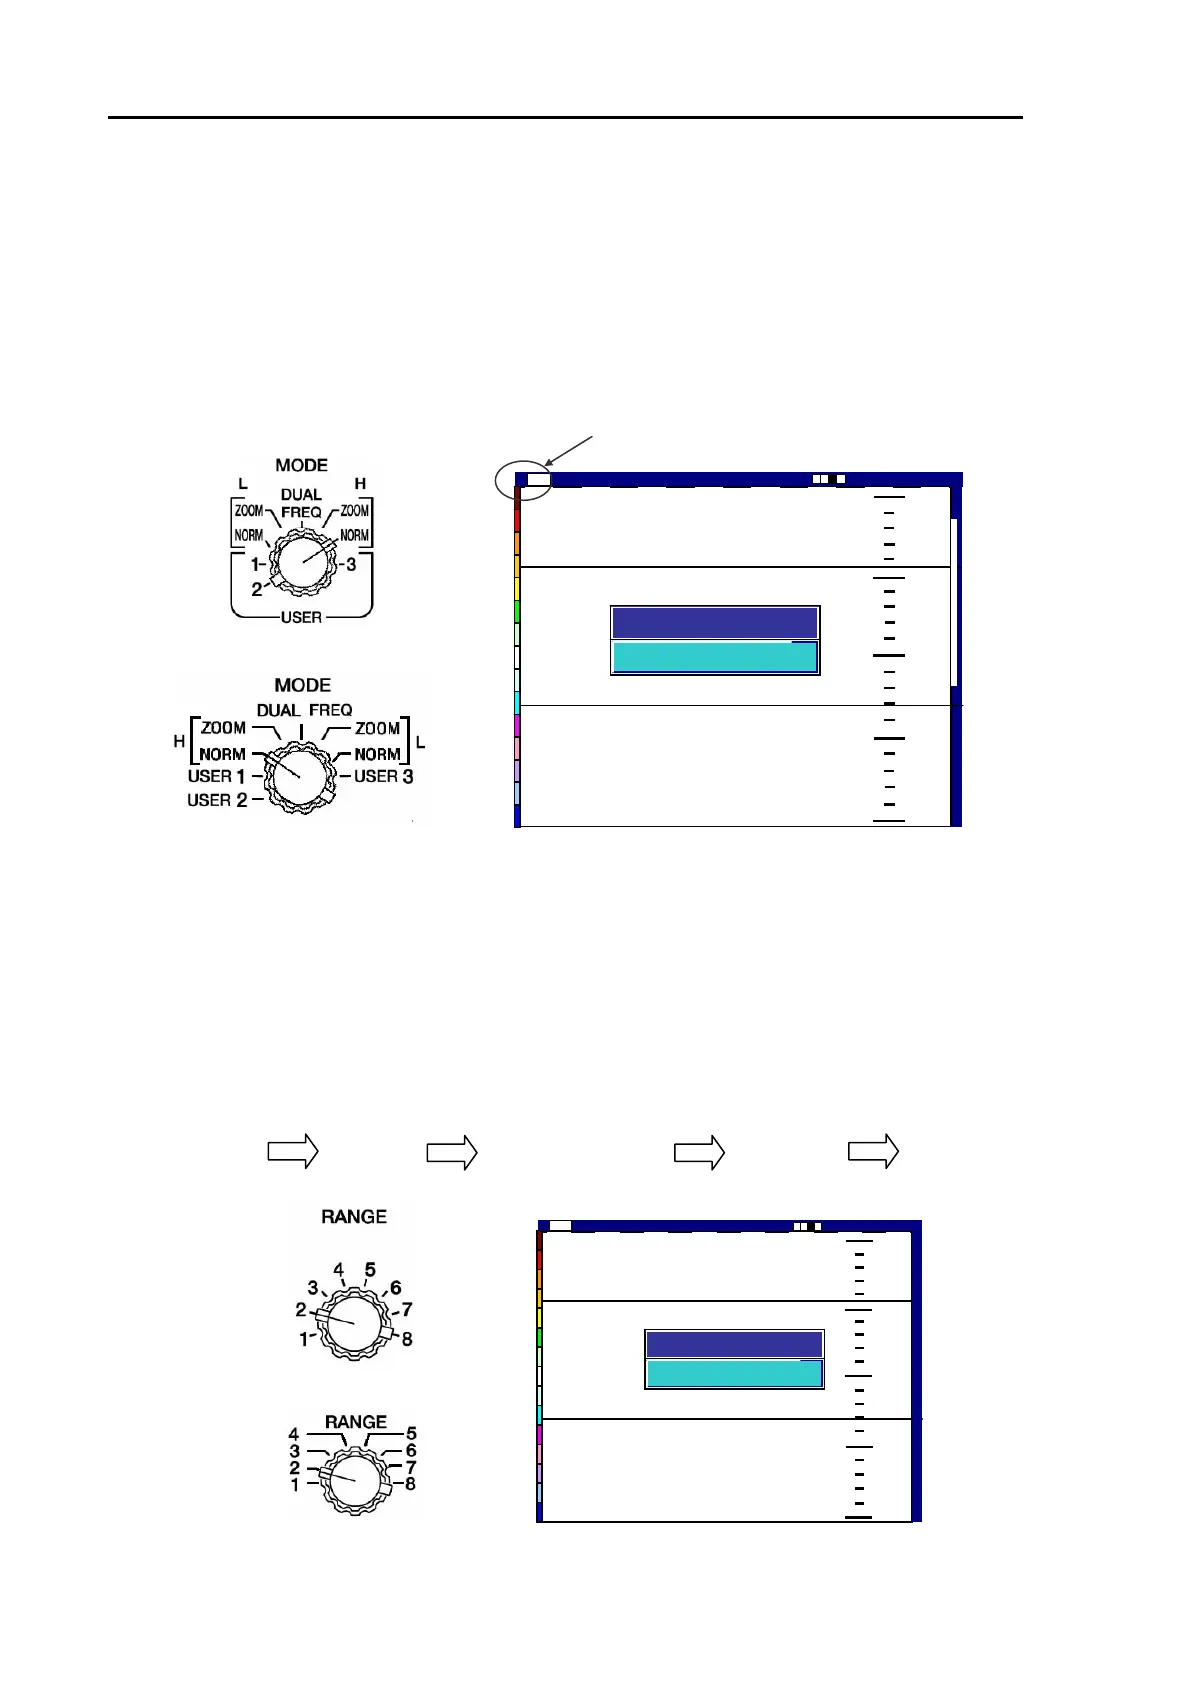
5.2.2 Selecting NORMAL image mode
(1) Turn the MODE switch to NORMAL (High or Low).
(2) The selected image display mode will be shown in the center of the screen and it disappears
automatically in approximately 5 seconds. The display mode will be shown in the upper left corner
of the screen, i.e. “H” for High Frequency and “L” for Low Frequency.
[CVS-841] Selected Frequency notation is shown here.
[CVS-851]
Figure 5.5 Setting and image of NORMAL image mode
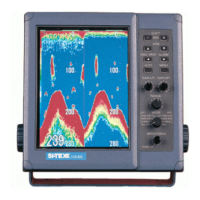
5.2.3 Selecting the depth range
(1) Turn the RANGE switch to select the desired depth range, which is shown on the screen for
approximately 5 seconds.
NOTE: Available depth range can be registered to each range number, which is printed around the
range scale selector switch. To do so, enter the menu in the following order: For detail, refer to Para.
7.1 “Depth Range registration”.
MENU SYSTEM Depth Range Preset SW1 – SW8 ENTER
[CVS-841]
[CVS-851]
43
130
0
100
150
200
High
2001/05/23(Wed)
Image Speed 1/1
14:22:56
Shift
000 0
Depth Range
200
Figure 5.6 Selecting a depth range and its depth display
43
130
0
50
100
1
1
5
5
0
0
2
2
0
0
0
0
High
2001/05/23(Wed)
Image Speed 1/1
14:22:56
Shift
000 0
H Normal
Image Mode
5-4 93132682-00