11.15
Section 11
Reassembly
11
Heads with Separate Pivots/Rocker Arms–
Figure 11-37
• Non-Adjustable Valve Lash Configuration
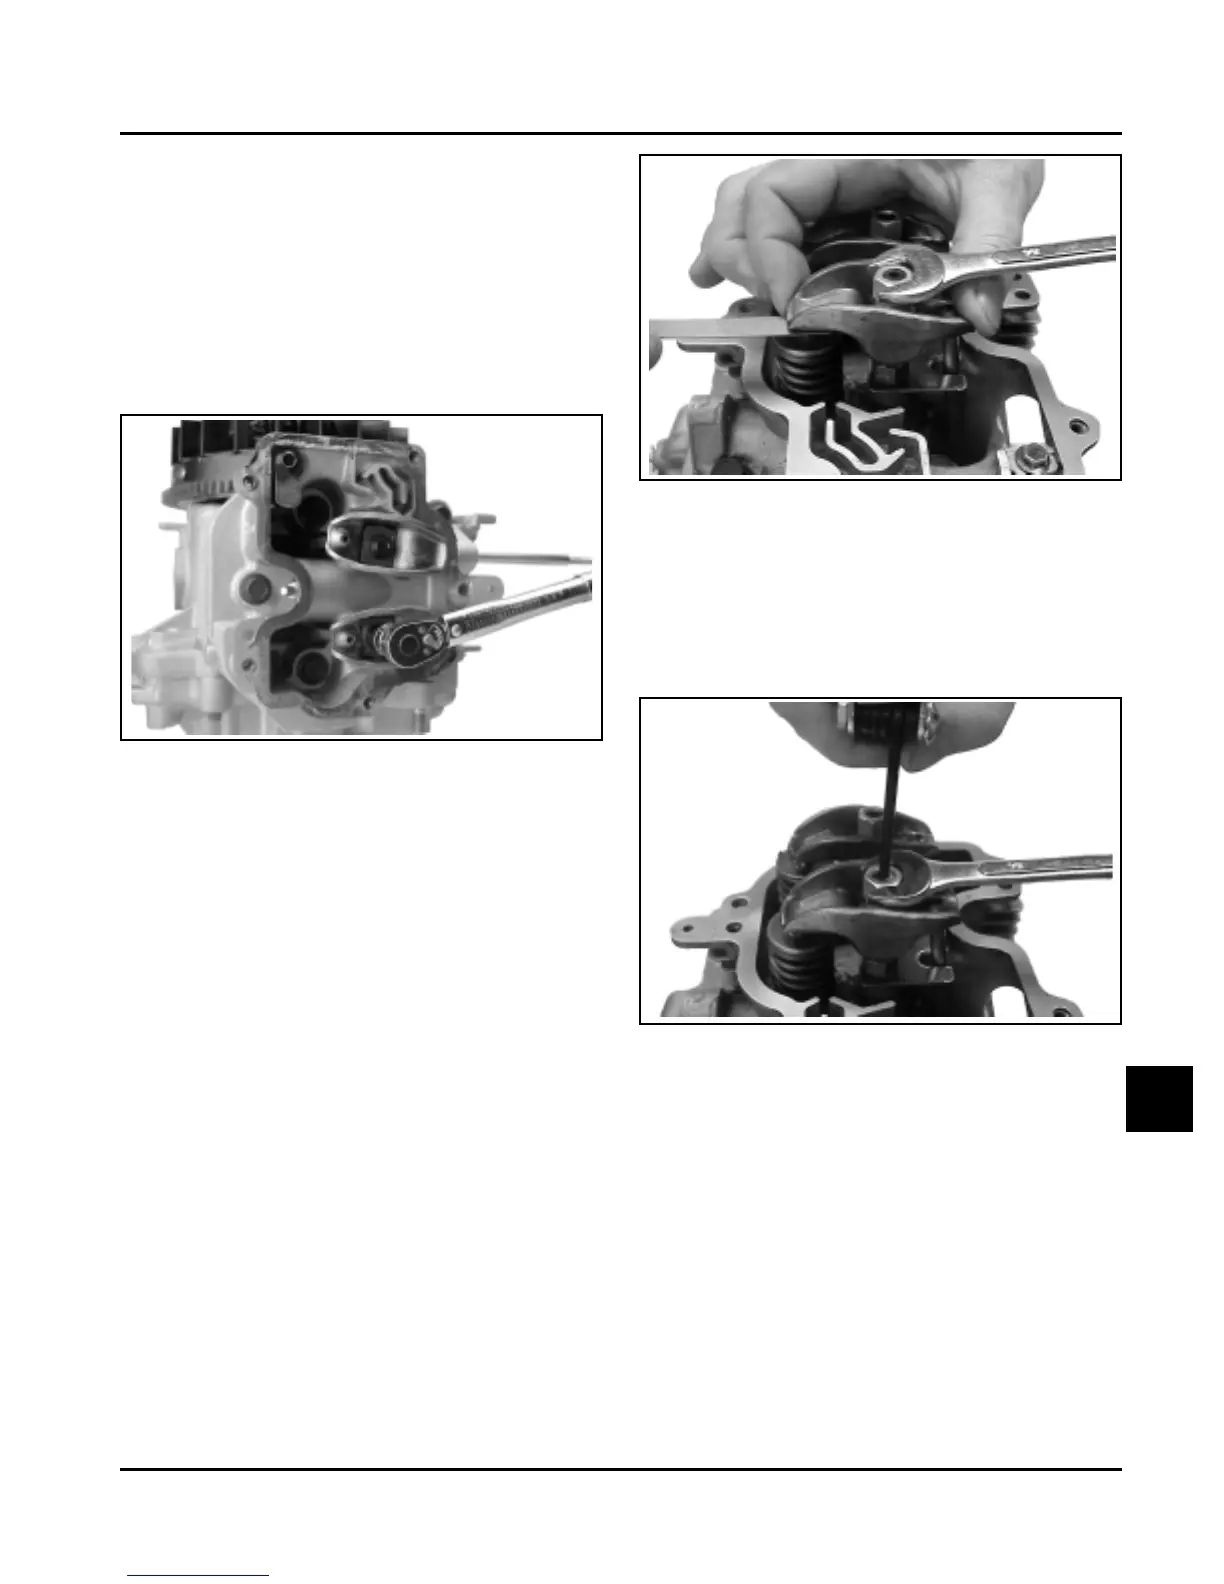
a. Seat the push rods into sockets under the
end of the rocker arm and align the rocker
arms over the valve stems. Hold the rocker
arm in the position and torque the screws to
11.3 N·m (100 in. lb.). See Figure 11-45.
Figure 11-46. Adjusting Valve Lash.
d. Hold the adjustment nut from turning and
tighten the set screw to lock it in position.
Torque the set screw to 7.3 N·m (65 in. lb.).
See Figure 11-47. After tightening, verify
lash is .07/.12 mm (.003/.005 in.); readjust if
necessary.
Figure 11-47. Torquing Set Screw (Adjusting Valve
Lash).
e. Repeat steps "b", "c", and "d" on the other
rocker arm.
5. If the head has a threaded hole in the intake port,
install the pipe plug or vacuum line. The pipe plug
should be installed for all applications which do
not have a metal vacuum line at this location. Use
pipe sealant with Teflon
®
on the threads.
6. Install the spark plug into the cylinder head.
Torque the spark plug to 24.4-29.8 N·m
(18-22 ft. lb.).
Figure 11-45. Torquing Rocker Arm Mounting
Screws.
• Adjustable Valve Lash Configuration
a. Position the push rods within slots in
guide plate and seat the push rods into
sockets under the end of the rocker arms.
Align the rocker arms over the valve stems.
b. Apply downward pressure to the push rod
side of rocker arm, to compress the lifter
and "bottom" the plunger in the lifter bore.
Hold in this position for Steps "c".
NOTE: It takes two hands to make the lash
adjustment. You will probably need
a clamping device or an assistant to
hold the lifter compressed while you
make the adjustment.
c. Insert a .07/.12 mm (.003/.005 in.) feeler
gauge between the rocker arm and end of
valve, and turn the adjustment nut
"clockwise" (down) until a slight drag is felt
on the feeler gauge. See Figure 11-46.
 Loading...