11.17
Section 11
Reassembly
11
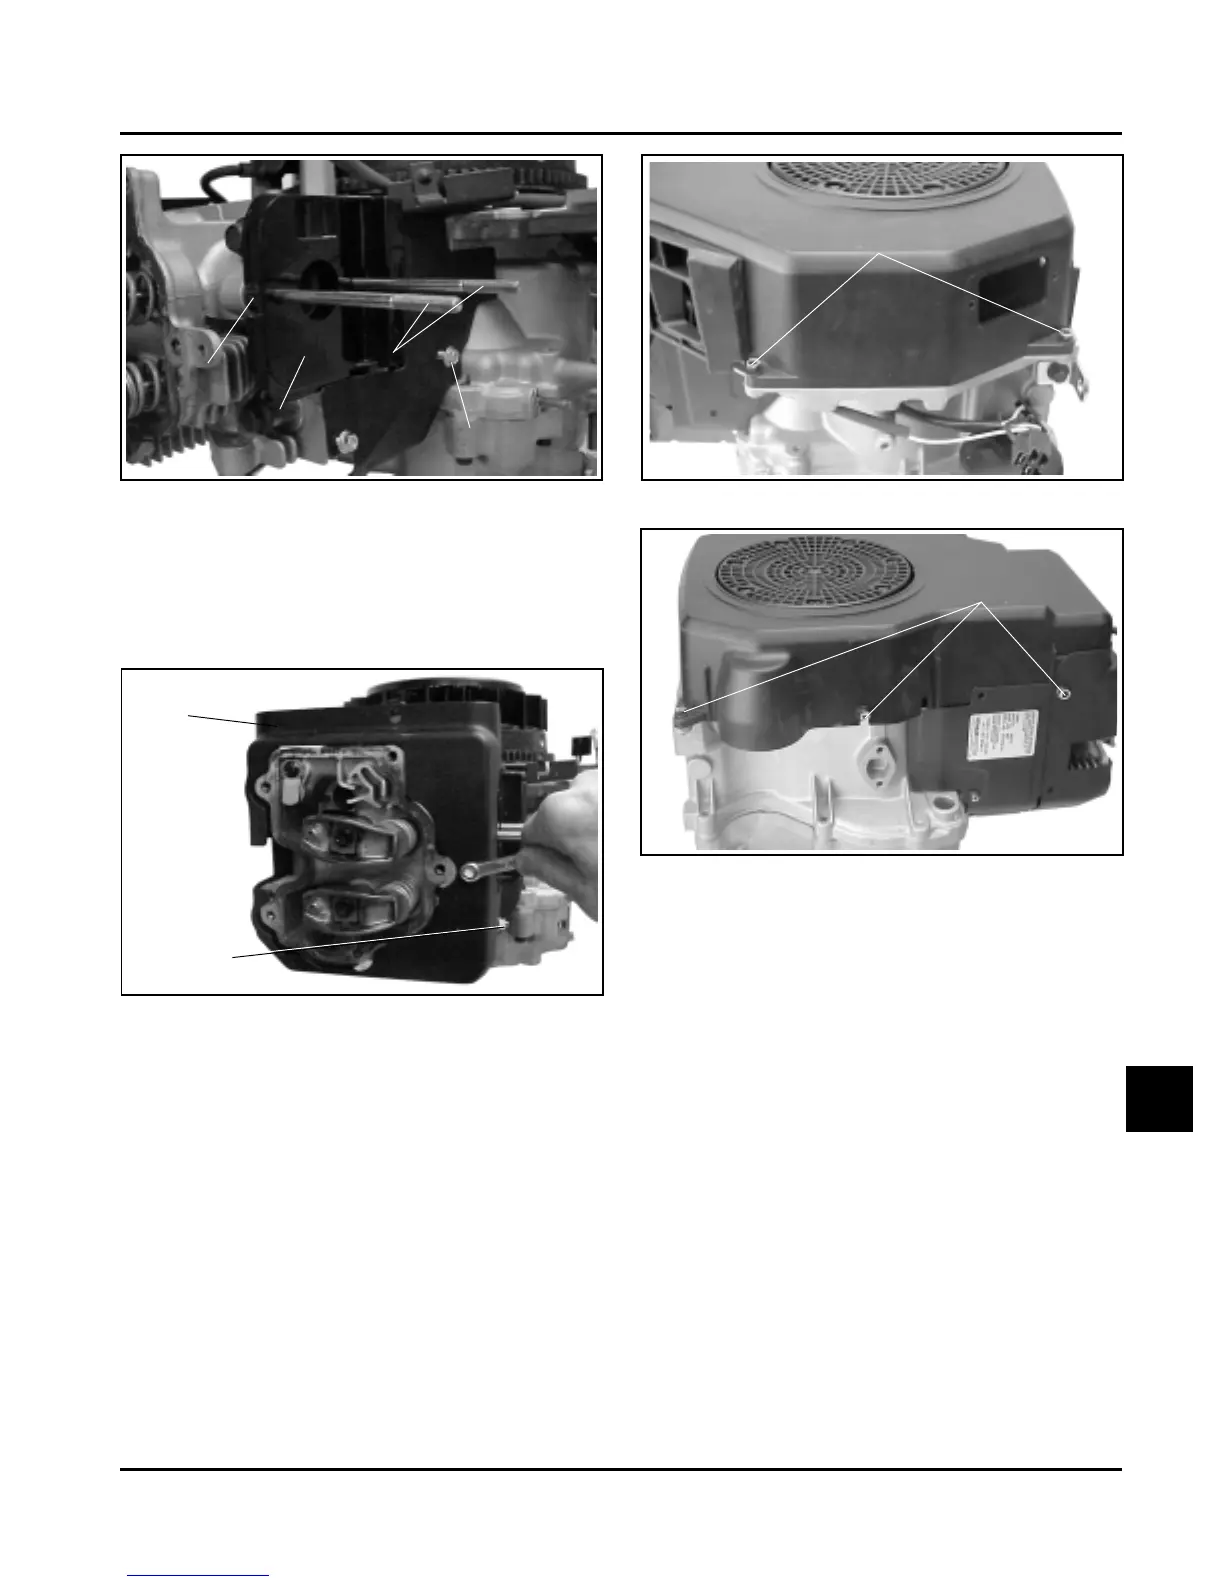
Figure 11-52. Installing Cylinder Head Baffle.
5. Install the grommet around the high tension lead
(metal blower housings only). Insert the grommet
into the slot in the end of the blower housing.
Plastic blower housings have a formed slot to
contain the lead. Install the blower housing and
secure with the mounting screws. See Figures
11-53 and 11-54.
Figure 11-54. Installing Blower Housing.
6. Tighten all hardware securely when all sheet
metal pieces are in position.
Install Valve Cover and Muffler Bracket
RTV silicone sealant is used between the valve cover
and crankcase. Refer to page 2.1 for the approved
sealant.
NOTE: Always use fresh sealant. Using outdated
sealant can result in leakage.
1. Prepare the sealing surfaces of the cylinder head
and valve cover following Service Bulletin 252. If it
is a stamped steel valve cover, the flatness of the
sealing surface must be checked prior to
reinstallation. See Section 10.
Figure 11-51. Installing Heat Deflector and
Carburetor Side Baffle (not on all models).
4. Install the cylinder head baffle and secure with the
two hex. flange screws. Later production models
use one screw and one hex. flange nut. See
Figure 11-52.
Gasket
Heat Deflector
Intake Studs
Silver Screw for
Ground Lead
Mounting Screws
Cylinder Head
Baffle
Hex. Flange
Screw or Nut
Figure 11-53. Installing Blower Housing.
Mounting Screws
 Loading...