9.5
Section 9
Disassembly
9
Figure 9-14. Removing Oil Fill Tube.
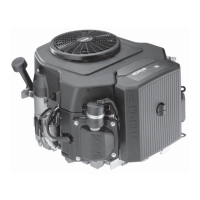
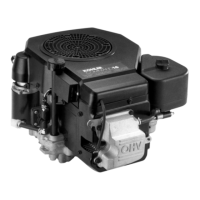
Remove Blower Housing and Baffles
1. See Figure 9-15, 9-16, and 9-17. Remove the six
screws securing the blower housing and any
commonly mounted clamps/brackets. Remove the
blower housing.
Remove Rectifier-Regulator (If Required)
1. Remove the connector from the rectifier-regulator.
See Figure 9-13.
2. Remove the two screws securing the rectifier-
regulator and individual ground lead (if used).
Figure 9-15. Removing Blower Housing and Baffles.
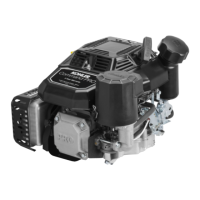
Figure 9-17. Removing Blower Housing and Baffles.
2. Remove the hex. flange valve cover screws and any
loose spacers (stamped steel valve covers) which
also attach the muffler and/or lift bracket. Note the
assembly orientation for proper reassembly later.
Oil Fill Tube
Hex. Flange Screw
Muffler
Bracket
Valve Cover
Screws
Hex. Flange
Screws
Cylinder Head
Baffle
Hex. Flange Screws
Connector
Rectifier-
Regulator
Ground Lead
Mounting Screws
Cylinder
Baffle
Cylinder Baffle
Mounting Screw
Blower
Housing
Figure 9-13. Removing Rectifier-Regulator (not on
all models).
Remove Extended Oil Fill Tube
1. Remove the hex. flange screw securing the oil fill
tube to the blower housing/crankcase. See Figure
9-14.
2. Pull the oil fill tube out of the crankcase flange.
Figure 9-16. Removing Blower Housing and Baffles.
Mounting Screws
 Loading...