3.3 Charging of DR Detector
79
Chapter 3
HINT
•••••••••••••••••••••••••••••••••••••
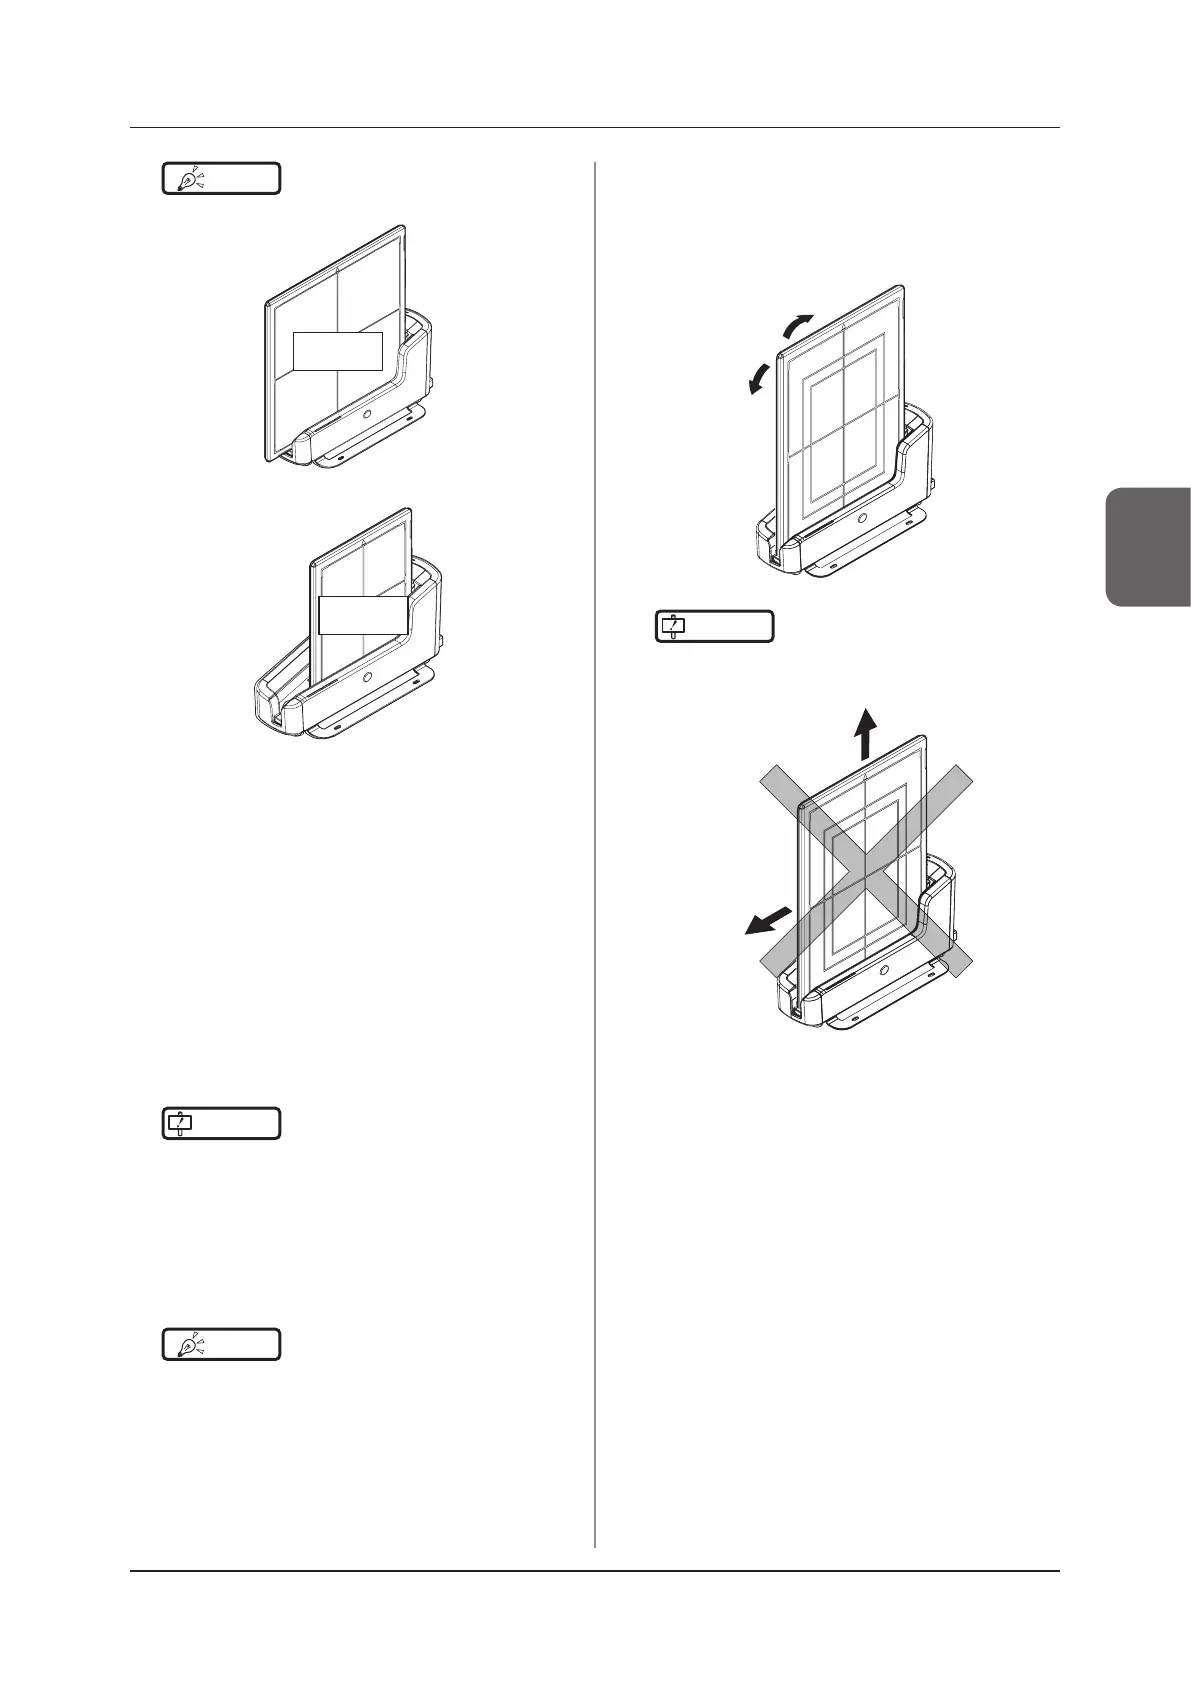
• AeroDR 3 1717HD is inserted
Exposure
side
• AeroDR 3 1012HQ is inserted
Exposure
side
•••••••••••••••••••••••••••••••••••••••••••••••••••••
3
Once the DR Detector is inserted correctly
and charging starts, the LED (blue) on
the AeroDR Battery Charger2 will ash or
light.
• The LED (blue) on the AeroDR Battery Charger2
changes according to the level of battery power
of the DR Detector.
4
Once charging of the DR Detector is com-
pleted, all the LEDs (blue) on the AeroDR
Battery Charger2 will turn on.
IMPORTANT
•••••••••••••••••••••••••••••••••••••
• Handle the DR Detector with extreme care when in-
serting it into the AeroDR Battery Charger2.
• The wired connection connector of the DR Detector
may become warm right after charging on the AeroDR
Battery Charger2. This often occurs during charging
and is not a malfunction.
•••••••••••••••••••••••••••••••••••••••••••••••••••••
HINT
•••••••••••••••••••••••••••••••••••••
• If there is any problem during charging, the LED (or-
ange) on the AeroDR Battery Charger2 will light. Also,
charging will stop when an error occurs.
•••••••••••••••••••••••••••••••••••••••••••••••••••••
5
Remove the DR Detector from the AeroDR
Battery Charger2.
• Tilt the DR Detector in the direction shown in the
following gure and remove it.
IMPORTANT
•••••••••••••••••••••••••••••••••••••
• As the DR Detector is locked by a magnet, do not pull
it out horizontally or vertically.
•••••••••••••••••••••••••••••••••••••••••••••••••••••
 Loading...