67
Chapter 3
3.2.2 Exposure under the S-SRM
connection example
1
Perform examination registration with the
image processing controller.
2
Check that this device is ready to expose
images, and then prepare for the expo-
sure.
3
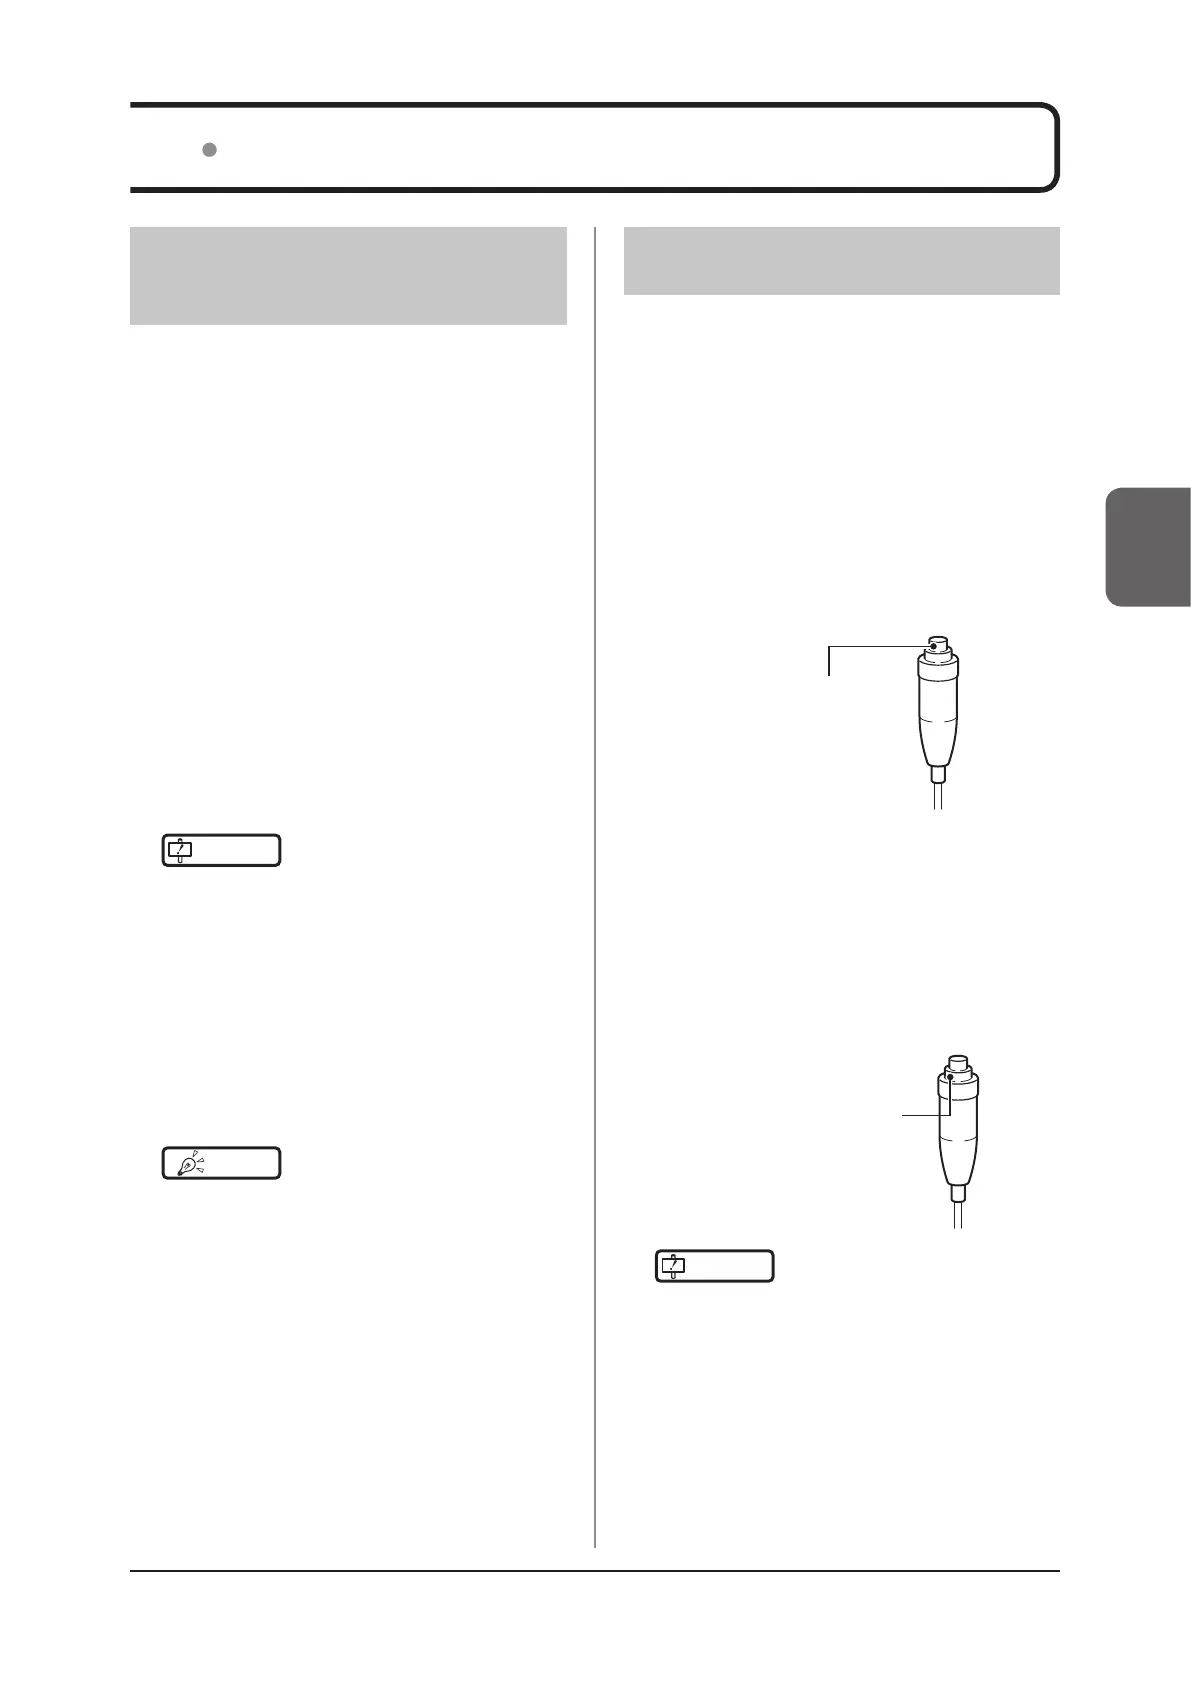
Push the S-SRM’s hand switch to the rst
stage.
• The exposure preparation signal is sent to the
X-ray device.
First stage switch
4
Push the S-SRM’s hand switch up to the
second level to perform exposure.
• Exposure is performed from the X-ray device to
produce X-ray images.
• When the exposure is completed, images are
stored in the DR Detector and will then be con-
verted to digital data and sent to the image pro-
cessing controller sequentially.
Second stage switch
IMPORTANT
•••••••••••••••••••••••••••••••••••••
• The DR Detector is precision equipment, and there-
fore impact or vibration during radiography or image
transfer may aect the image quality. Be careful when
handling the DR Detector during and just after radiog-
raphy.
•••••••••••••••••••••••••••••••••••••••••••••••••••••
5
Check that the exposed image is dis-
played on the image processing control-
ler.
3.2.1 Exposure with basic
connection or Aero Sync
connection
Exposure with the basic connection is performed with
the following procedure.
Exposure under the basic connection ex-
ample
1
Perform examination registration with the
image processing controller.
2
Check that this device is ready to expose
images, and then prepare for the expo-
sure.
3
Push the exposure switch of the X-ray de-
vice to perform the exposure.
• When the exposure is completed, images are
stored in the DR Detector and will then be con-
verted to digital data and sent to the image pro-
cessing controller sequentially.
IMPORTANT
•••••••••••••••••••••••••••••••••••••
• The DR Detector is precision equipment, and there-
fore impact or vibration during radiography or image
transfer may aect the image quality. Be careful when
handling the DR Detector during and just after radiog-
raphy.
•••••••••••••••••••••••••••••••••••••••••••••••••••••
4
Check that the exposed image is dis-
played on the image processing control-
ler.
HINT
•••••••••••••••••••••••••••••••••••••
• If the DR Detector remains unused for a long time (time
can be set) it transitions to the sleep mode.
• When the image processing controller is ready to ex-
pose, it recovers from the sleep mode.
•••••••••••••••••••••••••••••••••••••••••••••••••••••
3.2 Operation of DR Detector
 Loading...