Product Service 1-800-522-7658
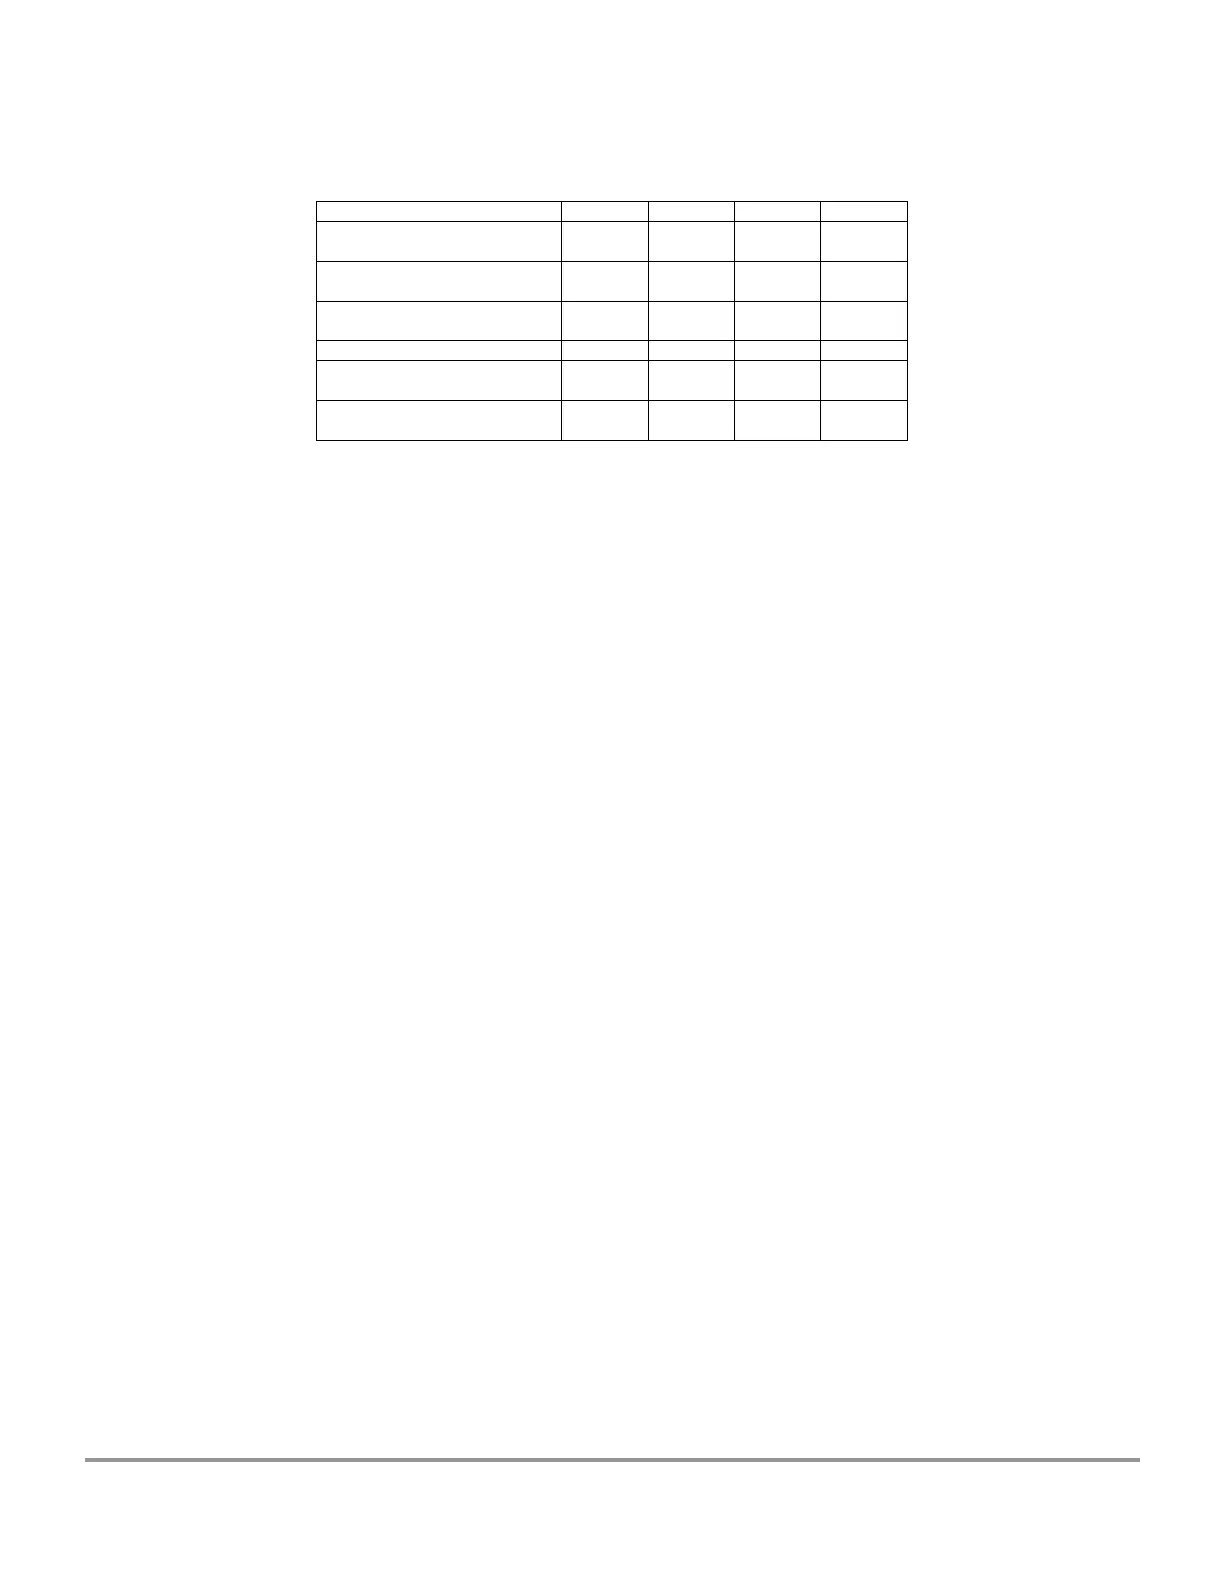
Circuit Breaker Specifications, 230 VAC
Motor/Light Breaker Rating,
Amps
Motor/Light Breaker, Labconco
Part #
Motor/Light Breaker,
Mechanical Products Part #
Outlet Breaker Rating, Amps
Outlet Breaker, Labconco
Part #
Outlet Breaker, Mechanical
Products Part #
Testing a circuit breaker
Note: If the breaker is tripped (white button is extended), press the reset button
of the breaker. If it does not reset smoothly, the breaker has failed and must be
replaced.
1. With the breaker reset, unplug the Logic+, either at the wall, or at the power
cord inlet at the back of the electronics module, as shown in Figure 9-2.
2. Remove the three 7/16-inch acorn nuts and lock washers that secure the
module.
3. Tip the module on its side to access the breakers.
4. Using a continuity meter, check the continuity (resistance) across the
terminals of the breaker being tested.
5. The resistance across the breaker should not exceed the resistance noted
when the meter probes are connected to each other.
Replacing a circuit breaker
1. Unplug the Logic+, either at the wall, or at the power cord inlet at the back
of the electronics module, as shown in Figure 7-2.
2. Remove the two 7/16-inch acorn nuts and lock washers that secure the
module.
3. Tip the module on its side to access the breakers.
4. Disconnect the wires connected to the breaker terminals.
5. Using a pair of pliers, loosen the chrome ring nut outside of the reset button.
Remove the ring nut, and pull the breaker out of the electronics module.