Introduction
CoaDATA 501 – Operators Manual 2.1 Page 6
1.3 Installation
Remove the analyzer from its packaging and verify that the accessories kit
is complete. Please notify your distributor immediately in the event that the
shipment was incomplete. Refer also to Materials Supplied in chapter 5.2
Proceed as follows to install the analyzer:
• Prior to installation of the analyzer read the instructions under Hazard and
Precautions in chapter 4.1.
• Place the analyzer in a position that it is not exposed to excess humidity,
any explosive gases, or magnetic influences.
• Connect the power adapter between the analyzer and a power supply
(100V - 240V) free from interferences by large power users such as
elevators and centrifuges.
• Use only the included original AC power adapter.
• Use only original cuvettes and stir bars which will assure proper operation
of the instrument.
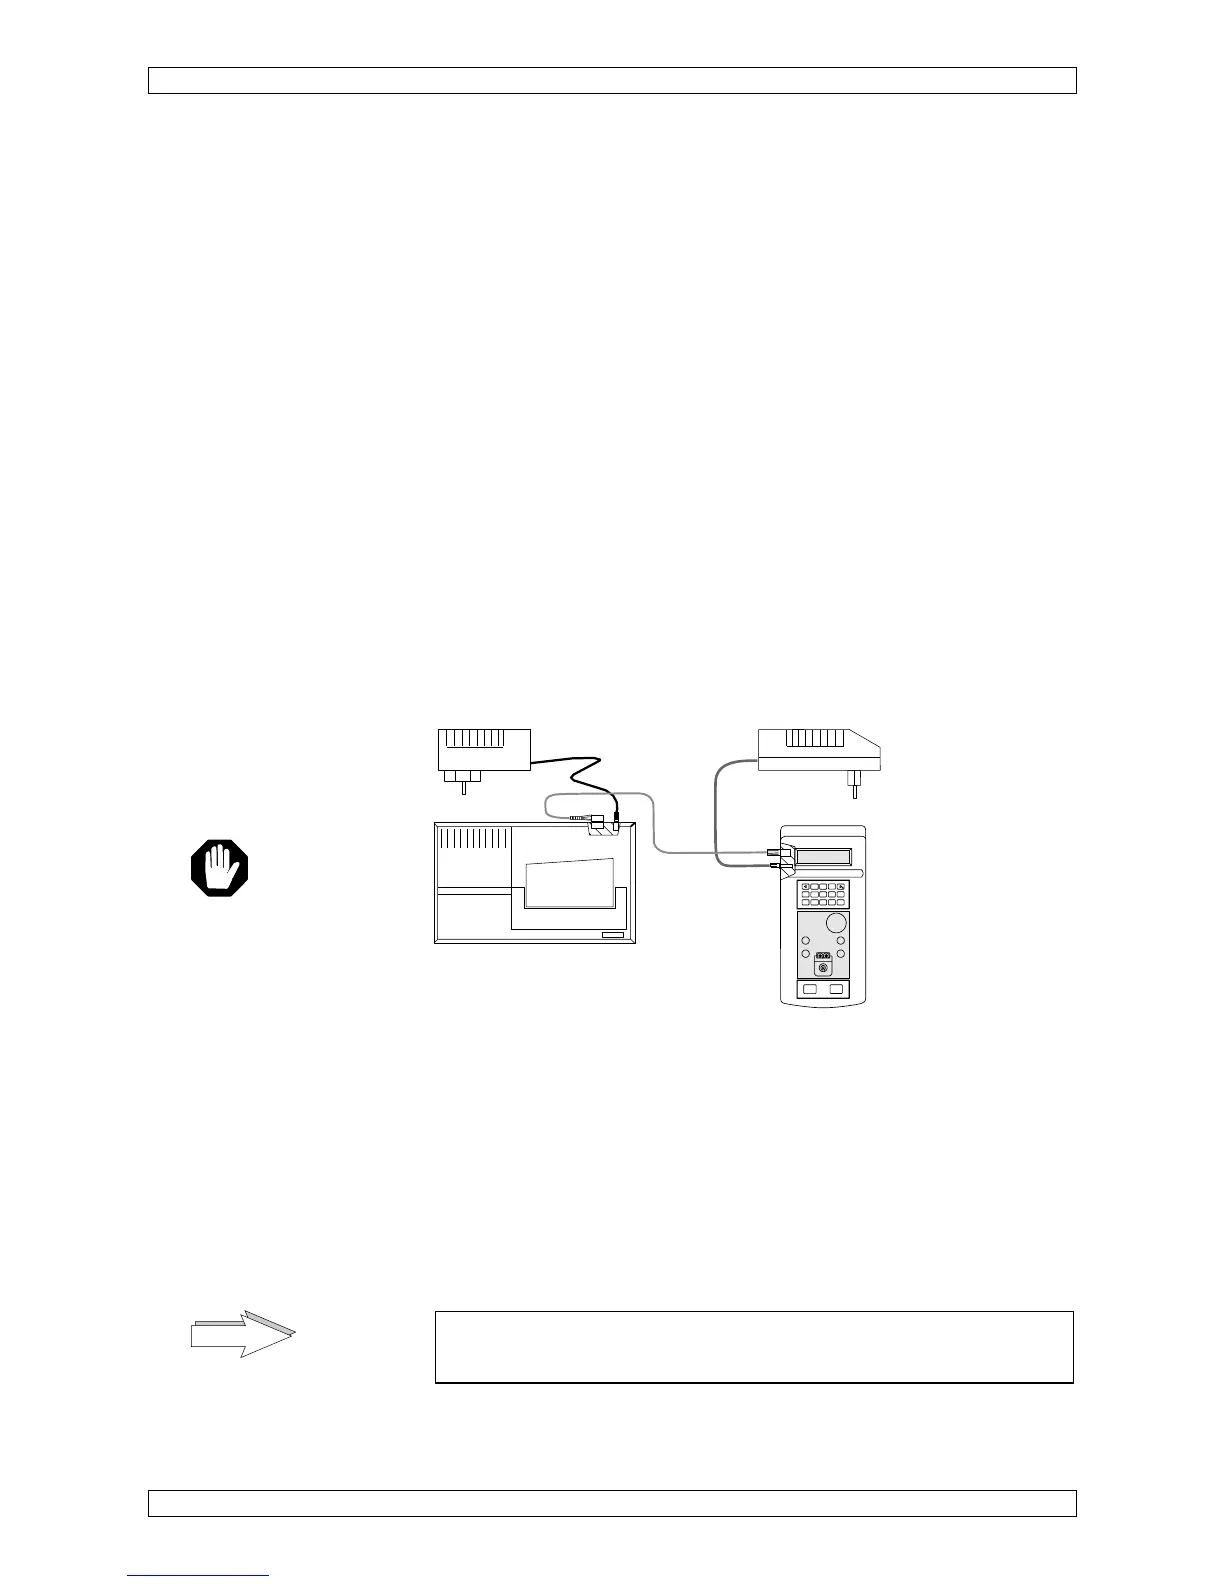
Switch on CoaDATA 501
• Connect the external power adapter with the analyzer
.
• Connect the external power adapter with the mains; automatically the
analyzer is switched on.
Figure 3 Analyzer connections
1.3.1 Connect an external printer
• Connect the data-cable between the analyzer and the printer. Ask your
dealer for recommended printer types.
• Connect the power adapter to the printer (see figure 3). The printer will be
set ON by connecting to the mains.
• Refer to chapter 2.2.8.1 for proper printer setting.
Never operate the printer without paper! Read the instructions
manual from the manufacturer of the printer for further details.
power supply
12 Volt, 0,8 Amp. 9,6VA
Printer
power supply
Mode
Esc
0
123
456
789
Enter
Reset
Start