USER GUIDE
48
CONTROL PANEL
Setting
To enter the set mode, press the button (4) for more
than two seconds.
Select, by pushing the arrow keys (2) and (3), the
setting menu you want to operate and then confirm by
pushing the button (4):
• By selecting “CLOCK” you operate the menu to set
only the parameters clock and alarm clock.
• By selecting “DISPLAY” you operate the menu to
set the display parameters.
• By selecting “SETTING” you operate the menu to
set the system parameters.
• By selecting “ADJUST” you operate the menu to
set the temperature and battery parameters.
• By selecting “SW VERSION” you operate the menu
to view the connected CBE devices’ software
versions.
By using the arrow keys (2) and (3) you can modify
the setting of the parameters. Confirm the setting by
pushing the button (4), you then go automatically to
next parameter.
To abandon programming and save changes, select
“EXIT” and then choose to save or not save changes.
9.2 Kosmo series (except for
Kosmo Compact 5 and
Compact 9)
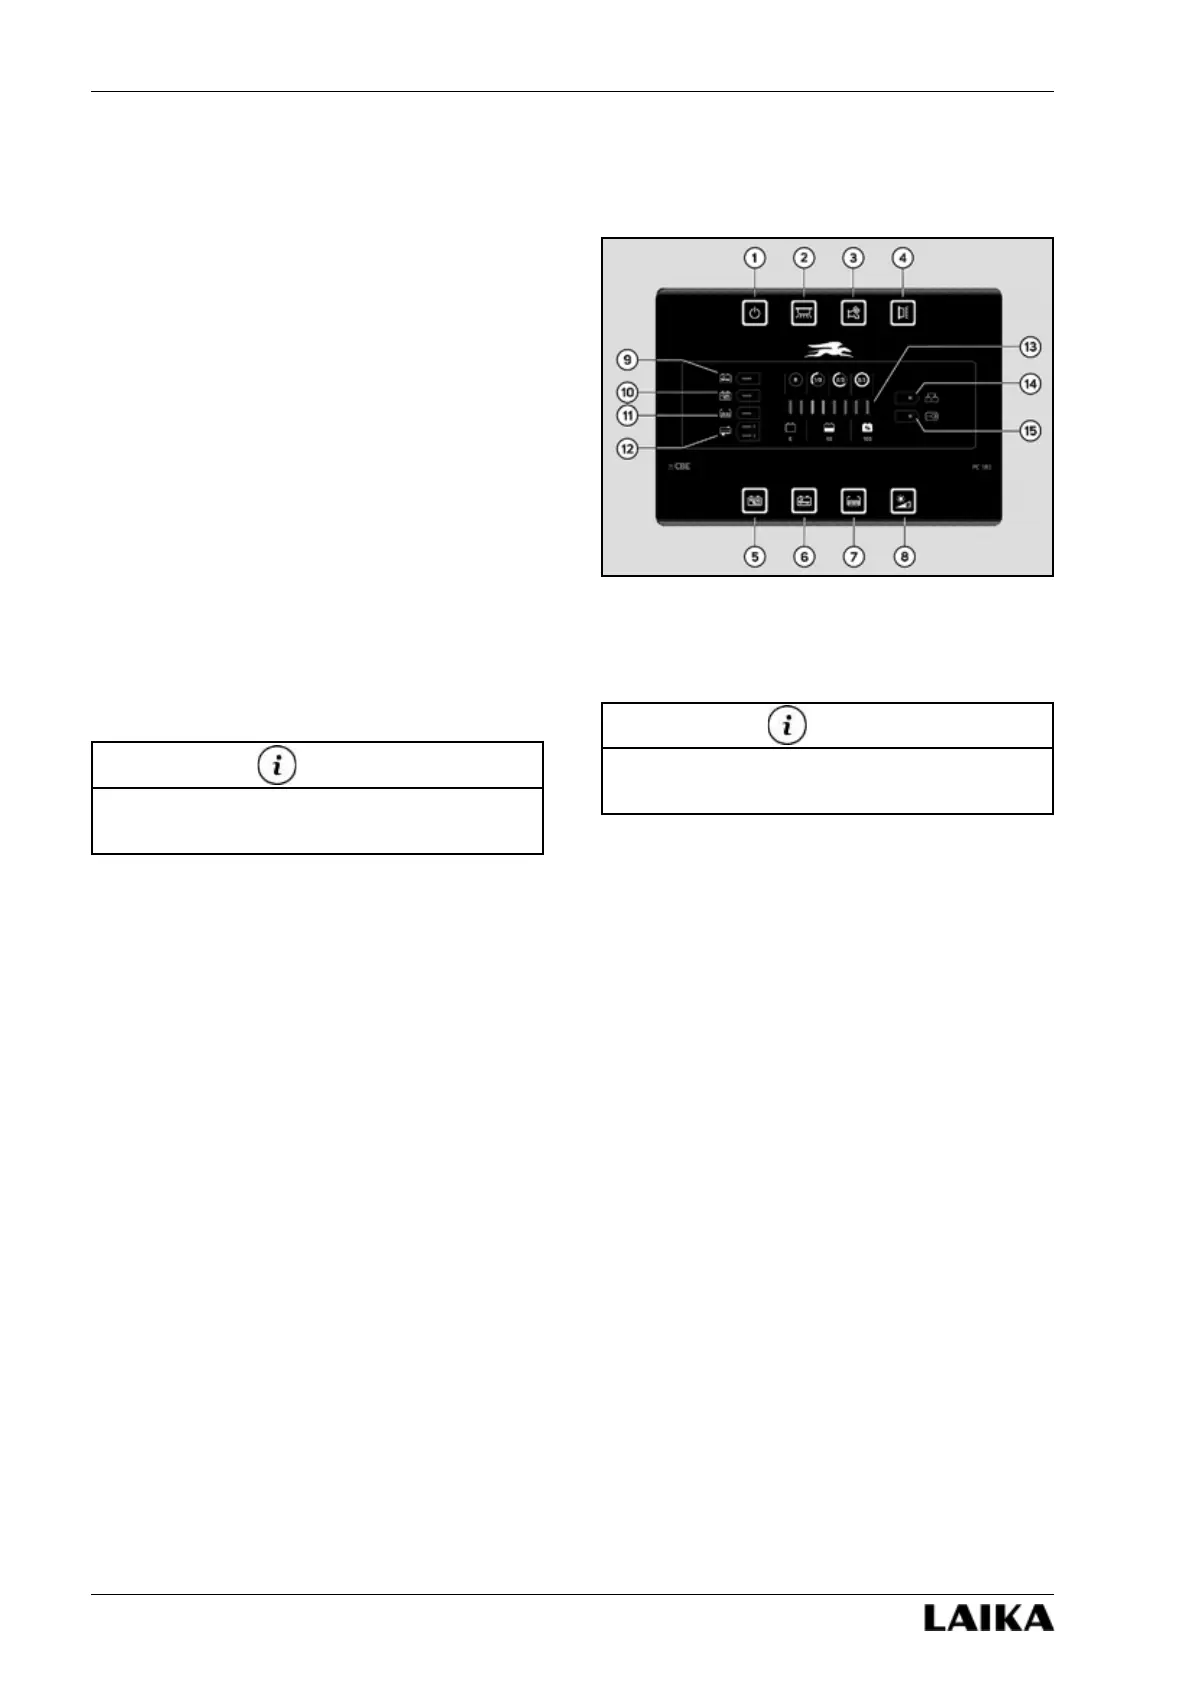
1) On/off main switch. The flashing LED indicates
that the auxiliary battery is run down and all the
appliances will soon be disconnected.
2) Inside lights button.
3) Button for pump on and off.
4) Awning light control button, switches automati-
cally off when you start up the engine.
5) Button to control auxiliary battery voltage (B2).
6) Button to control engine battery voltage (B1).
7) Button to control fresh water and waste water
tank level.
8) Button for adjusting panel night backlight. To
set, press for more than three seconds until
the desired level has been reached. When the
ambient light decreases, a dusk sensor located
near the button will automatically reduce the
backlight intensity to the set level.
9) The flashing of this LED indicates that the engine
battery (B1) has run down.
10) The flashing of this LED indicates that the
auxiliary battery (B2) has run down.
11) The flashing of this LED indicates that the fresh
water tank is empty.
12) The flashing of this LED indicates that the waste
water tank is full (tank 1).
13) Battery voltage and tank level display.
14) Indicates the auxiliary battery charging by means
of the vehicle alternator.
15) Indicates 230 V power source connection.
Refer to the producer’s handbook for further
information on the control panel.
NOTE
At startup the control panel checks the working of
all LEDs, except LED 14 and 15.
NOTE