4: Configuration
Lantronix® xPrintServer® User Guide 44
Changing Printer Geolocation
Use this selection to specify the advertised geographical location (geolocation) of a configured
printer as it will be displayed to all users on their tablet, smartphone or PC device(s). Reference
https://tools.ietf.org/html/rfc5870 to learn more
URI use for geographic locations. Geolocation
information for a printer is blank by default.
1. Login to the xPrintServer device’s Admin interface (see Logging In.)
2. Click the Printer tab to access the Printers > List page (see Figure 4-1.)
3. Utilize Navigation as necessary in situations where there are multiple pages of printers.
4. Utilize Search as necessary to find a particular printer.
5. Click the button beside the printer with geolocation to be specified.
6. Click Change Geolocation in the popup command menu that appears (or Cancel within the
same menu if you want to back out of it.)
7. Modify the printer geolocation in the popup window which appears.
8. Click OK. After a few seconds, the printer location will be changed.
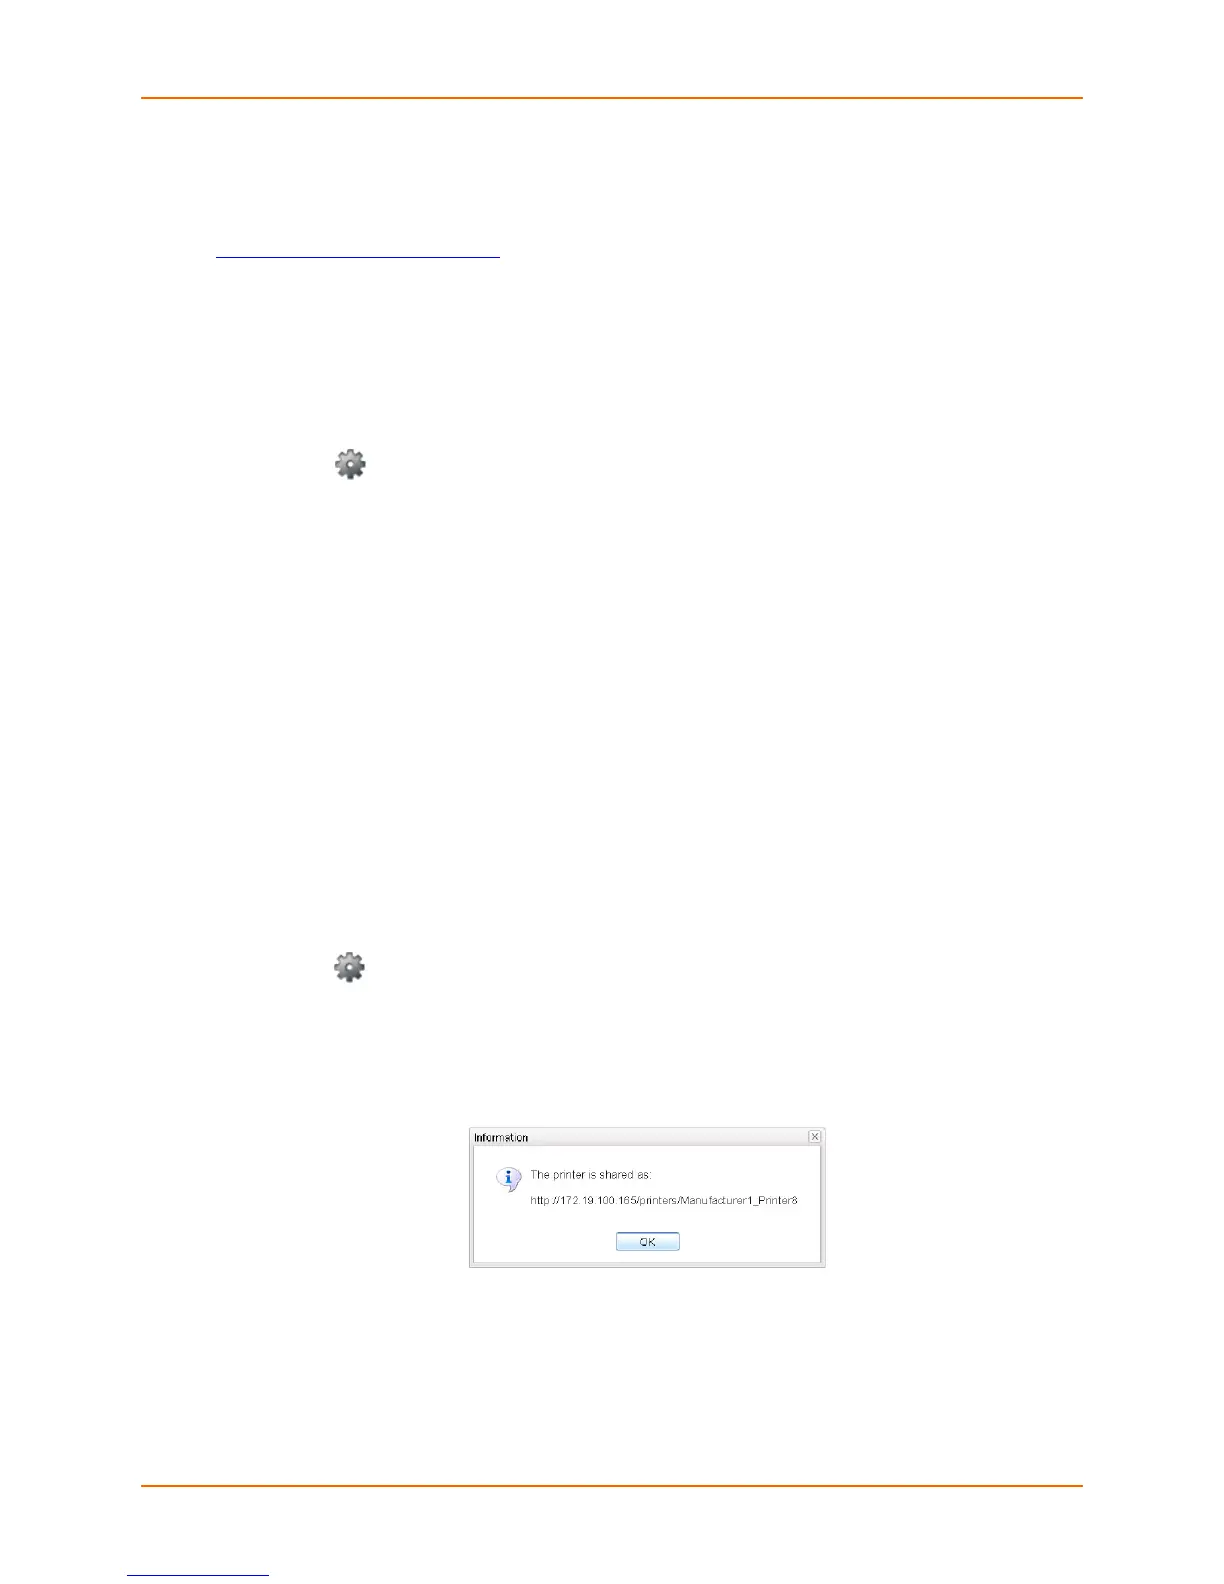
Showing Shared Printer Information
Note: All printers are shared to the registered Google account by default.
Use this selection to show the url information of a specific printer provisioned for the xPrintServer
device. Up to 10 network-attached printers can be seen and shared at a time.
1. Login to the xPrintServer device’s Admin interface (see Logging In.)
2. Click the Printer tab to access the Printers > List page (see Figure 4-1.)
3. Utilize Navigation as necessary in situations where there are multiple pages of printers.
4. Utilize Search as necessary to find a particular printer.
5. Click the button beside the printer information to be shared.
6. Click Show Share Info in the popup command menu that appears (or Cancel within the
same menu if you want to back out of it.) An information popup window appears showing the
printer as it is shared:
Figure 4-8 Show Share Info Popup
7. Click OK in the popup window to close it.