LAUNCH X-431Diagun User's Manual
13
3) Close the leather cover. The installation finished, shown in 3-1d.
Note: You can hear a clicking sound if you insert the TF card in the
right place. Press the card slightly, it will be ejected automatically.
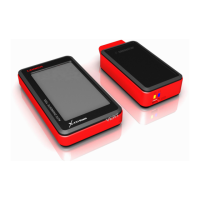
3.1.3 Connect X-431Diagun
X-431Diagun could also diagnose two cars at a time by connecting two
X-431Diagun connectors (one is supplied and one is optional), one
communicates by blue tooth (wireless) and the other communicates by
cable ( wire connection), so, cable ( wire connection) and blue tooth
(wireless) connections are the two connect options.
Cable ( wire connection) Connection Procedure of X-431Diagun:
z Insert the TF card into the slot;
z Link one end (20PIN Male) of the X-431Diagun main unit diagnostic
cable with X-431Diagun main unit diagnose interface;
z Link the other end (12PIN connector) of X-431Diagun main unit
diagnostic cable with one end (12PIN port) of selected X-431Diagnun
connector.
z Find out the vehicle’s DLC;
z Connect the other end of X-431Diagun diagnosis connector to the
vehicle’s DLC.
Blue Tooth (wireless) Connection Procedure of X-431Diagun
z Insert the TF card into the slot;
z Find out the vehicle’s DLC;
z Plug the X-431Diagun diagnosis connector into the vehicle’s DLC
Note: The Bluetooth indicator on the X-431Diagun diagnostic
connector is off when wire diagnoses is carried out.
 Loading...