6300 Rev H User’s Manual
125-9106A Page 35
3.6.2 LEAK CHECKS
Leak checks can be performed either independently or simultaneously on the Pitot and Static outputs of
the 6300. The ideal way to perform leak checks is to put only one output in Leak mode while keeping the
other output in Control mode. However, if necessary, both outputs can be simultaneously put into Leak
mode.
Note: During a leak check it is not possible to change units, target values or modes.
Independent Pitot Leak-check
The ideal way to perform a Pitot leak-check is to keep Static in Control at “Ground’ and control Pitot to a
minimum of 100 knots before starting the leak check. Below is a step-by-step process of performing the
Pitot leak-check. It is assumed that the Self-Test has already been performed as described in Section 3.1
1. Close both Pitot and Static ports (tightly, please).
2. Press GND to perform the Go-To-Ground function. The pumps will turn On and the tester will
go through the EQZN process. The targets will automatically be set to 20 knots and the feet
equivalent to “Ground” (ambient pressure).
3. Once the EQZN process is completed, the tester will control the Actual values at the Targets.
4. Change the Pitot Target to 100 knots. (Press 2 to change Pitot Target. Press 1, 0, 0, ENTER for
new value.) The new Target value will be blinking. Press GO to activate. The Pitot Actual value
will ramp to 100 knots. The Static output will still be controlling at “Ground”.
5. Once the Pitot Actual reaches 100 knots, allow it to stabilize for a few seconds.
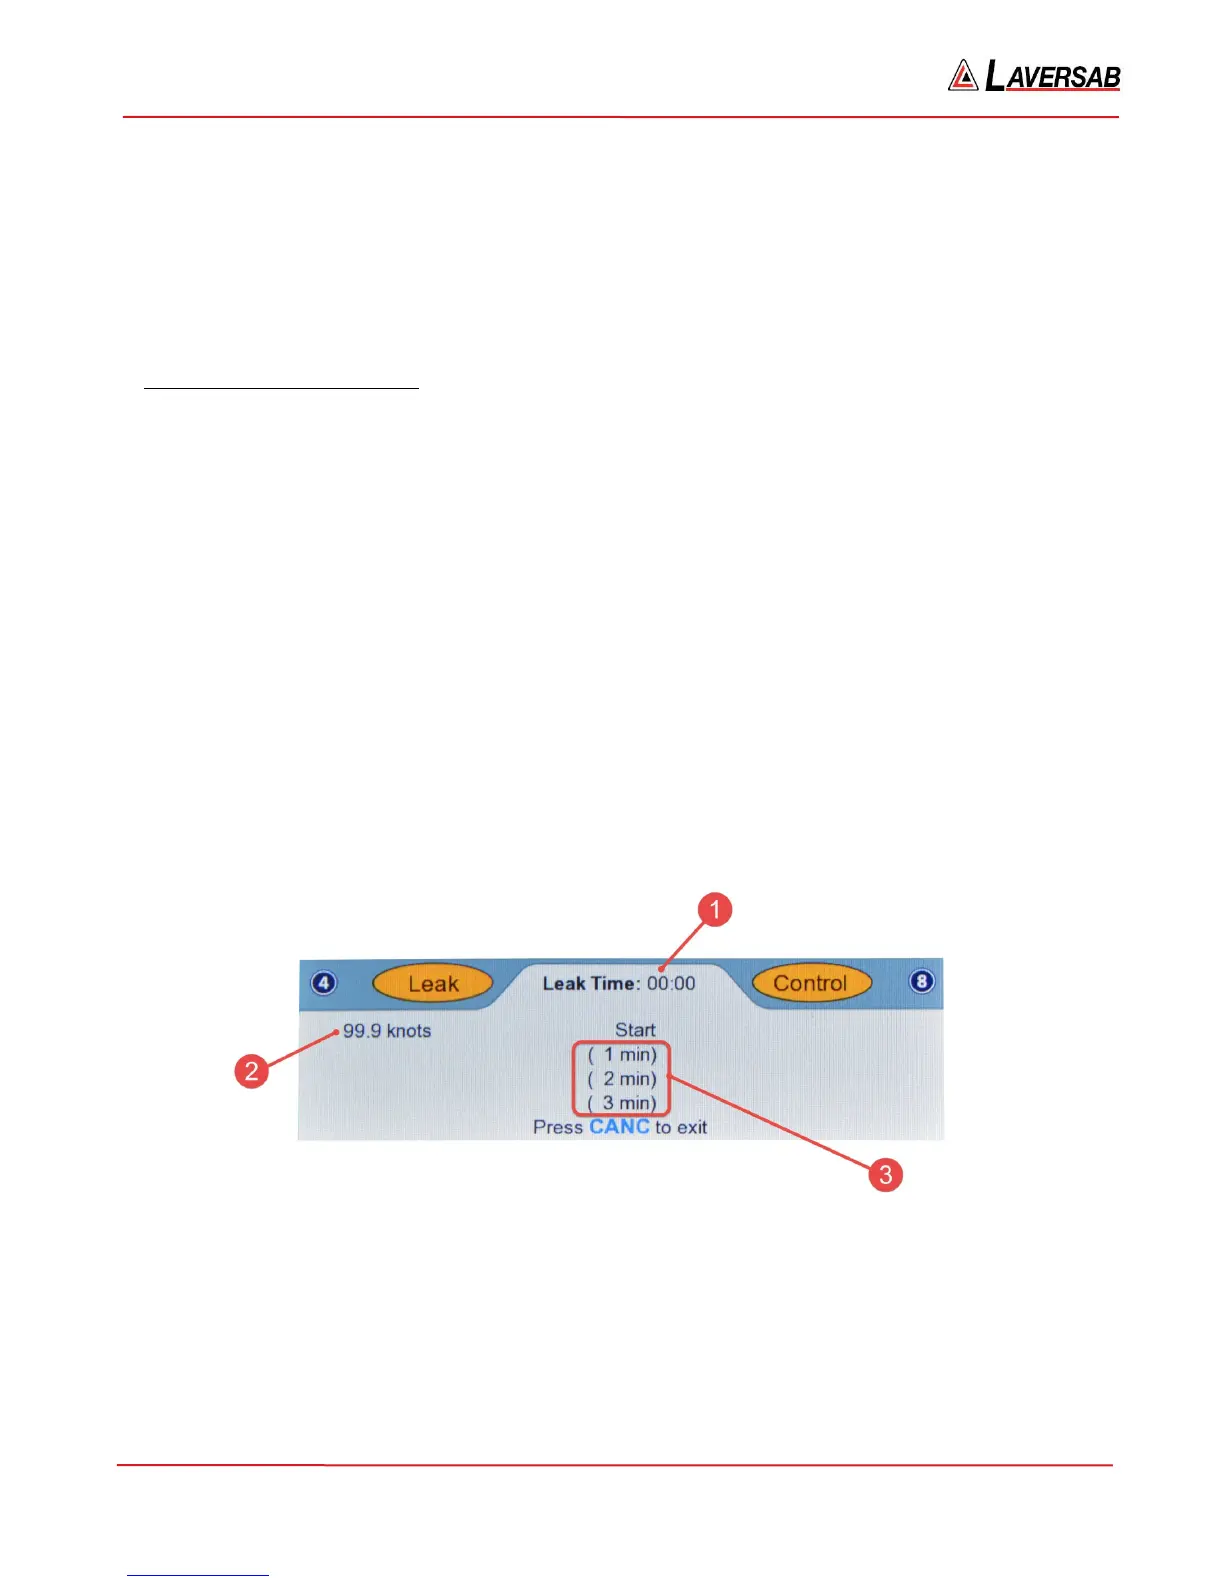
6. Change the Pitot mode to Leak. (Press 4 to change Pitot mode. Press 2 to select Leak). ‘Leak’ will
be blinking in the Pitot mode field. Press GO to activate.
The Lower section of the screen will appear similar to Figure 3.21 below. The parameters shown in the
Leak screen are explained below, after Figure 3.24.
Figure 3.21 : Pitot Leak (start)
At the end of one minute, the screen will appear similar to Figure 3.22 below.