3 MOUNTING THE POLYMAT
Make sure that the POLYMAT is always coupled to the
LELYTERRA or tractor before proceeding to a hopper refill.
3.1
Mounting behind a LELYTERRA
- Remove the rubber gasket disc from the protection cover
for the LELYTERRA PTO extension.
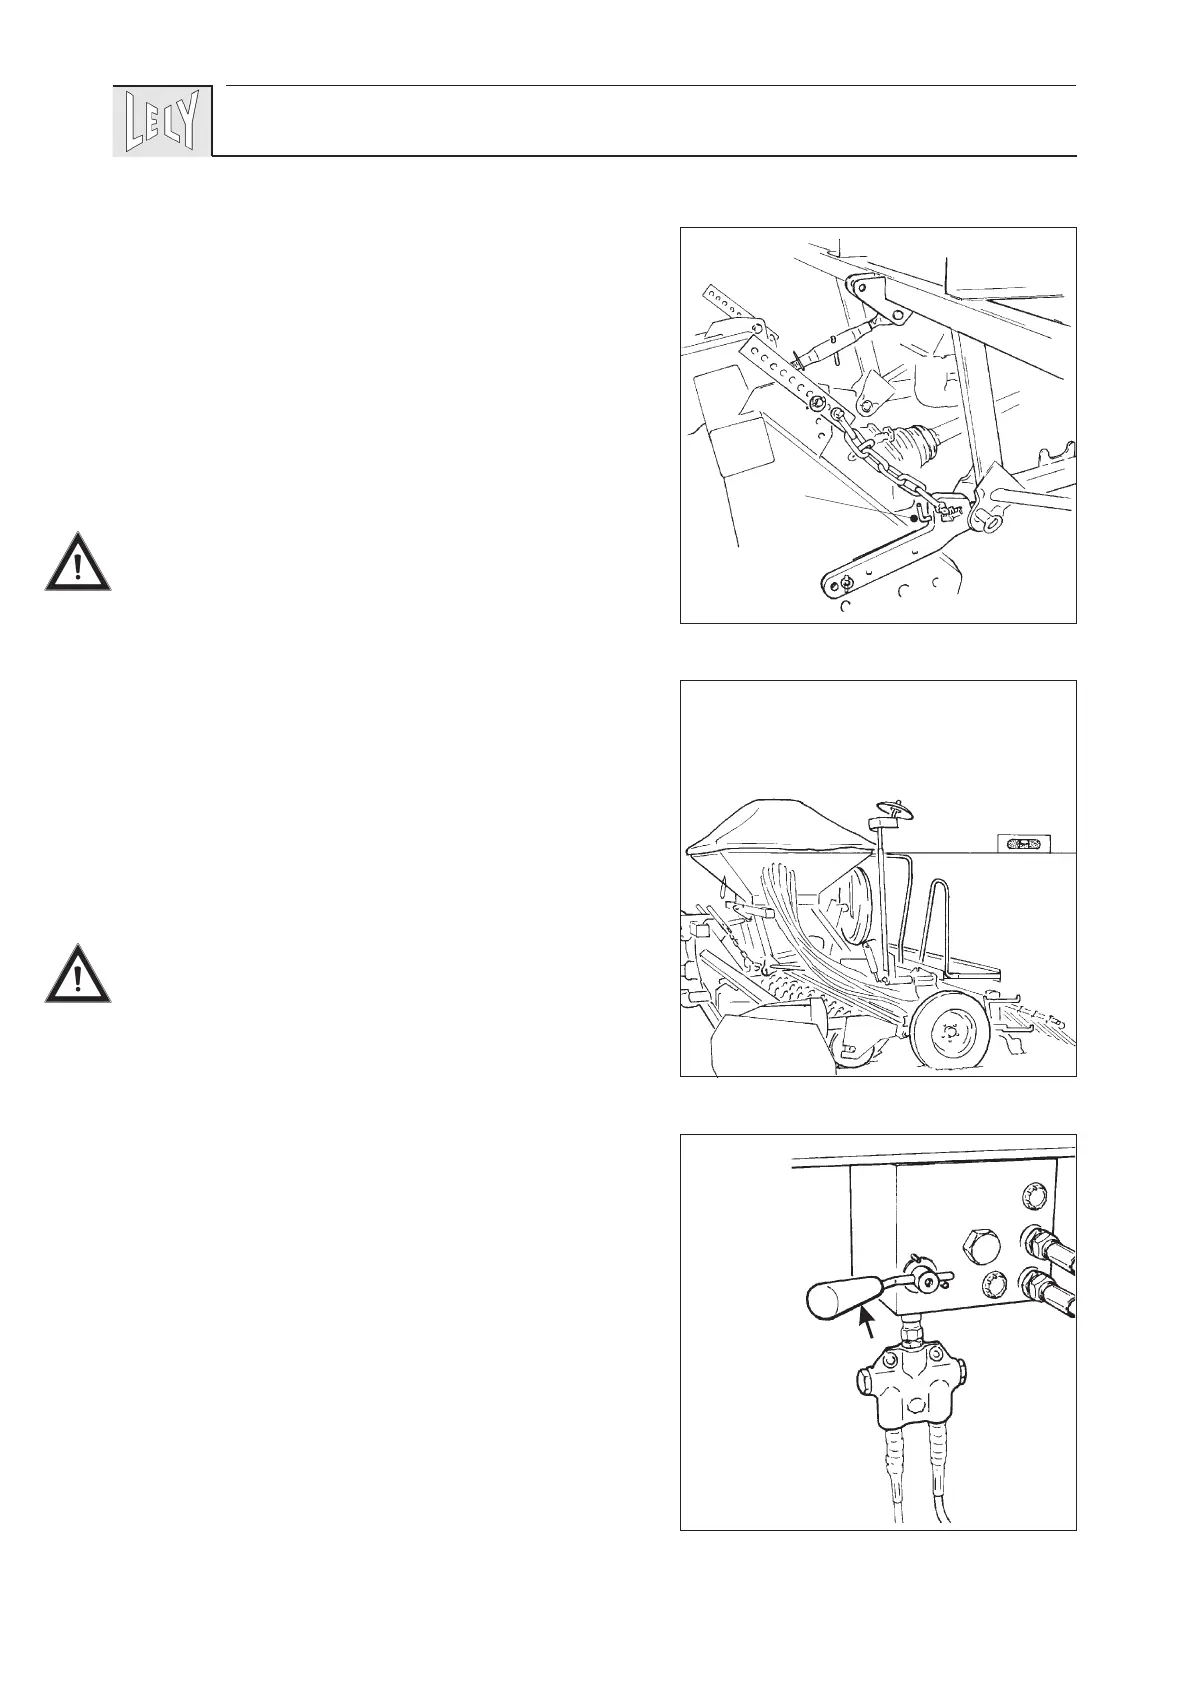
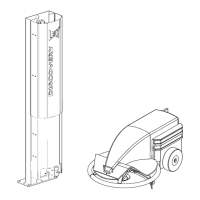
- Pull the locking pins A (fig. 6) back.
Make sure that there are no human beings on either
POLYMAT or LELYTERRA.
- Manoeuver the LELYTERRA in front of the POLYMAT.
- Lift the LELYTERRA until the linkage pins mesh with the
coupler arms.
If the space between the coulter beam and the LELYTERRA
is insufficient for mounting the POLYMAT, the coulter beam
has to be moved to the rear.
(see chapter 2)
- Secure the linkage pins by means of the locking pins A (fig.
6).
- Check the PTO shaft for easy telescoping.
- Mount the PTO shaft on the PTO extension.
- Fit the safety chain of the PTO guard to a rigid part of the
LELYTERRA.
- Lift the LELYTERRA until the POLYMAT’s parking jacks
are just clear of the ground.
- Remove the parking jacks.
- Lower the LELYTERRA until the POLYMAT is in a
horizontal position (fig. 7).
- Mount the top link in the lowermost hole of the LELY-
TERRA headstock by means of a top link pin.
- Check if the ball valve (fig. 8) is closed (TRANSPORT
position).
- Connect the two hydraulic hoses (marked in white) of the
combined marker/coulter beam control with a double
acting spool valve (including a floating position) on the
tractor.
- Connect -if required
*
- the two hydraulic hoses (marked in
blue) of the marker control with a second double acting
spool valve (including a floating position) on the tractor.
(
*
see paragraph 7.3)
41
6
A
!
7
8
TRANSPORT