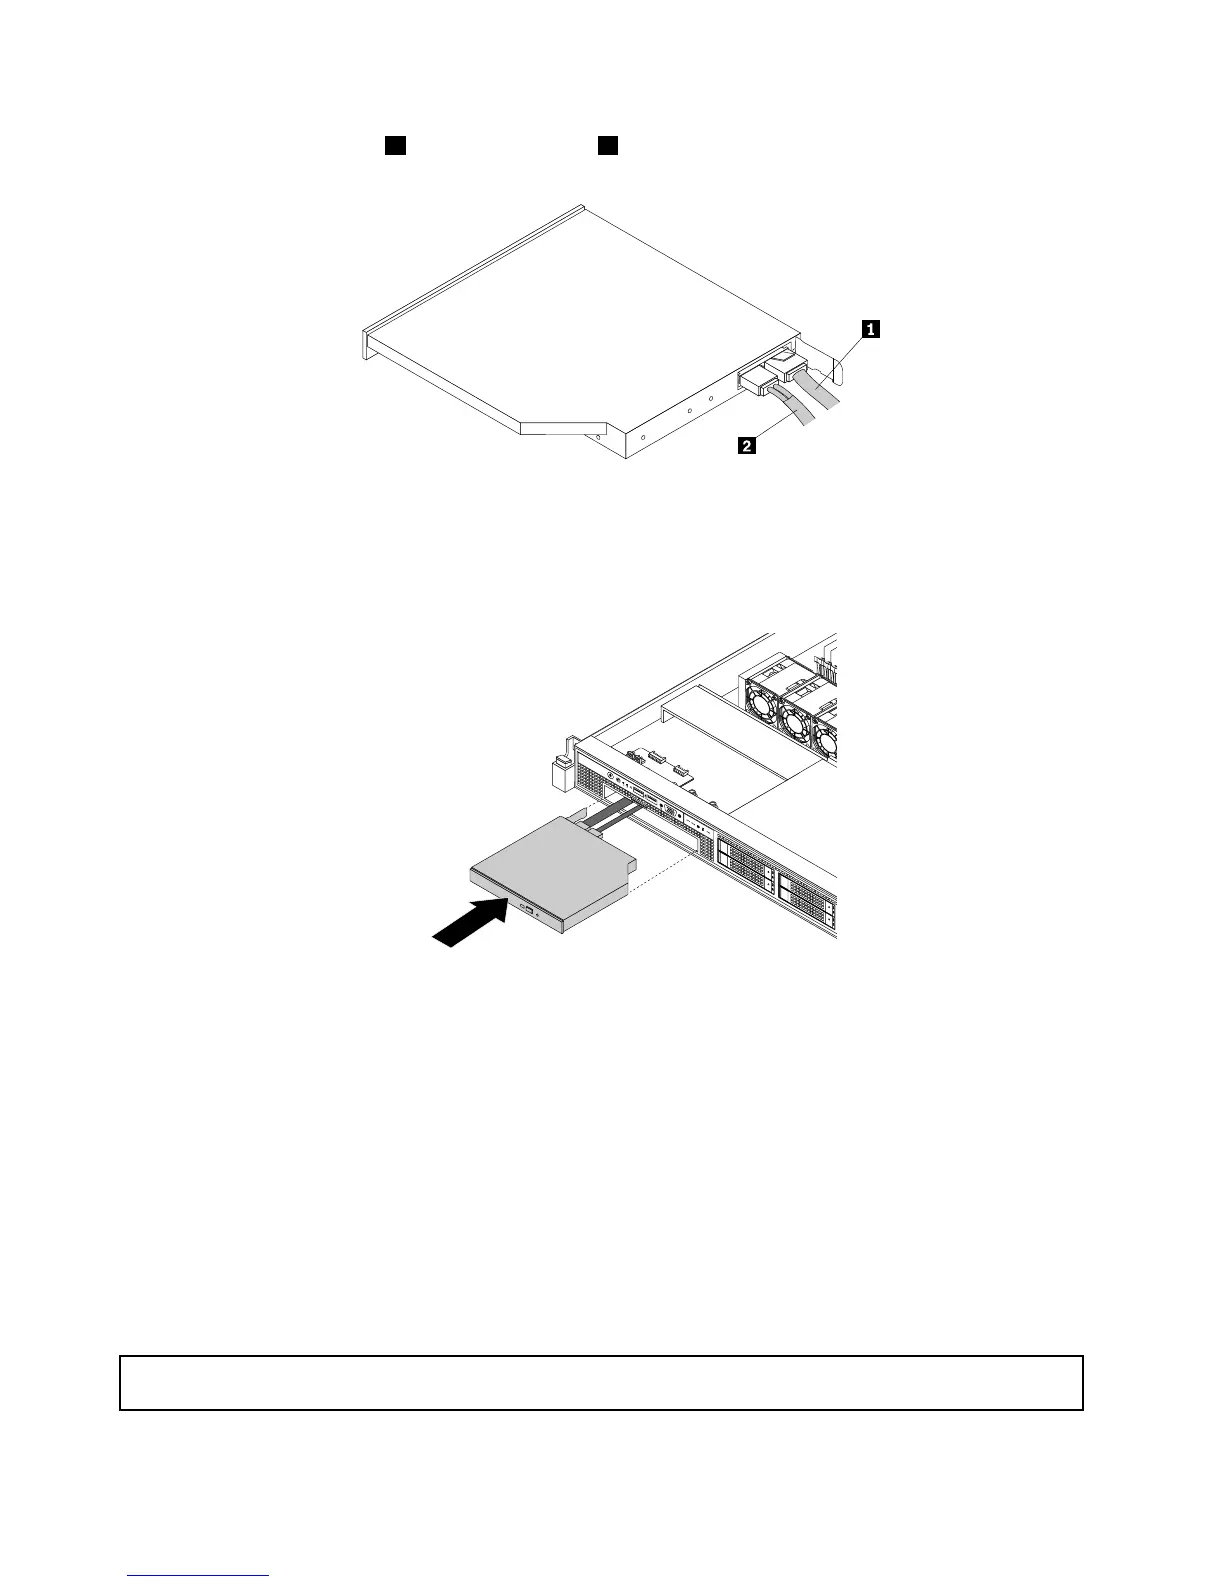
8.Connectthesignalcable1andthepowercable2totherearofthenewopticaldrive.
Figure83.Connectingcablestotherearoftheopticaldrive
9.Slidethenewopticaldrivewiththeretainingbracketandcablesintothedrivebayfromthefrontuntil
itsnapsintoposition.
Figure84.Installingtheopticaldriveforservermodelswith2.5-inchharddiskdrives
10.ConnecttheotherendofthesignalcabletotheSATAconnector0onthesystemboardandconnectthe
otherendofthepowercabletothebackplane.See“Reinstallingtheservercoverandreconnecting
cables”onpage153
.
11.Ifyouareinstructedtoreturntheoldopticaldrive,followallpackaginginstructionsanduseany
packagingmaterialsthataresuppliedtoyouforshipping.
Whattodonext:
•Toworkwithanotherpieceofhardware,gototheappropriatesection.
•Tocompletetheinstallationorreplacement,goto“Completingthepartsreplacement”onpage153.
Replacingthehot-swapharddiskdrivebackplane
Attention:Donotopenyourserverorattemptanyrepairbeforereadingandunderstanding“Safetyinformation”
onpageiiiand“Guidelines”onpage67.
132ThinkServerRD330HardwareMaintenanceManual

 Loading...


