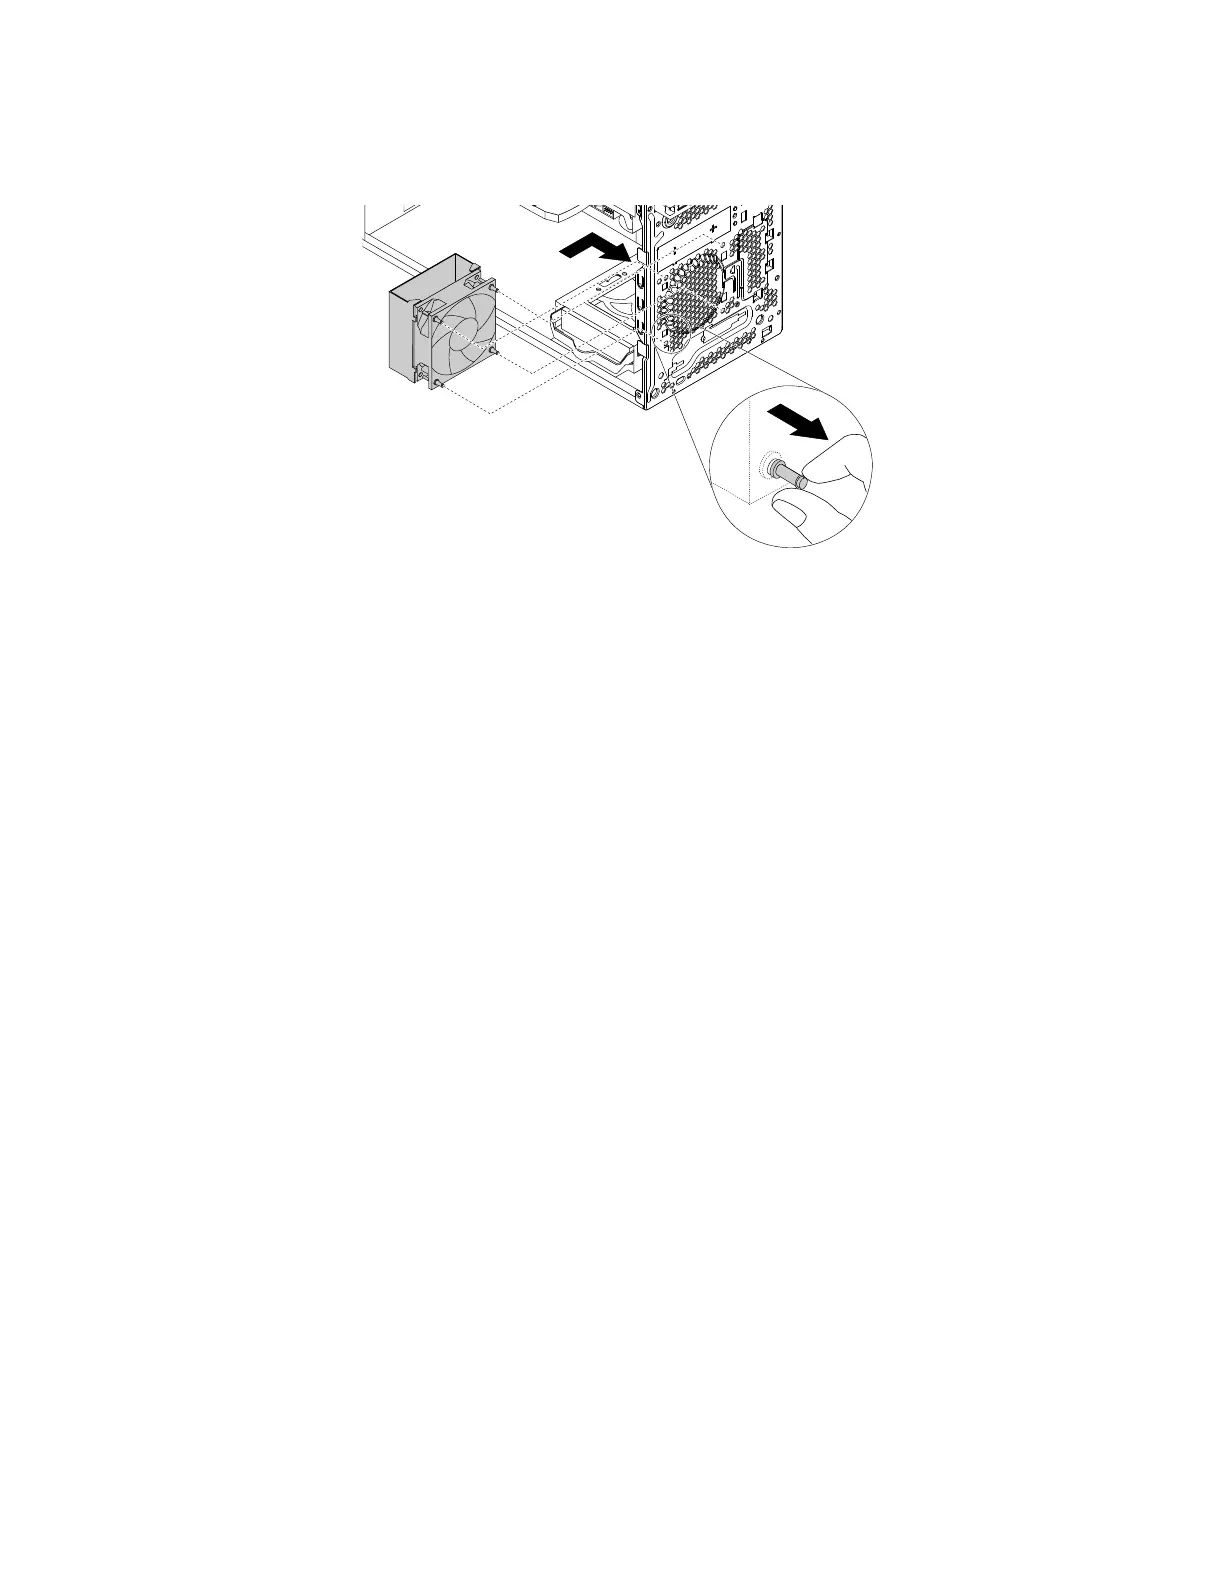
7.Pullthetipsoftherubbermountsuntilthefrontfanassemblyissecuredinplace.
Figure79.Installingthefrontfanassembly
8.Connectthefrontfanassemblycabletothepowerfanconnectoronthesystemboard.
Whattodonext:
•Toworkwithanotherpieceofhardware,gototheappropriatesection.
•Tocompletetheinstallationorreplacement,goto“Completingthepartsreplacement”onpage105.
Replacingtherearfanassembly
Attention:Donotopenyourcomputerorattemptanyrepairbeforereadingandunderstandingthe“Read
thisfirst:Importantsafetyinformation”onpagev.
Toreplacetherearfanassembly,dothefollowing:
1.Removeanymediafromthedrivesandturnoffallconnecteddevicesandthecomputer.Then,
disconnectallpowercordsfromelectricaloutletsanddisconnectallcablesthatareconnectedtothe
computer.
2.Removethecomputercover.See“Removingthecomputercover”onpage58.
3.Locatetherearfanassembly.See“Computercomponents”onpage6.
4.Disconnecttherearfanassemblycablefromthesystemfanconnectoronthesystemboard.See
“Partsonthesystemboard”onpage7.
98ThinkStationP310UserGuide