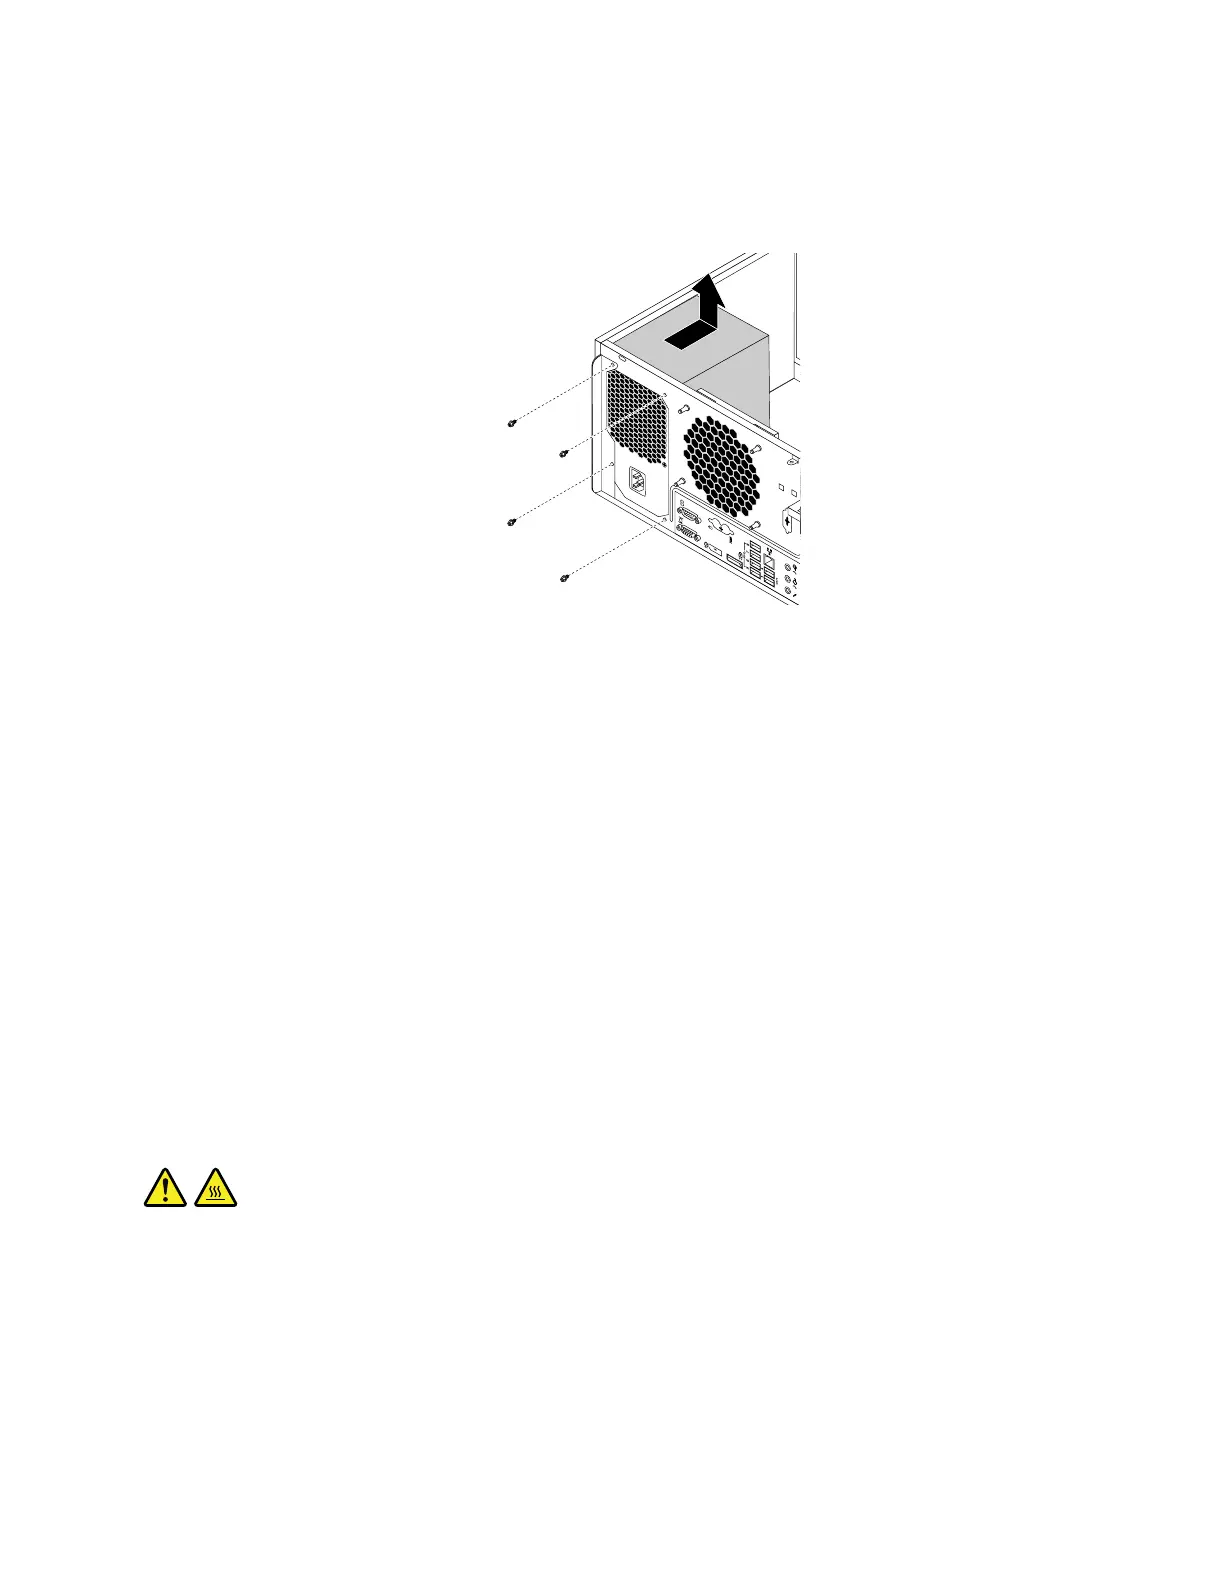
5.Laythecomputeronitssideandremovethefourscrewsattherearofthechassisthatsecurethe
powersupplyassembly.Thenslidethepowersupplyassemblytothefrontofthecomputerandthenlift
itoutofthechassis.
Figure58.Removingthescrewsforthepowersupplyassembly
6.Ensurethatthenewpowersupplyassemblyisthecorrectreplacement.
7.Installthenewpowersupplyassemblyintothechassissothatthescrewholesinthepowersupply
assemblyalignwiththoseinthechassis.
8.Installandtightenthefourscrewstosecurethepowersupplyassembly.
Note:UseonlyscrewsprovidedbyLenovo.
9.Connectthepowersupplyassemblycablestothesystemboardandeachofthedrives.
10.Securethepowersupplyassemblycableswiththecableclipsandtiesinthechassis.
Whattodonext:
•Toworkwithanotherpieceofhardware,gototheappropriatesection.
•Tocompletetheinstallationorreplacement,goto“Completingthepartsreplacement”onpage105
.
Replacingtheheatsinkandfanassembly
Attention:Donotopenyourcomputerorattemptanyrepairbeforereadingandunderstandingthe“Read
thisfirst:Importantsafetyinformation”onpagev
.
CAUTION:
Theheatsinkandfanassemblymightbeveryhot.Beforeyouopenthecomputercover,turnoffthe
computerandwaitseveralminutesuntilthecomputeriscool.
Toreplacetheheatsinkandfanassembly,dothefollowing:
1.Removeanymediafromthedrivesandturnoffallconnecteddevicesandthecomputer.Then,
disconnectallpowercordsfromelectricaloutletsanddisconnectallcablesthatareconnectedtothe
computer.
2.Removethecomputercover.See“Removingthecomputercover”onpage58.
3.Laythecomputeronitssideforeasieraccesstothesystemboard.
Chapter7.Installingorreplacinghardware85