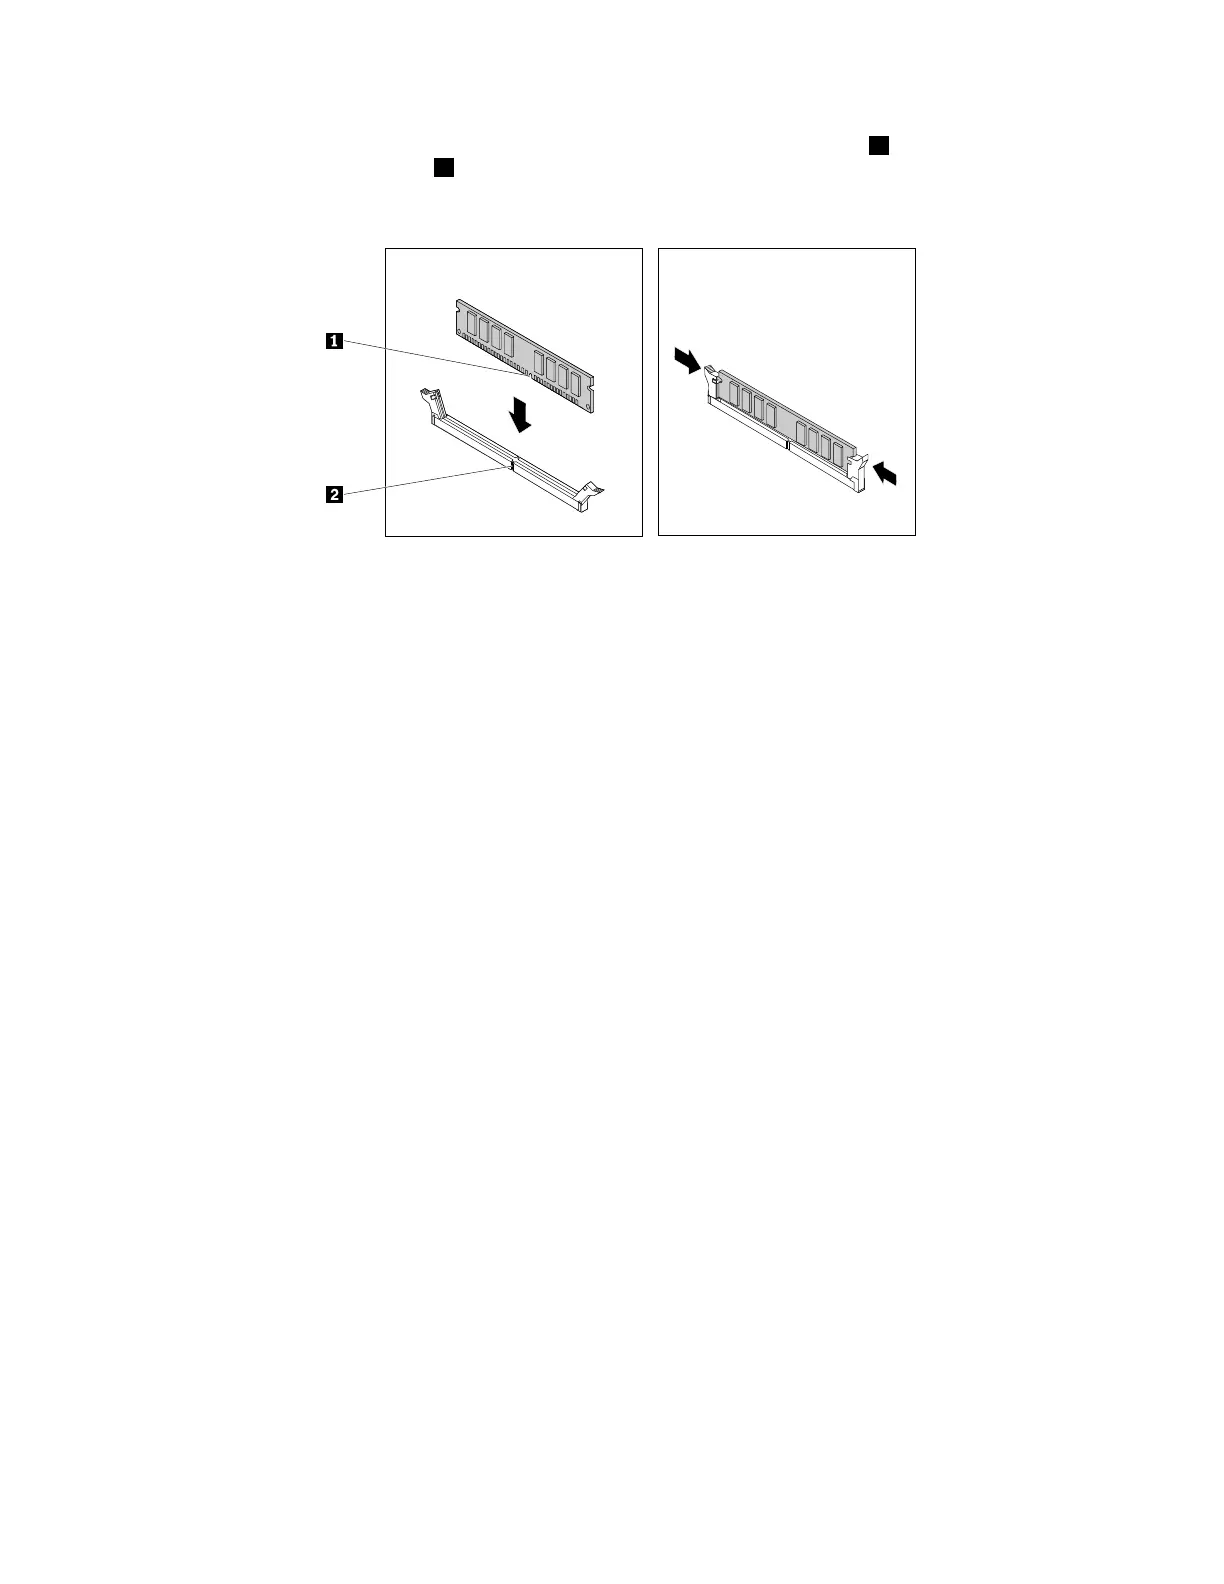
7.Positionthenewmemorymoduleoverthememoryslot.Ensurethatthenotch1onthememory
moduleisalignedwiththekey2intheslot.Pushthememorymodulestraightdownintotheslotuntil
theretainingclipscompletelyclose.
Figure21.Installingamemorymodule
8.ReinstallthePCIExpressx16graphicscardifyouhaveremovedit.
Whattodonext:
•Toworkwithanotherpieceofhardware,gototheappropriatesection.
•Tocompletetheinstallationorreplacement,goto“Completingthepartsreplacement”onpage105.
Installingorreplacinganopticaldrive
Attention:Donotopenyourcomputerorattemptanyrepairbeforereadingandunderstandingthe“Read
thisfirst:Importantsafetyinformation”onpagev
.
Note:Forsomecomputermodels,theopticaldrivebaymightbeinstalledwithadevicesuchasan
opticaldrive,a5.25-inchflexmodule,aflexstorageenclosure,afront-accessstorageenclosure,oran
optical/storagecombinationenclosure.
Toinstallorreplaceanopticaldrive,dothefollowing:
1.Removeanymediafromthedrivesandturnoffallconnecteddevicesandthecomputer.Then,
disconnectallpowercordsfromelectricaloutletsanddisconnectallcablesthatareconnectedtothe
computer.
2.Removethecomputercover.See“Removingthecomputercover”onpage58.
3.Removethefrontbezel.See“Removingandreinstallingthefrontbezel”onpage59.
4.Ifyouareinstallinganopticaldrive,dothefollowing:
a.Removethemetalstaticshieldfromthedesireddrivebay.
66ThinkStationP310UserGuide