•Tocompletetheinstallationorreplacement,goto“Completingthepartsreplacement”onpage105.
Replacingtheprimaryharddiskdrive
Attention:Donotopenyourcomputerorattemptanyrepairbeforereadingandunderstandingthe“Read
thisfirst:Importantsafetyinformation”onpagev
.
Toreplacetheprimaryharddiskdrive,dothefollowing:
1.Removeanymediafromthedrivesandturnoffallconnecteddevicesandthecomputer.Then,
disconnectallpowercordsfromelectricaloutletsanddisconnectallcablesthatareconnectedtothe
computer.
2.Removethecomputercover.See“Removingthecomputercover”onpage58.
3.Locatetheprimaryharddiskdrive.See“Computercomponents”onpage6.
4.Disconnectthesignalcableandthepowercablefromtheharddiskdrive.
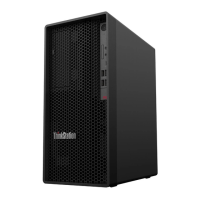
5.Pullthebluehandletoreleaseandremovetheharddiskdrivefromthedrivecage.
Figure66.Removingtheprimaryharddiskdrive
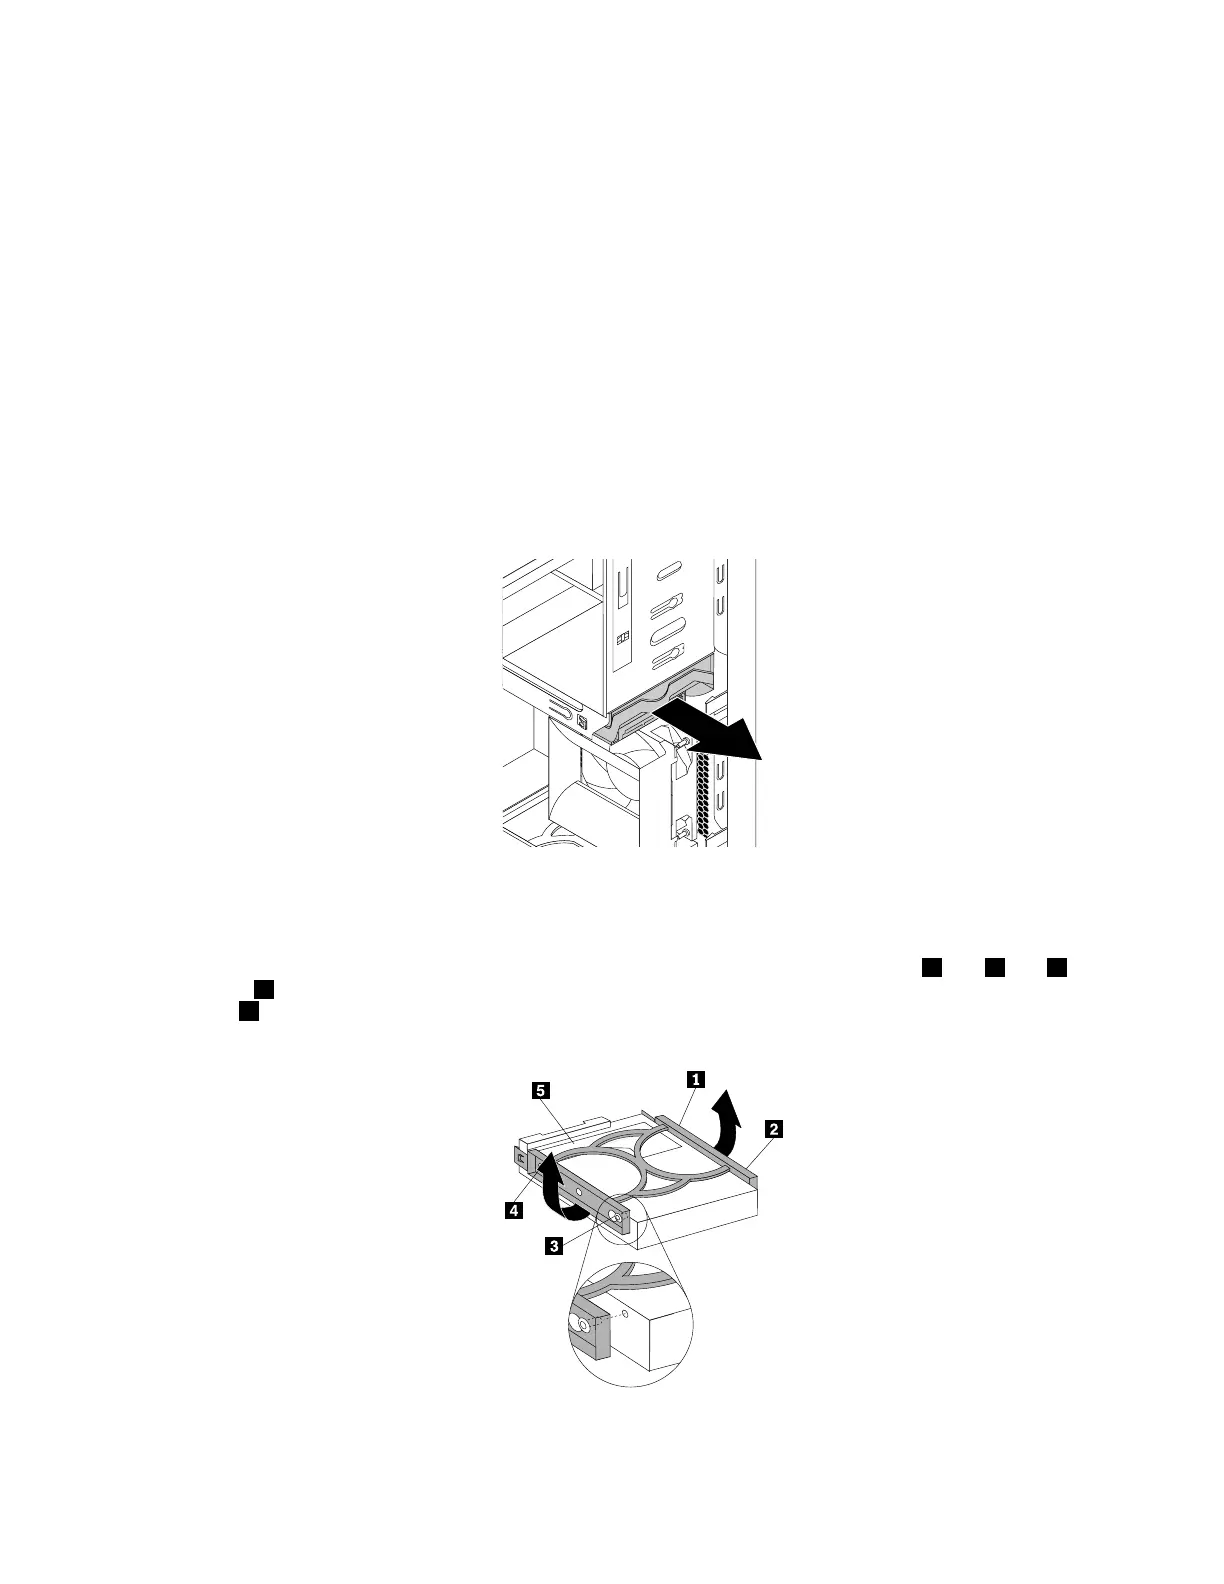
6.Flexthesidesofthebluebrackettoremovetheharddiskdrivefromthebracket.
7.Toinstallanewharddiskdriveintothebluebracket,flexthebracketandalignpin1,pin2,pin3,
andpin4onthebracketwiththecorrespondingholesintheharddiskdrive.Donottouchthecircuit
board5onthebottomoftheharddiskdrive.
Figure67.Installingtheharddiskdriveintothebracket
Chapter7.Installingorreplacinghardware91