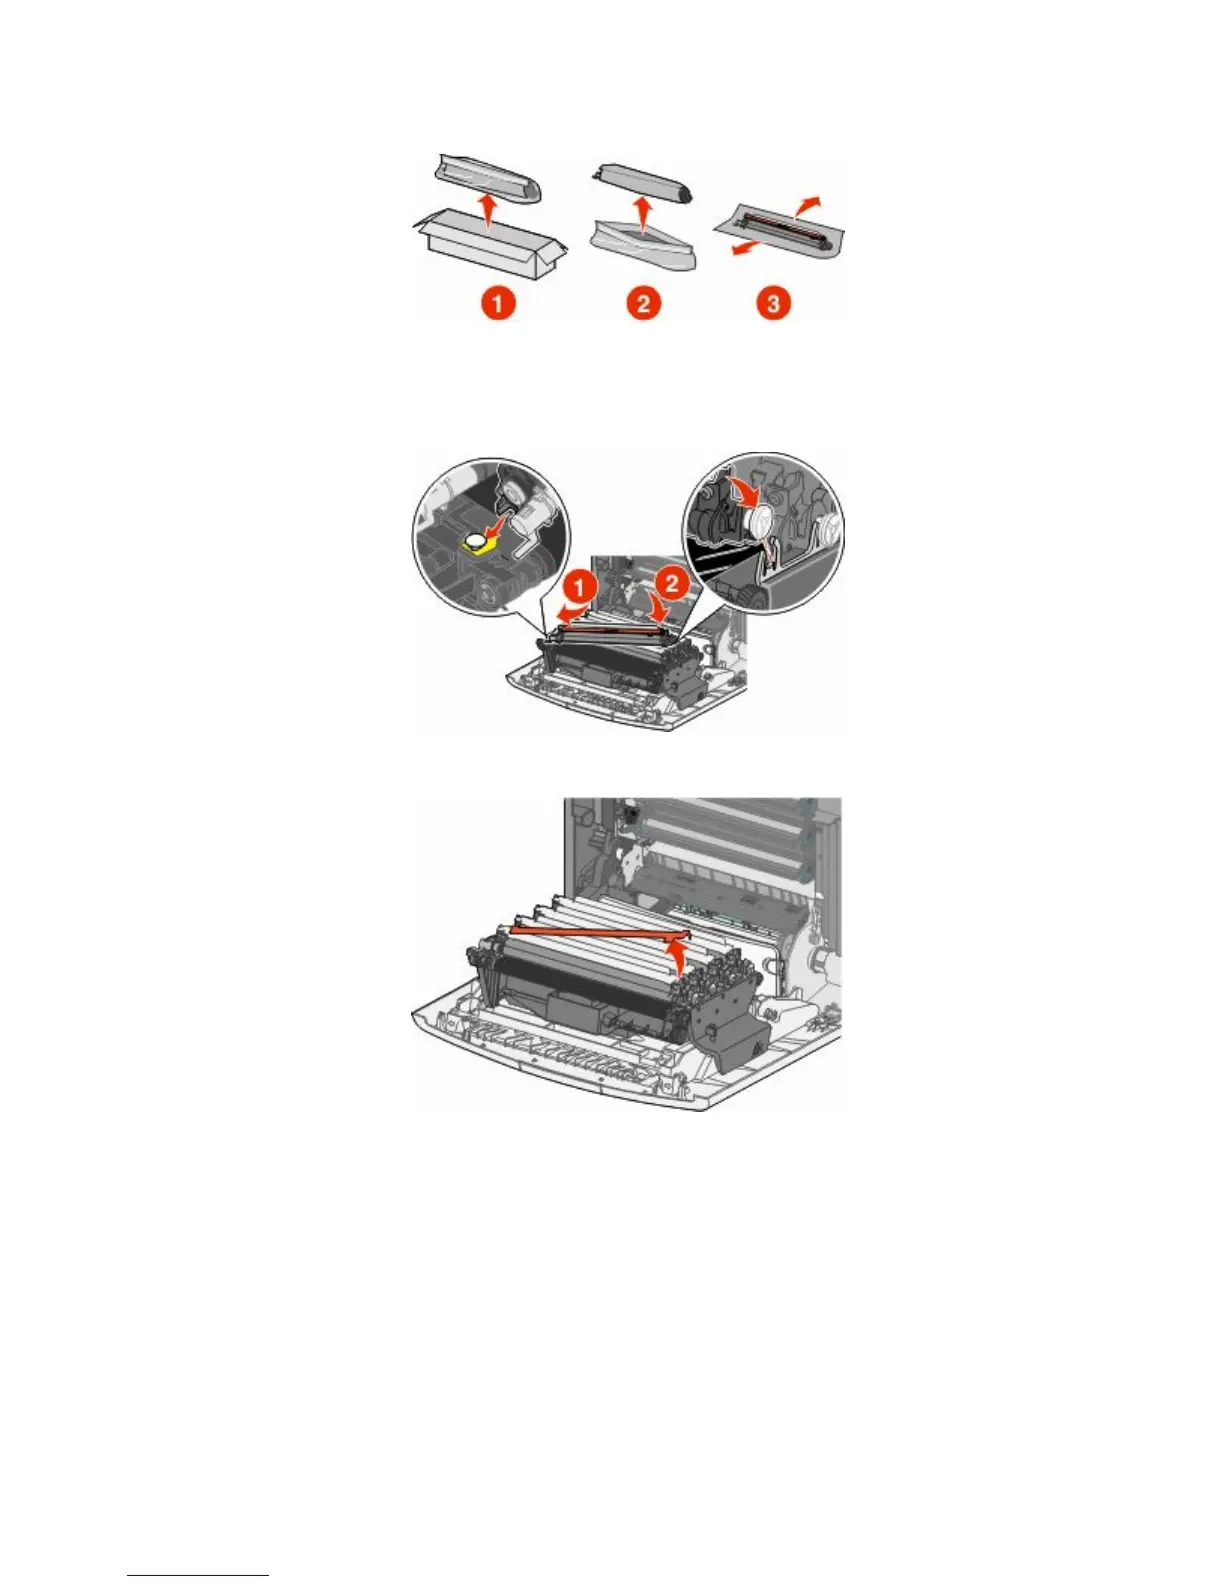
3 Unpack the replacement photoconductor.
Warning—Potential Damage: Do not touch the shiny area on the photoconductor drum. Touching it could
damage the photoconductor.
4 Align and insert the left end of the photoconductor, and then press the right end until it clicks into place.
5 Remove the red packing strip from the top of the photoconductor.
Maintaining the printer
142