b Lift the handholds on each side of the fuser unit, and then pull forward to remove it.
c Place the fuser unit on a flat surface.
3 Pull the paper gently out of the printer or up toward the standard exit bin to remove it.
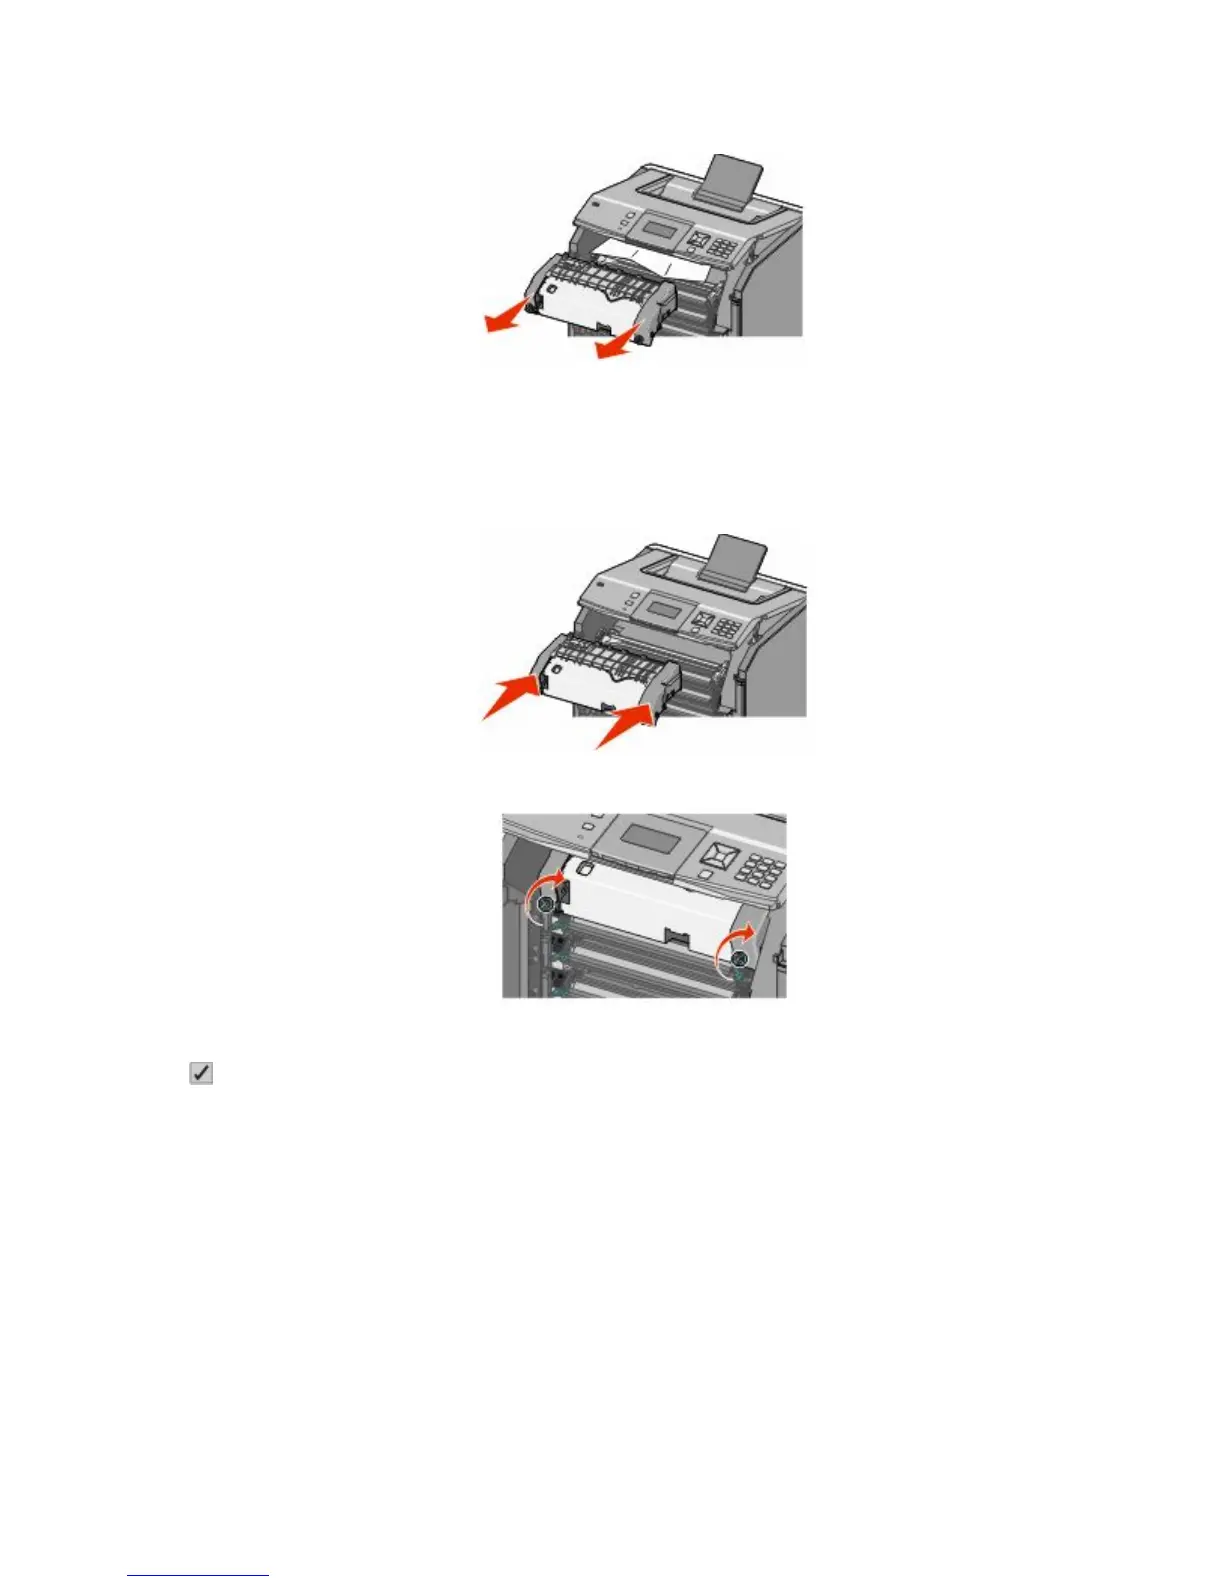
4 Reinstall the fuser unit.
a Align the fuser unit using the handholds on each side, and place it back into the printer.
b Turn the screws to the right to fasten the fuser unit securely.
5 Close the top cover, and then close the front door.
6 Press .
Clearing jams
155